Getting started
with Talos.
Your passwords, codes, and private files, together in an encrypted vault. Learn to set up Talos, organize your information, and make its features part of your everyday routine.

CHAPTER 02 13
Create your first database
Choose Local Storage or iCloud, set a master password, and open your new vault.
In this chapter 9 topics
Create your encrypted vault, give it a name, and unlock it with your master password. This walkthrough uses Abigail’s Vault as the example.
Before You Begin
Have Talos ready on your iPhone or iPad and choose a strong, unique master password. Keep a secure reference to that password outside the vault.
Step 1 — Open Databases
- Launch Talos.
- Complete the introductory screens, or use Skip to open Databases.
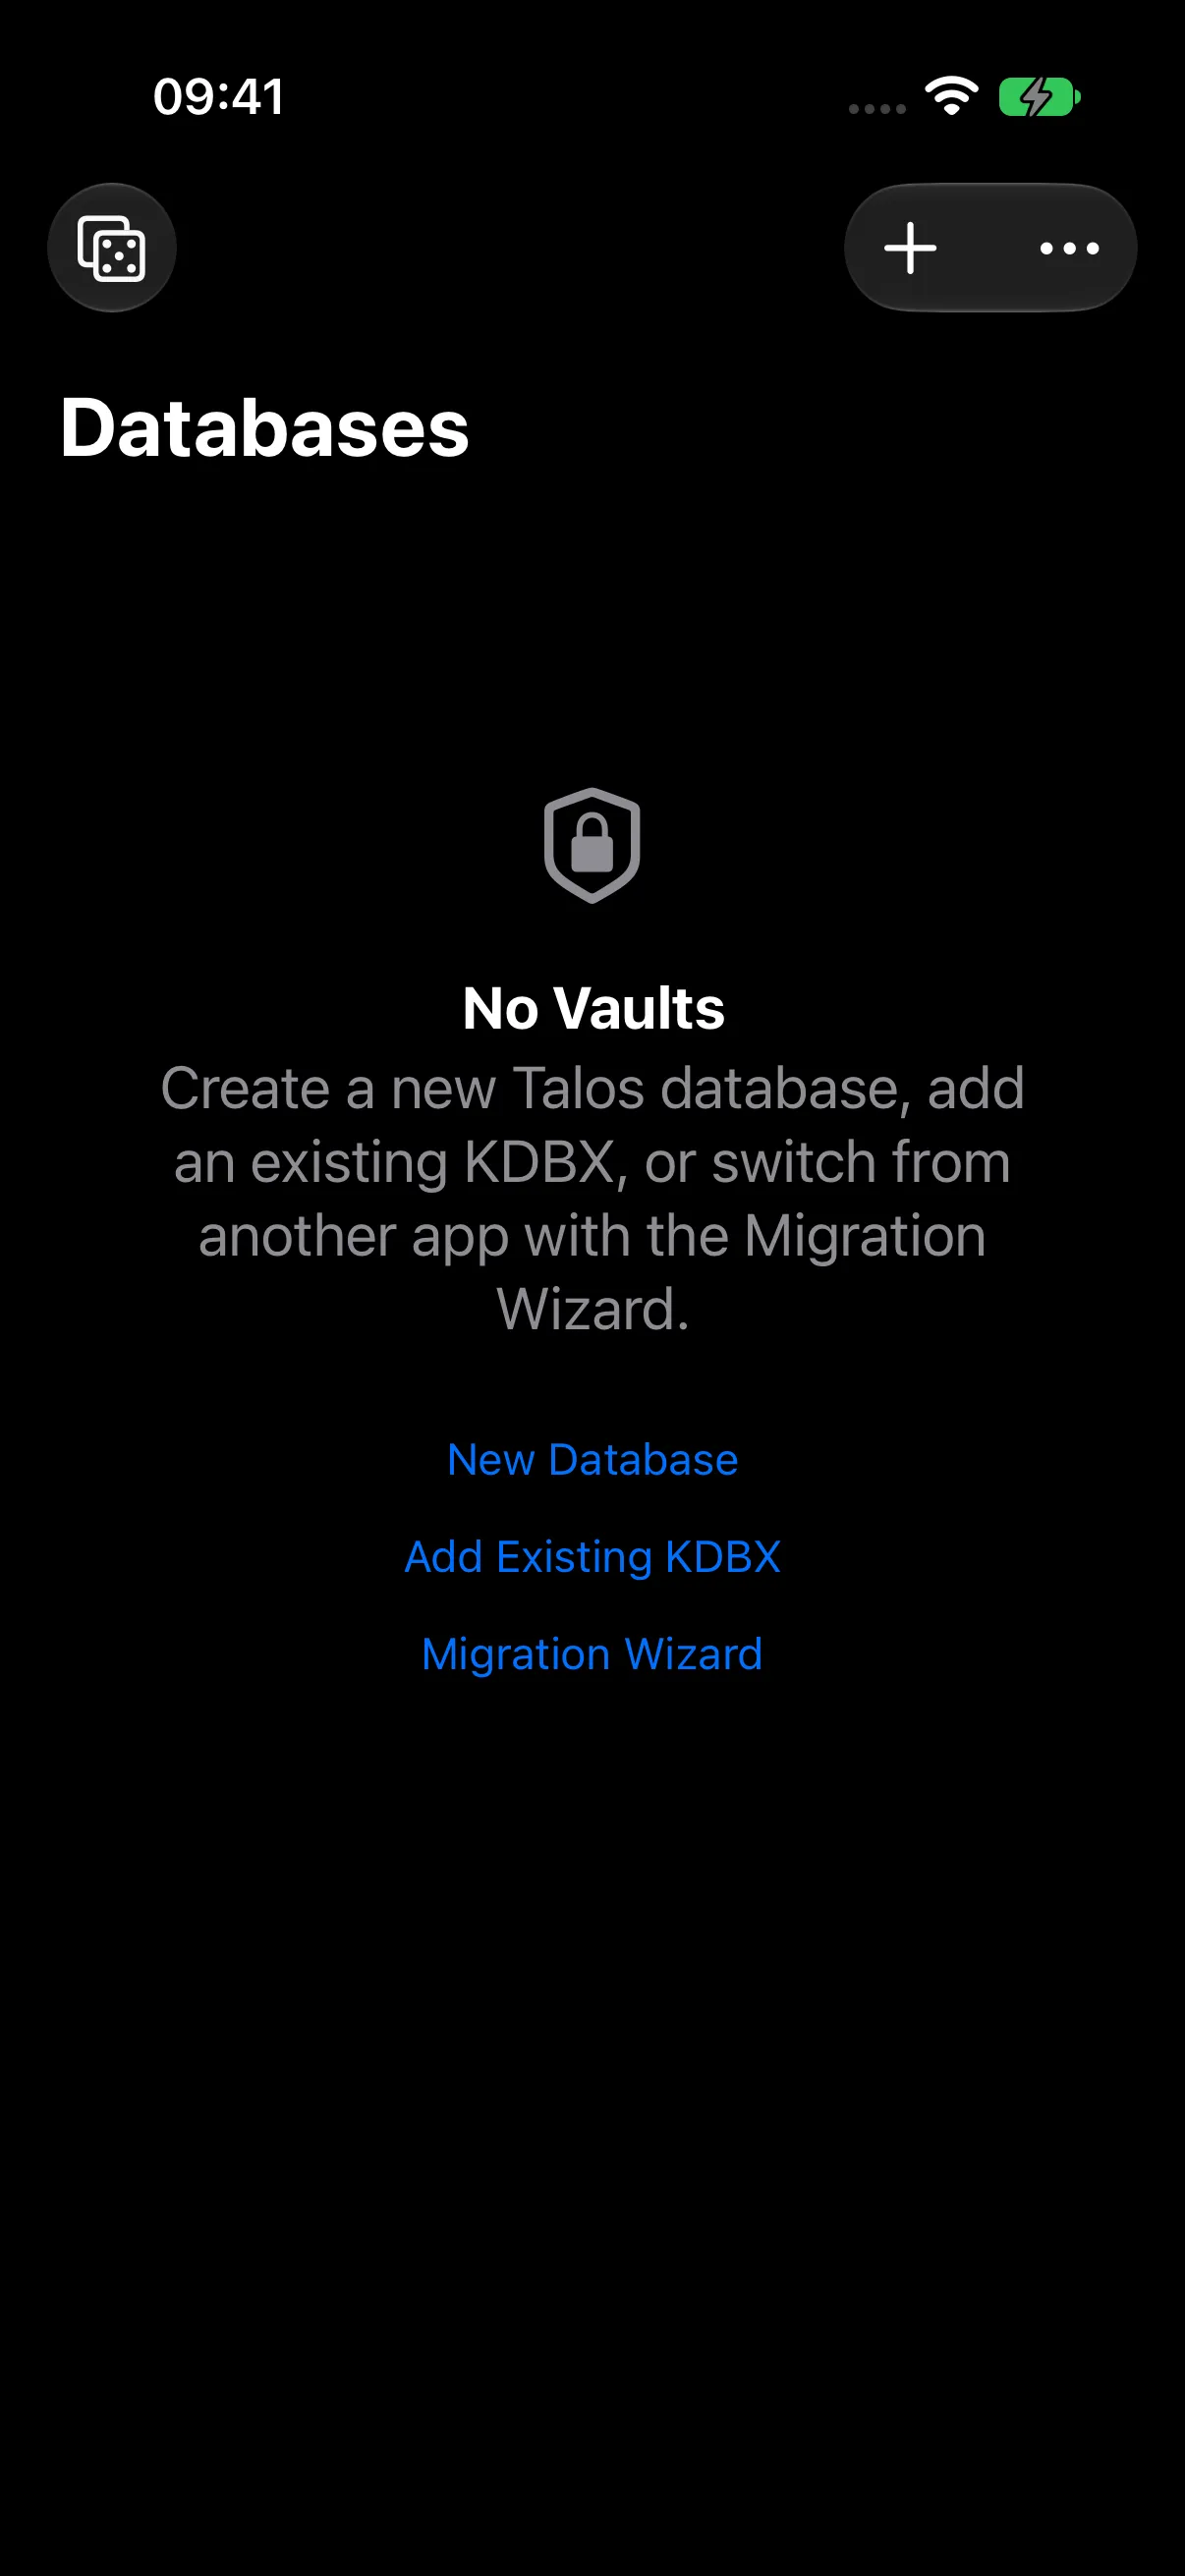
- On a fresh installation, the screen shows No Vaults and the actions for creating or adding a database.
Step 2 — Choose Local Storage or iCloud
- Tap New Database.
- Choose Local Storage or iCloud, according to where you want Talos to keep the encrypted database.
- For this walkthrough, tap Local Storage.
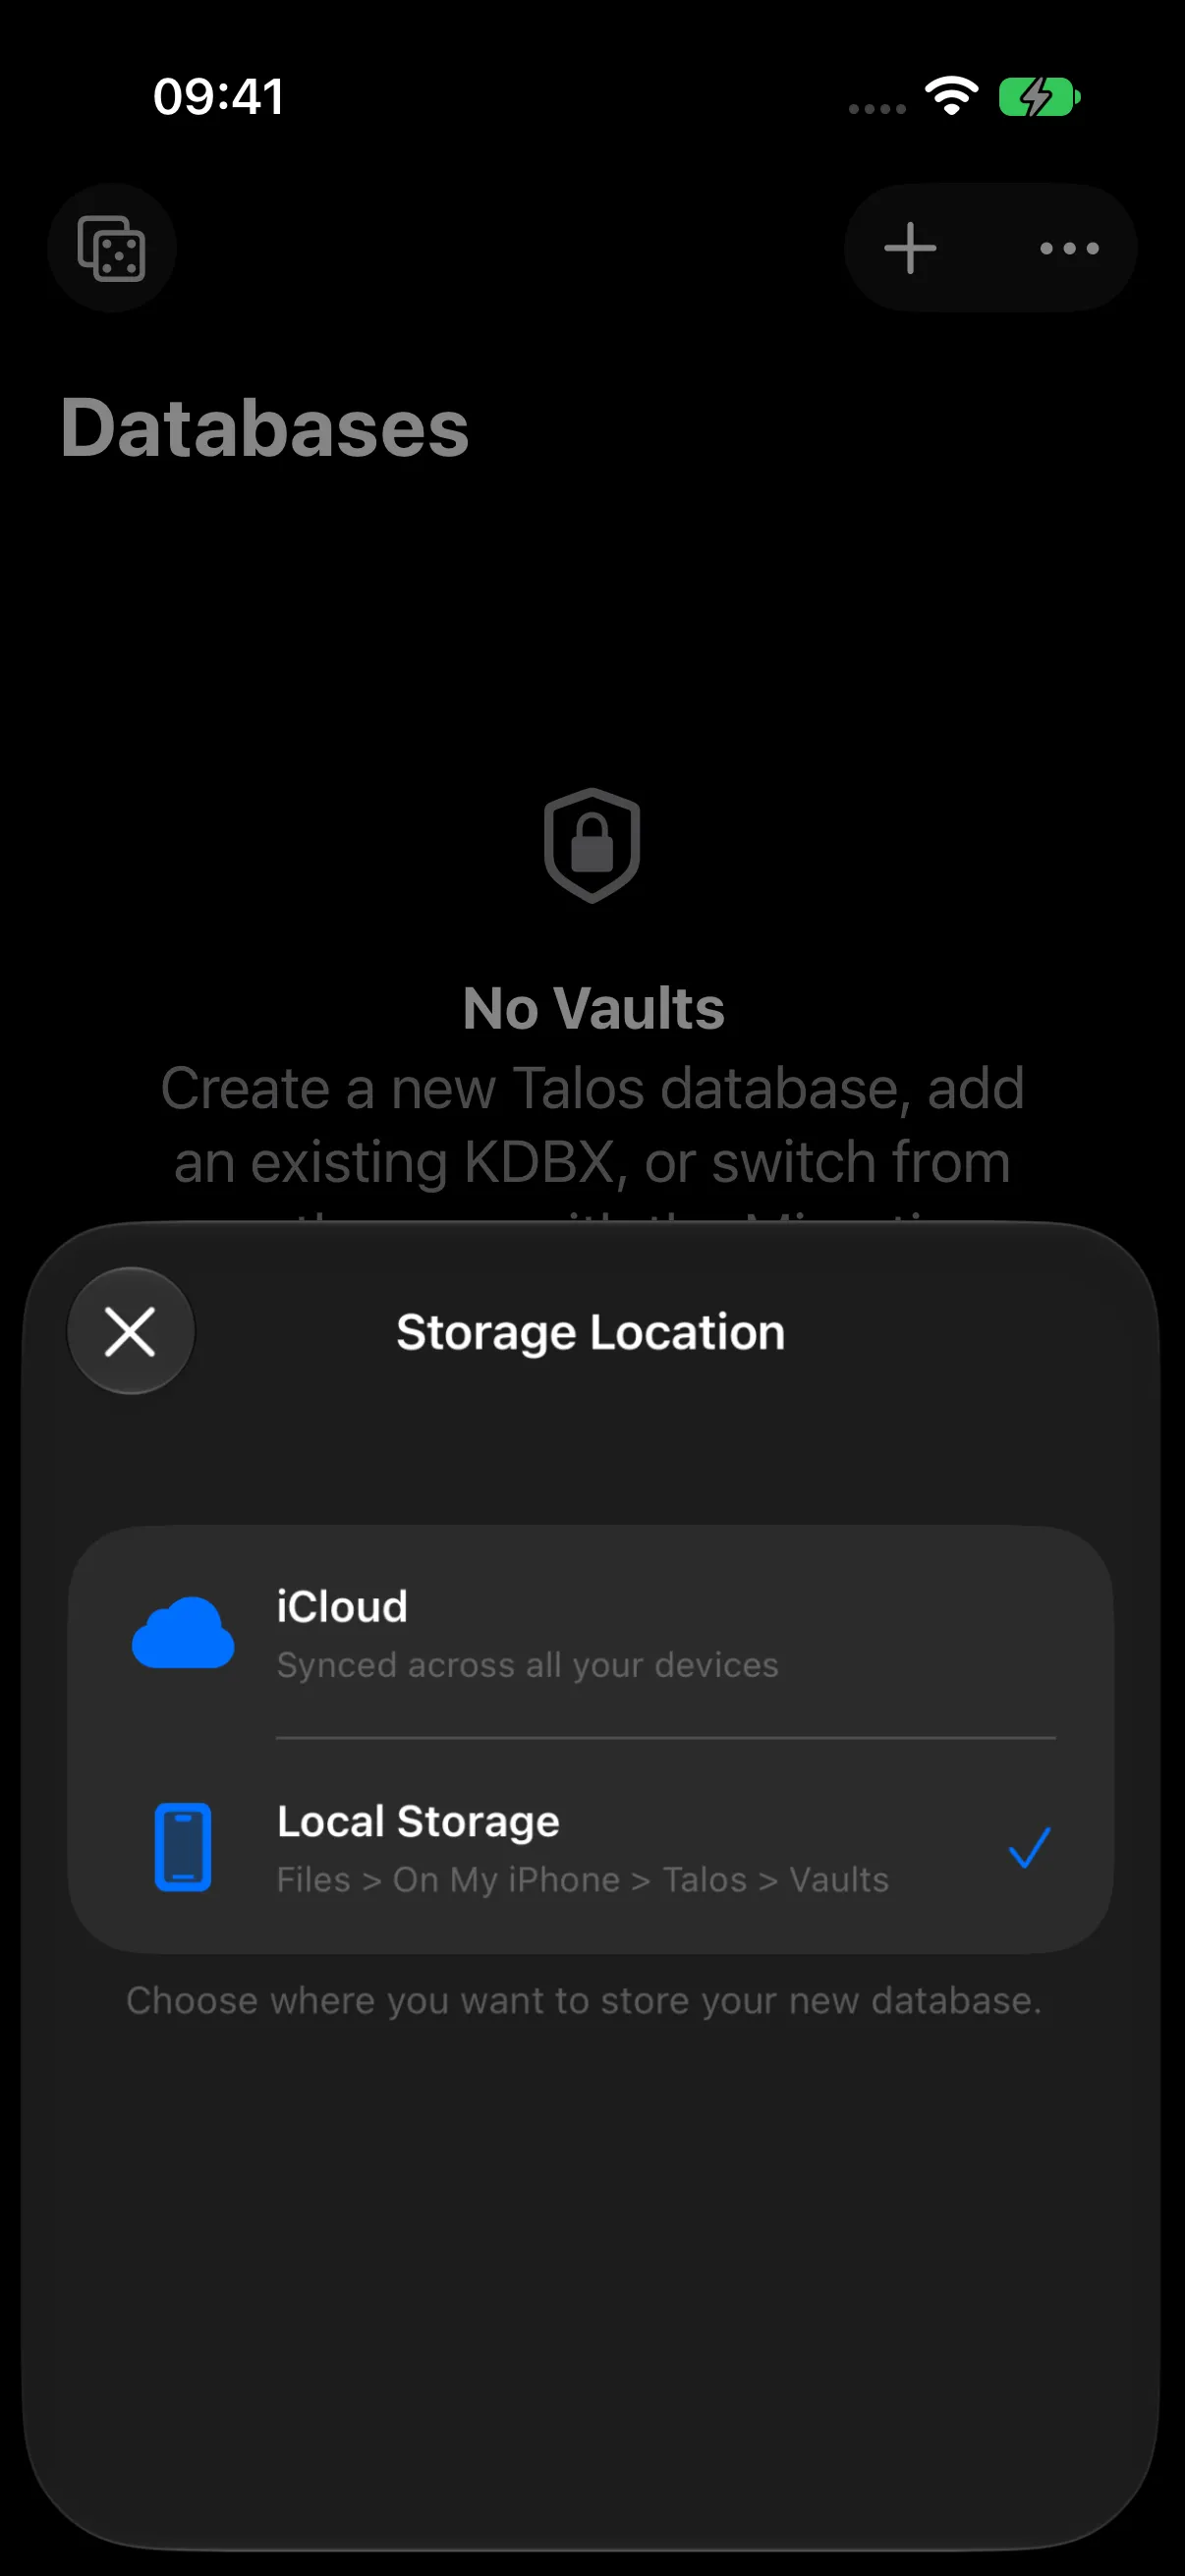
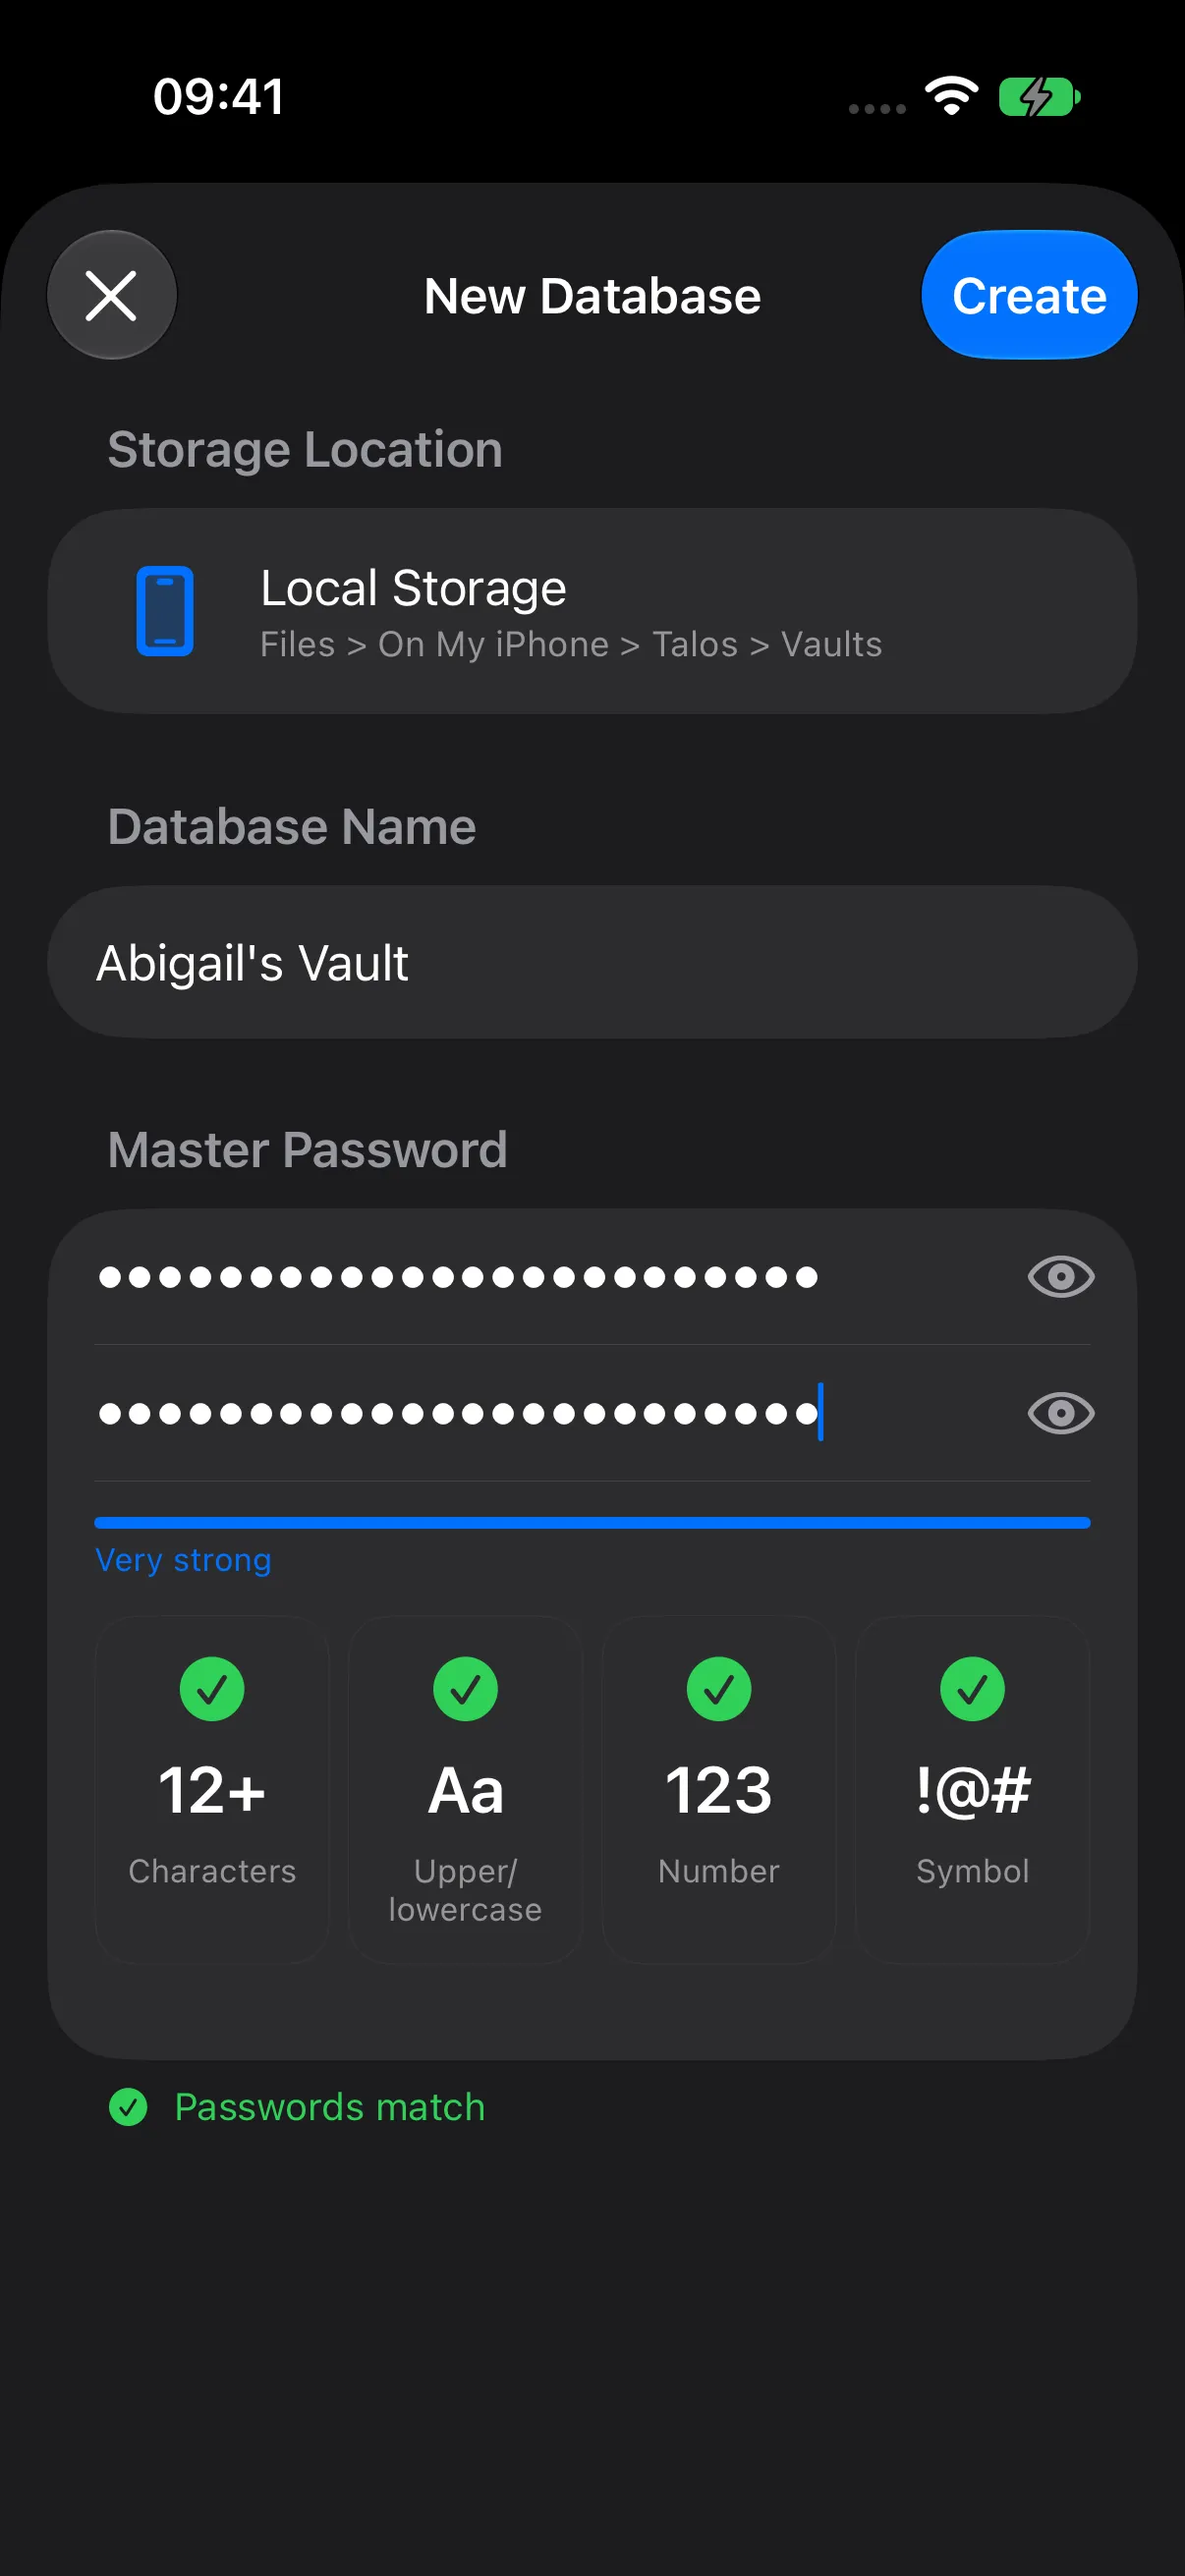
Talos opens New Database, with your selection displayed above the name and password fields.
Step 3 — Name Your Database
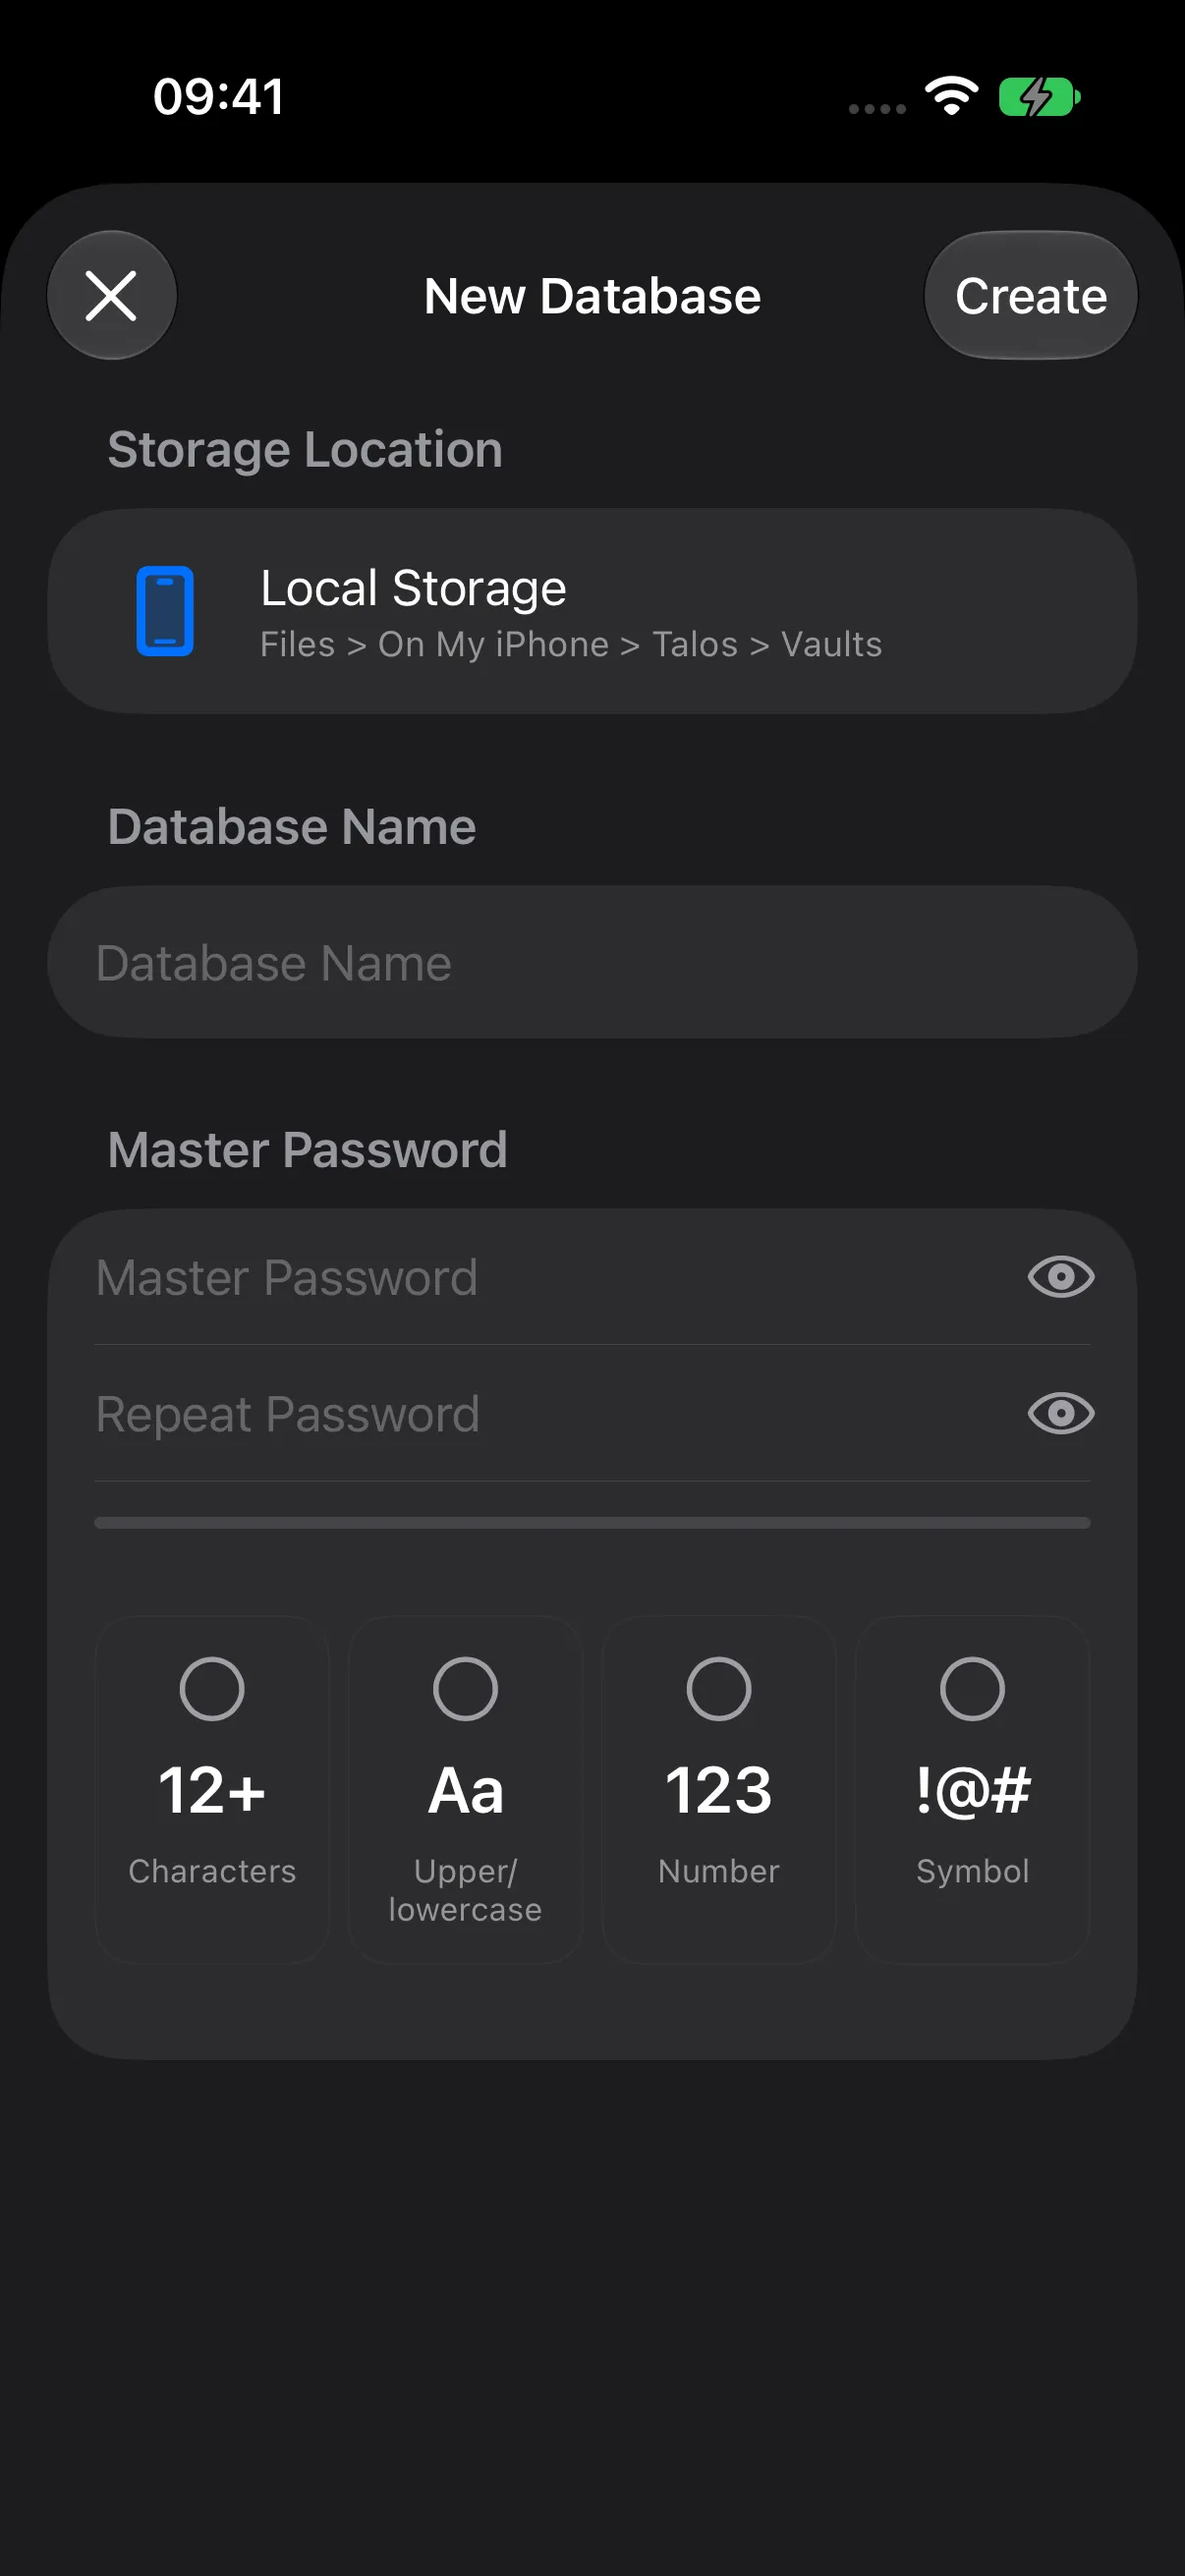
- Tap Database Name.
- Enter Abigail’s Vault, or a name of your own.
- Use a name that helps you recognize this vault in Databases.
Step 4 — Set Your Master Password
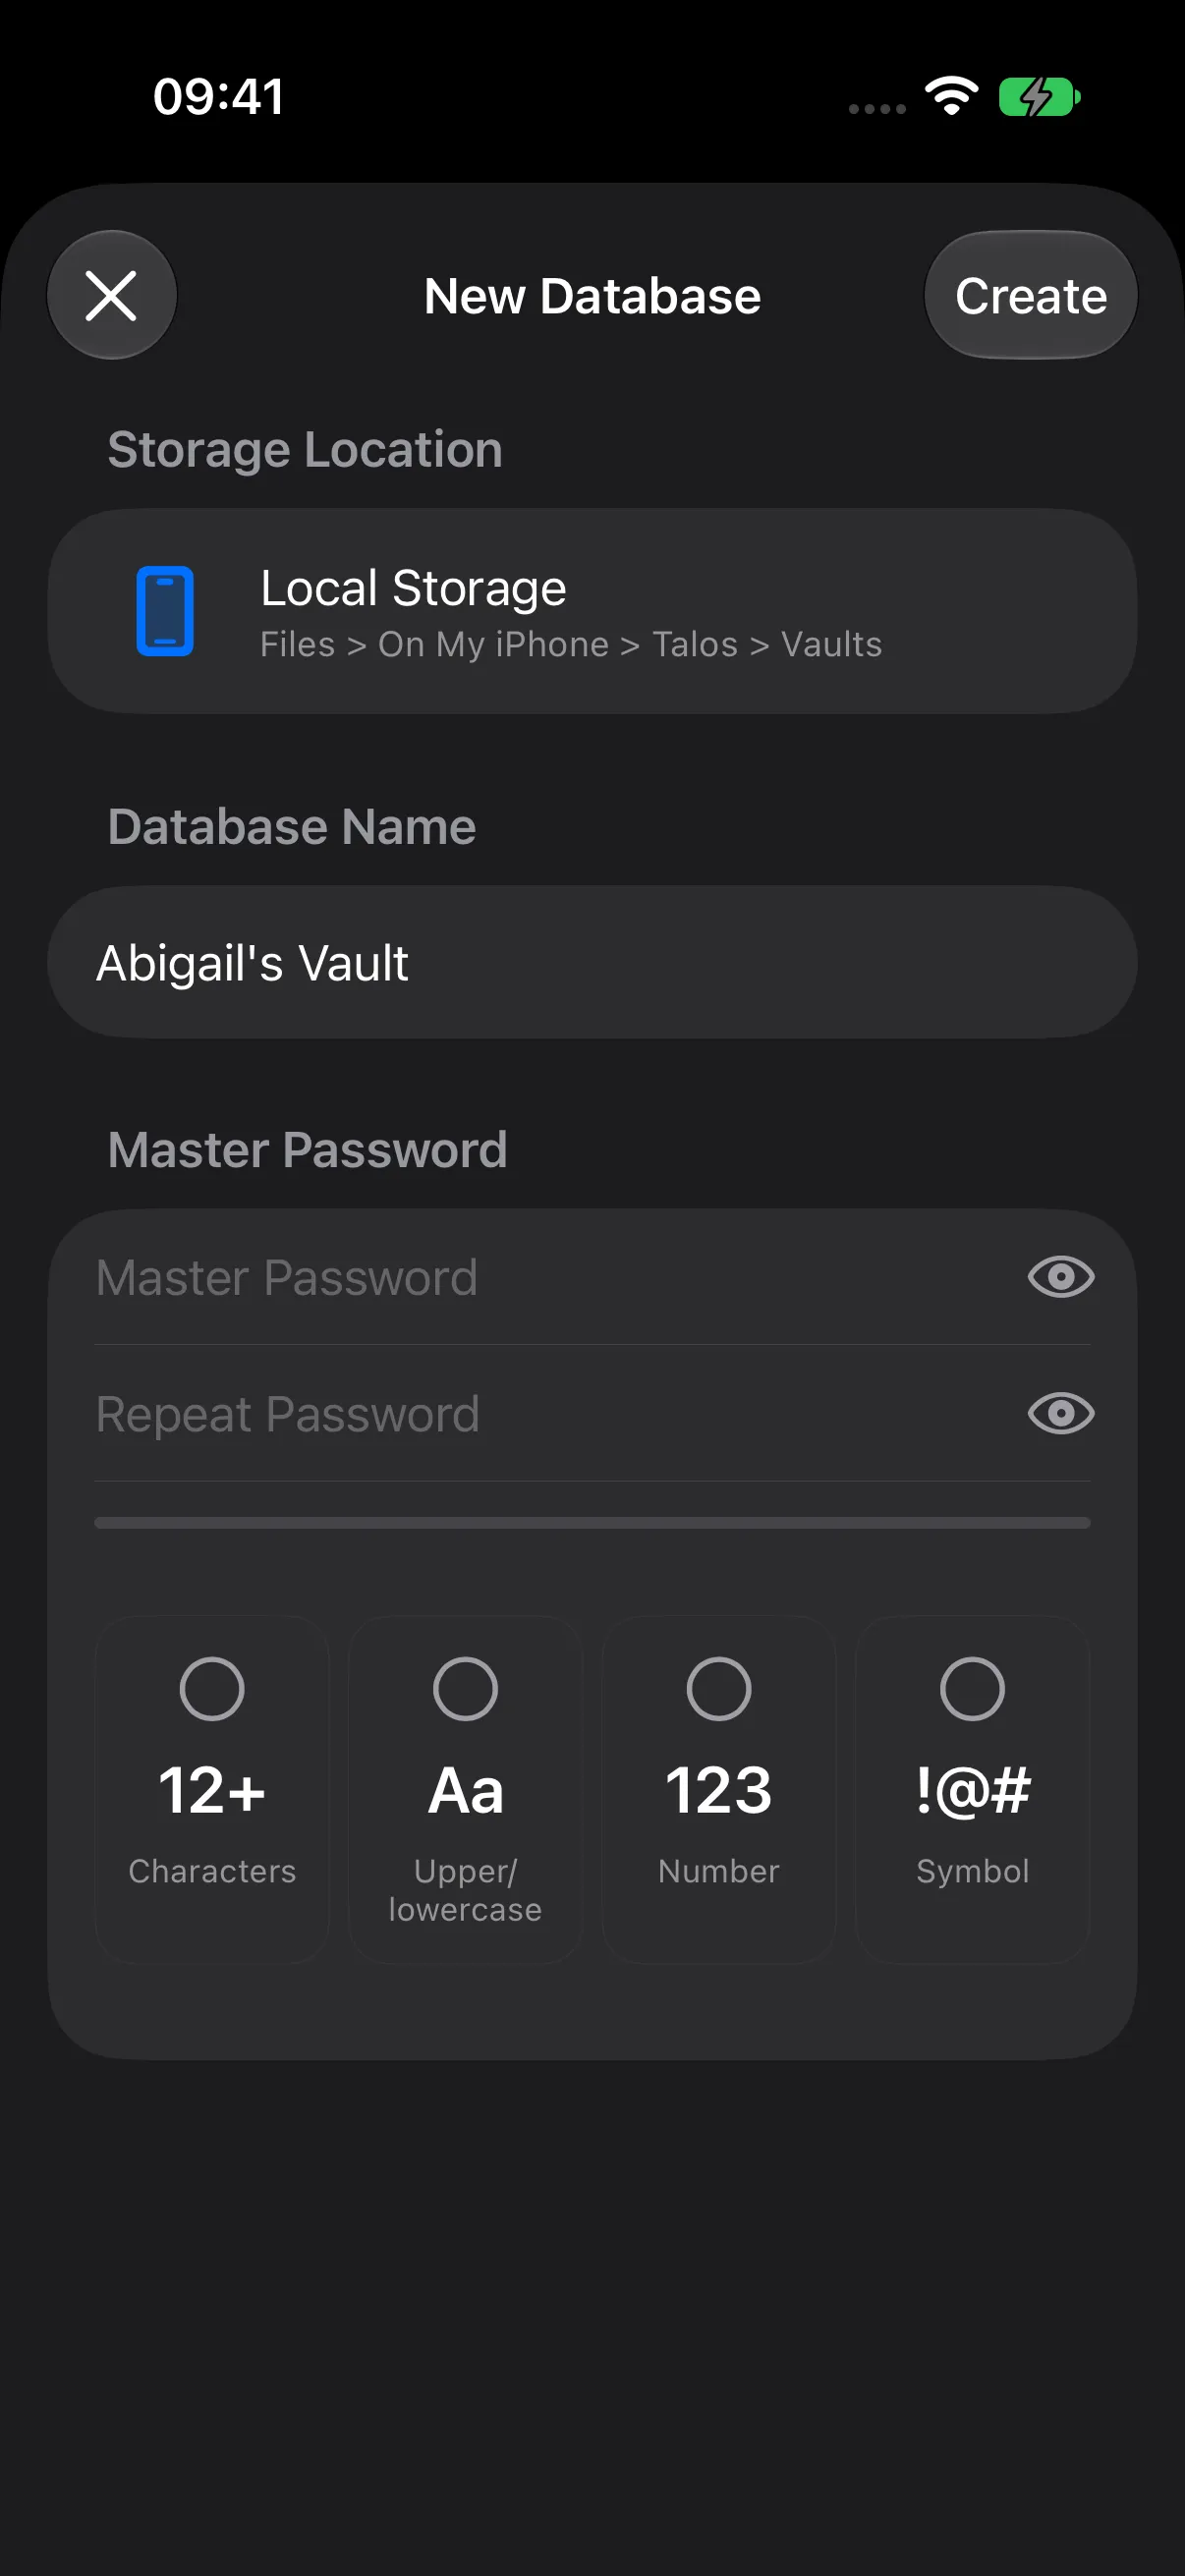
- Enter your password in Master Password.
- Follow the requirement indicators:
- At least 12 characters.
- Uppercase and lowercase letters.
- At least one number.
- At least one symbol.
- Choose a unique combination and use the strength feedback to refine it.
- Enter the same password in Repeat Password.
- Check that Passwords match appears.
The requirement cards gain checkmarks as you complete them. The eye controls let you review the password while entering it; keep it concealed when sharing your screen.
Step 5 — Create the Database
- Review Database Name and your Local Storage or iCloud selection.
- Tap Create at the top right.
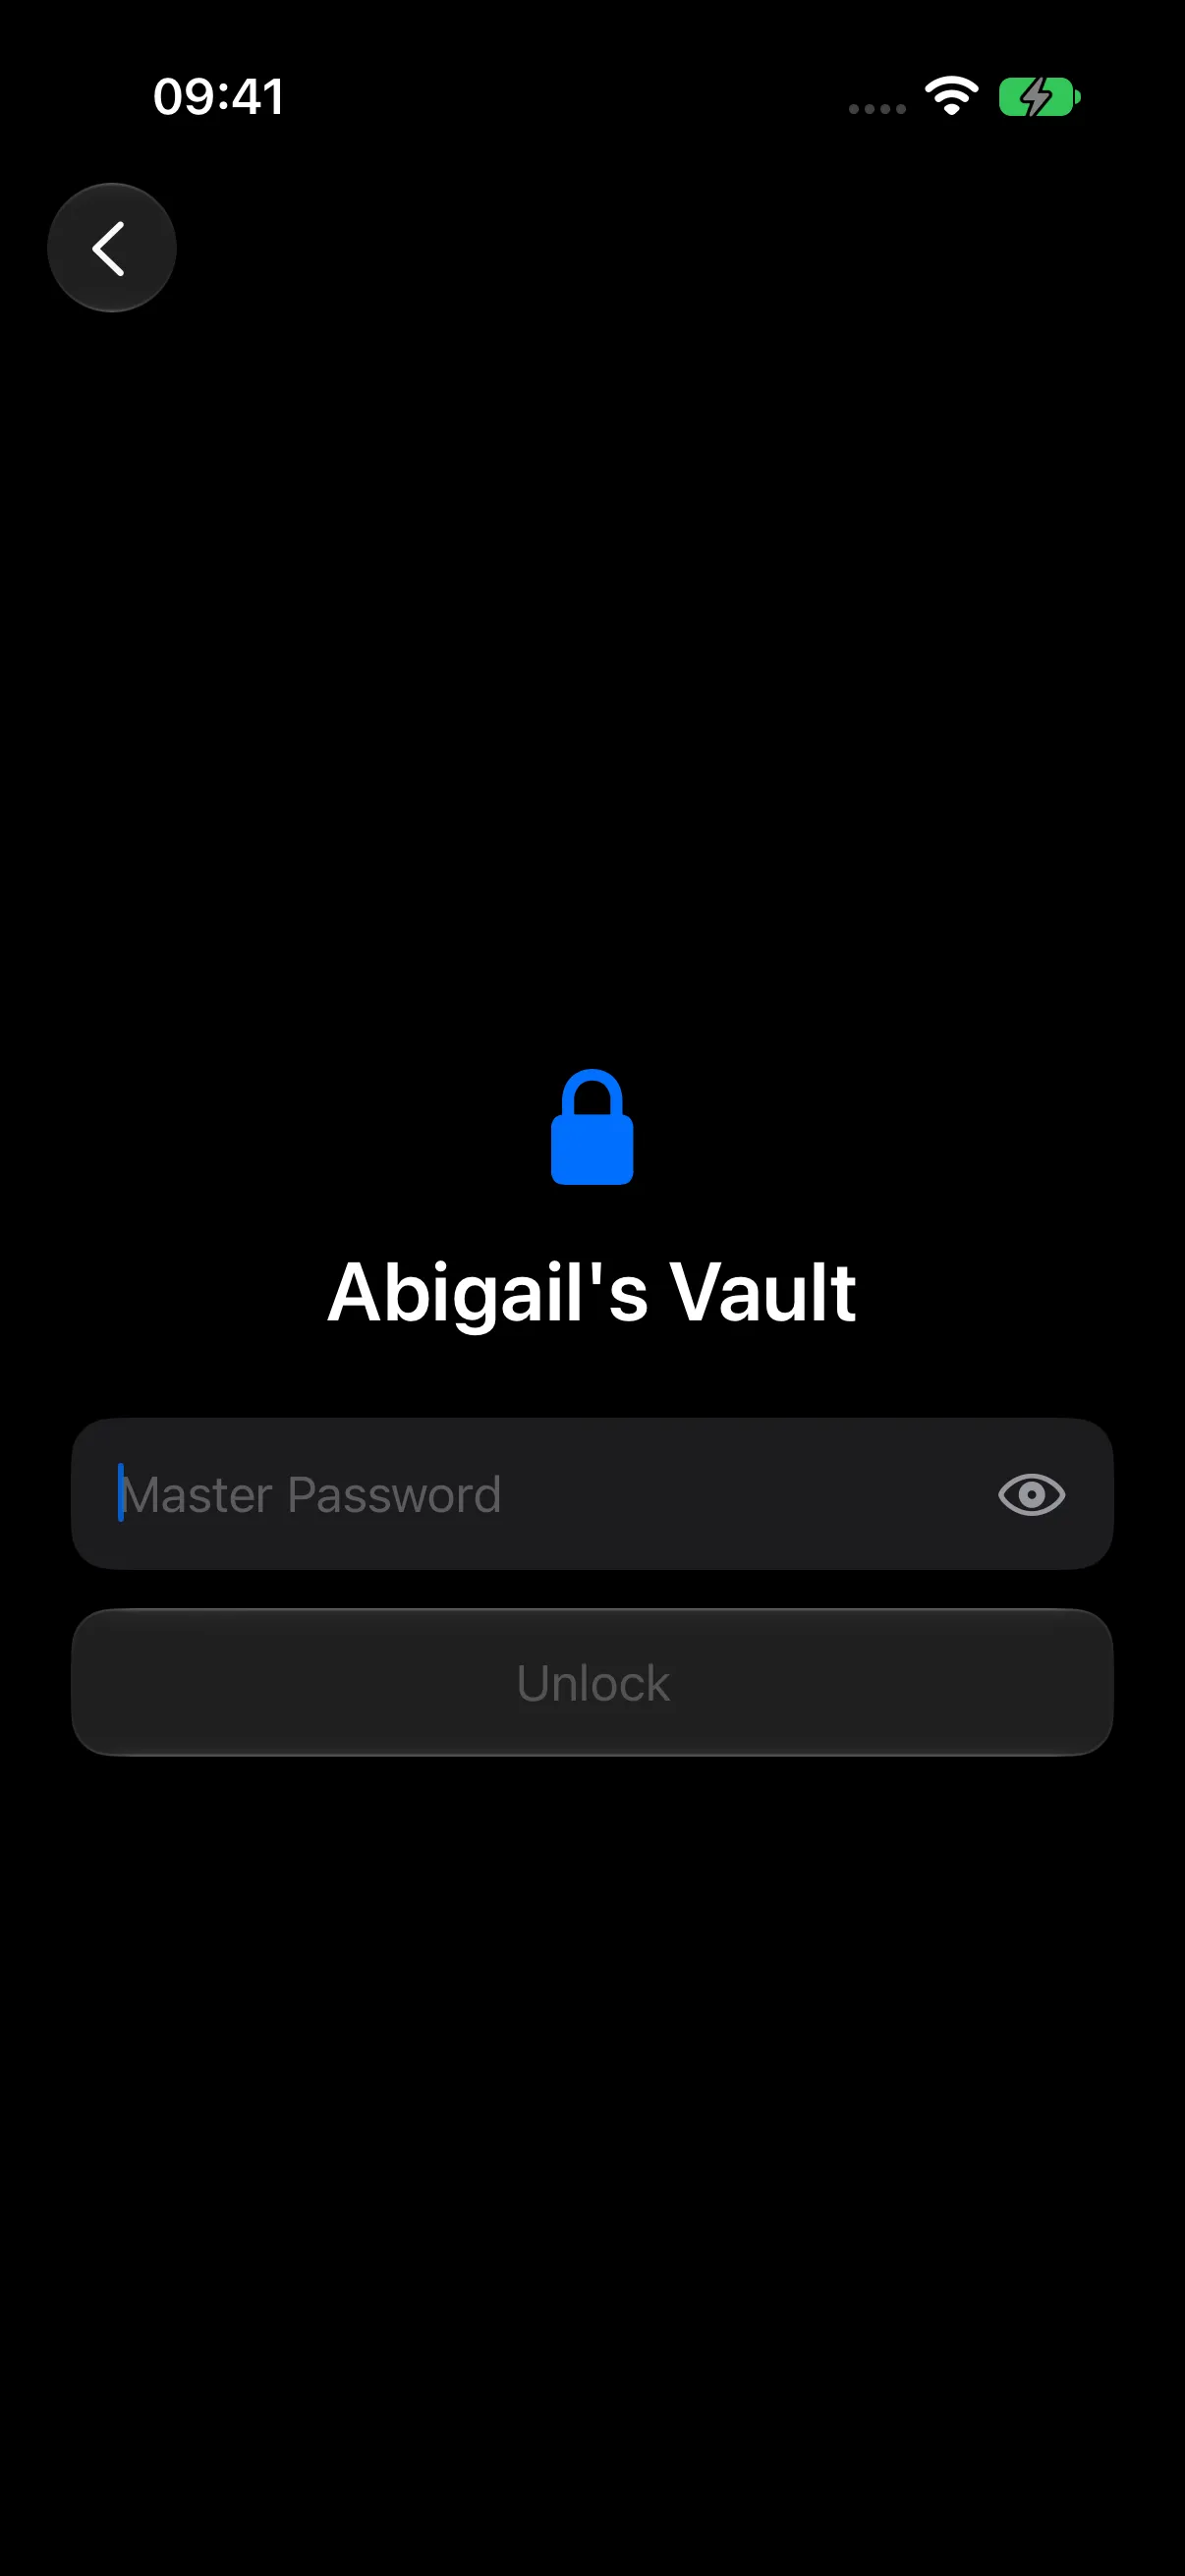
- Talos saves the encrypted database and opens its unlock screen.
Step 6 — Unlock Your Vault
- Check the vault name on the unlock screen.
- Enter the master password you chose.
- Tap Unlock.
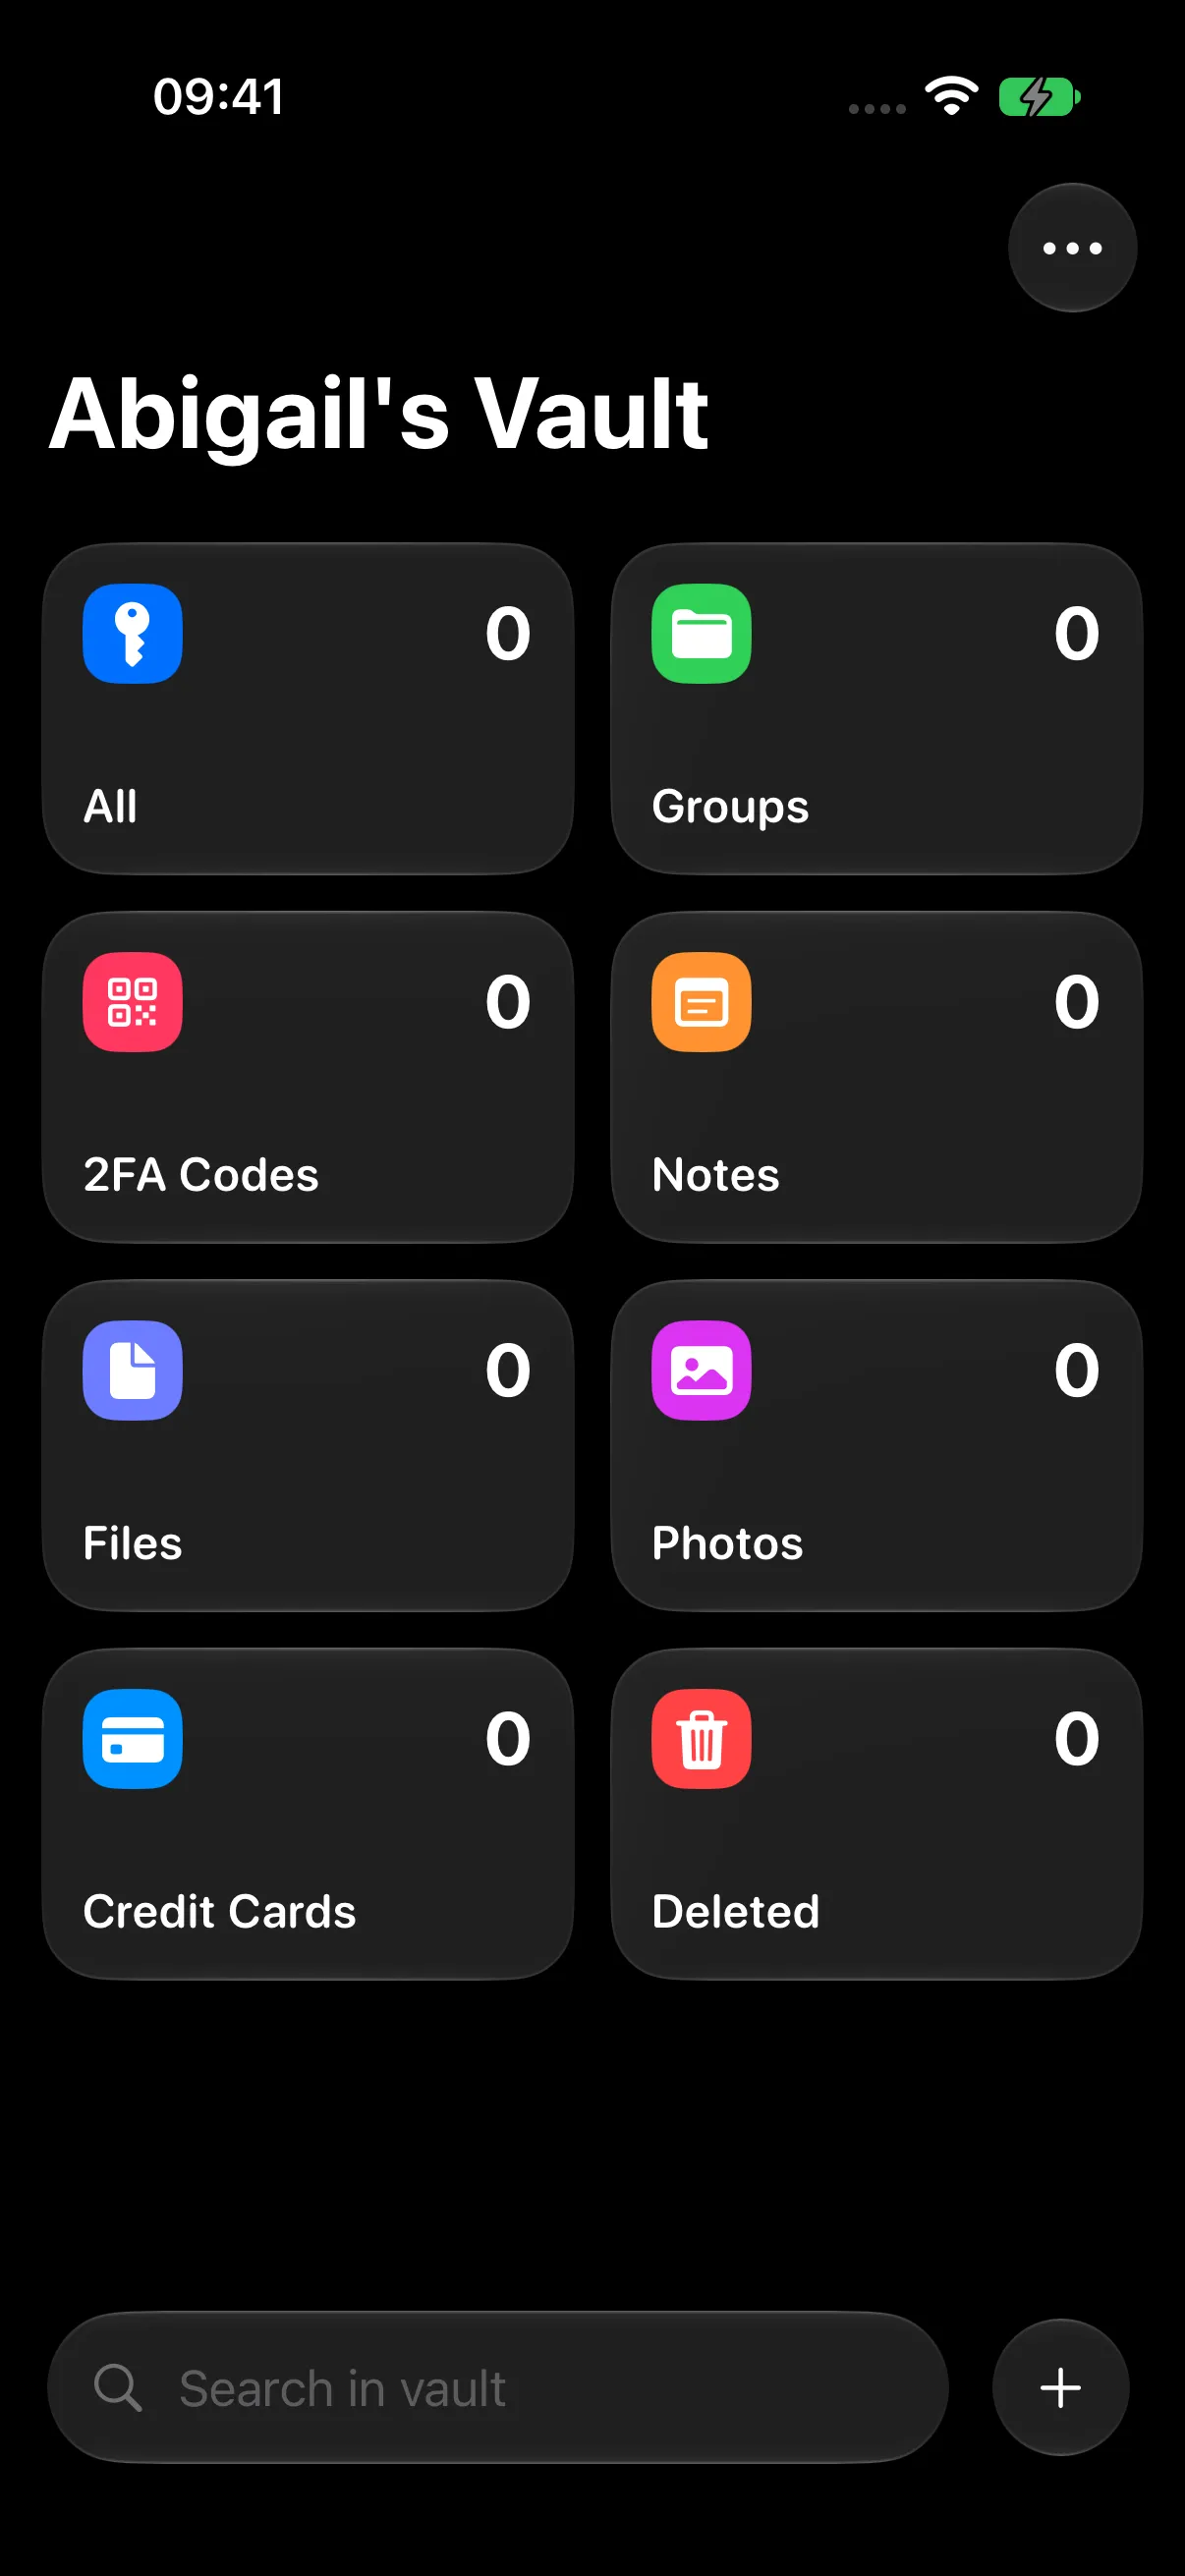
Your vault opens with its categories ready for use.
Keep Your Vault Ready for Everyday Use
Use a unique master password and keep it securely. Once you have added your records, make an encrypted copy through Settings > Backup > Back Up Now. The Security & Database Management chapter explains locking, biometric access, and backups.
Next Steps
Continue to Create Your First Entry.