Getting started
with Talos.
Your passwords, codes, and private files, together in an encrypted vault. Learn to set up Talos, organize your information, and make its features part of your everyday routine.

CHAPTER 09 13
Files, photos & OCR
Save documents and photos, recognize text, and configure document protection.
In this chapter 13 topics
- Step 1 — Add a Document
- Step 2 — Organize Document Details
- Step 3 — Choose Search Visibility
- Step 4 — Set Document Protection
- Sensitivity Presets
- Preview and Sharing
- Export Verification
- Step 5 — Save and Read Recognized Text
- Preview and Manage Documents
- Add a Gallery Photo
- Photo Details
- Attach a File to a Login
- Next Steps
Bring documents, photos, and attachments into your encrypted vault. Use Files for document organization and text recognition, Photos for your private gallery, and entry attachments for files associated with a specific login.
| Location | Use it for |
|---|---|
| Files | Documents with metadata, OCR, related records, and individual access policies. Document Vault and OCR are Premium features. |
| Photos | Images with a thumbnail gallery, full-screen viewer, and photo details. |
| Entry Attachments | Files that belong to a particular login or record. |
Step 1 — Add a Document
- Open Files in Abigail’s Vault.
- Choose Add (+) > New File to open New Document.
- Tap Add Document, beside Select.
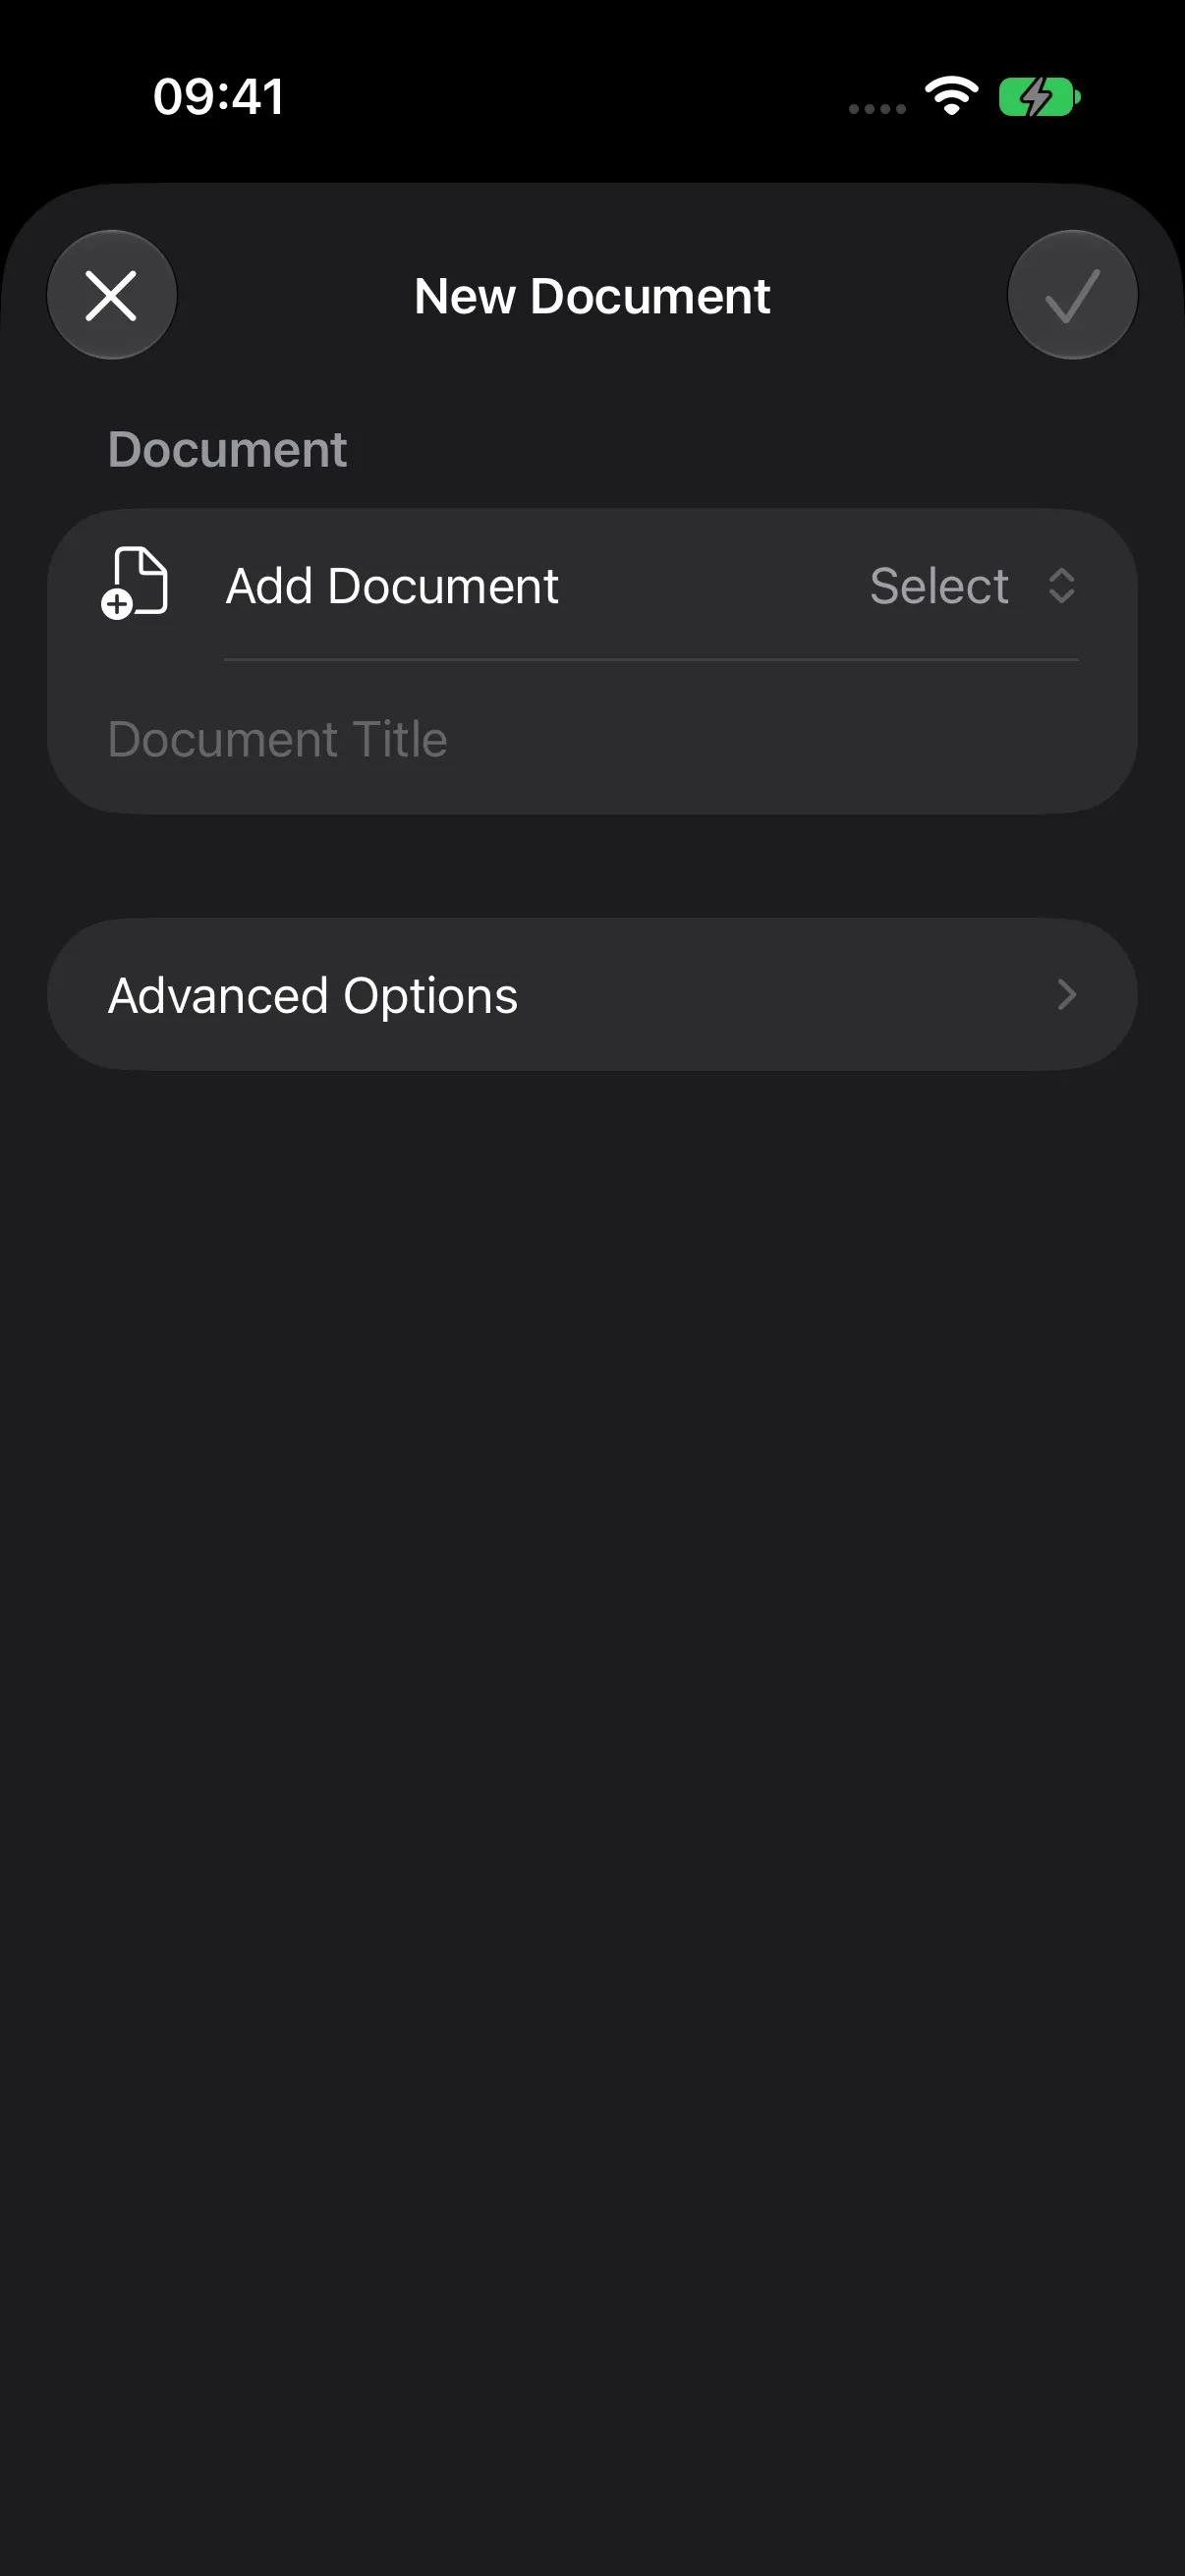
Choose the source that fits your document.
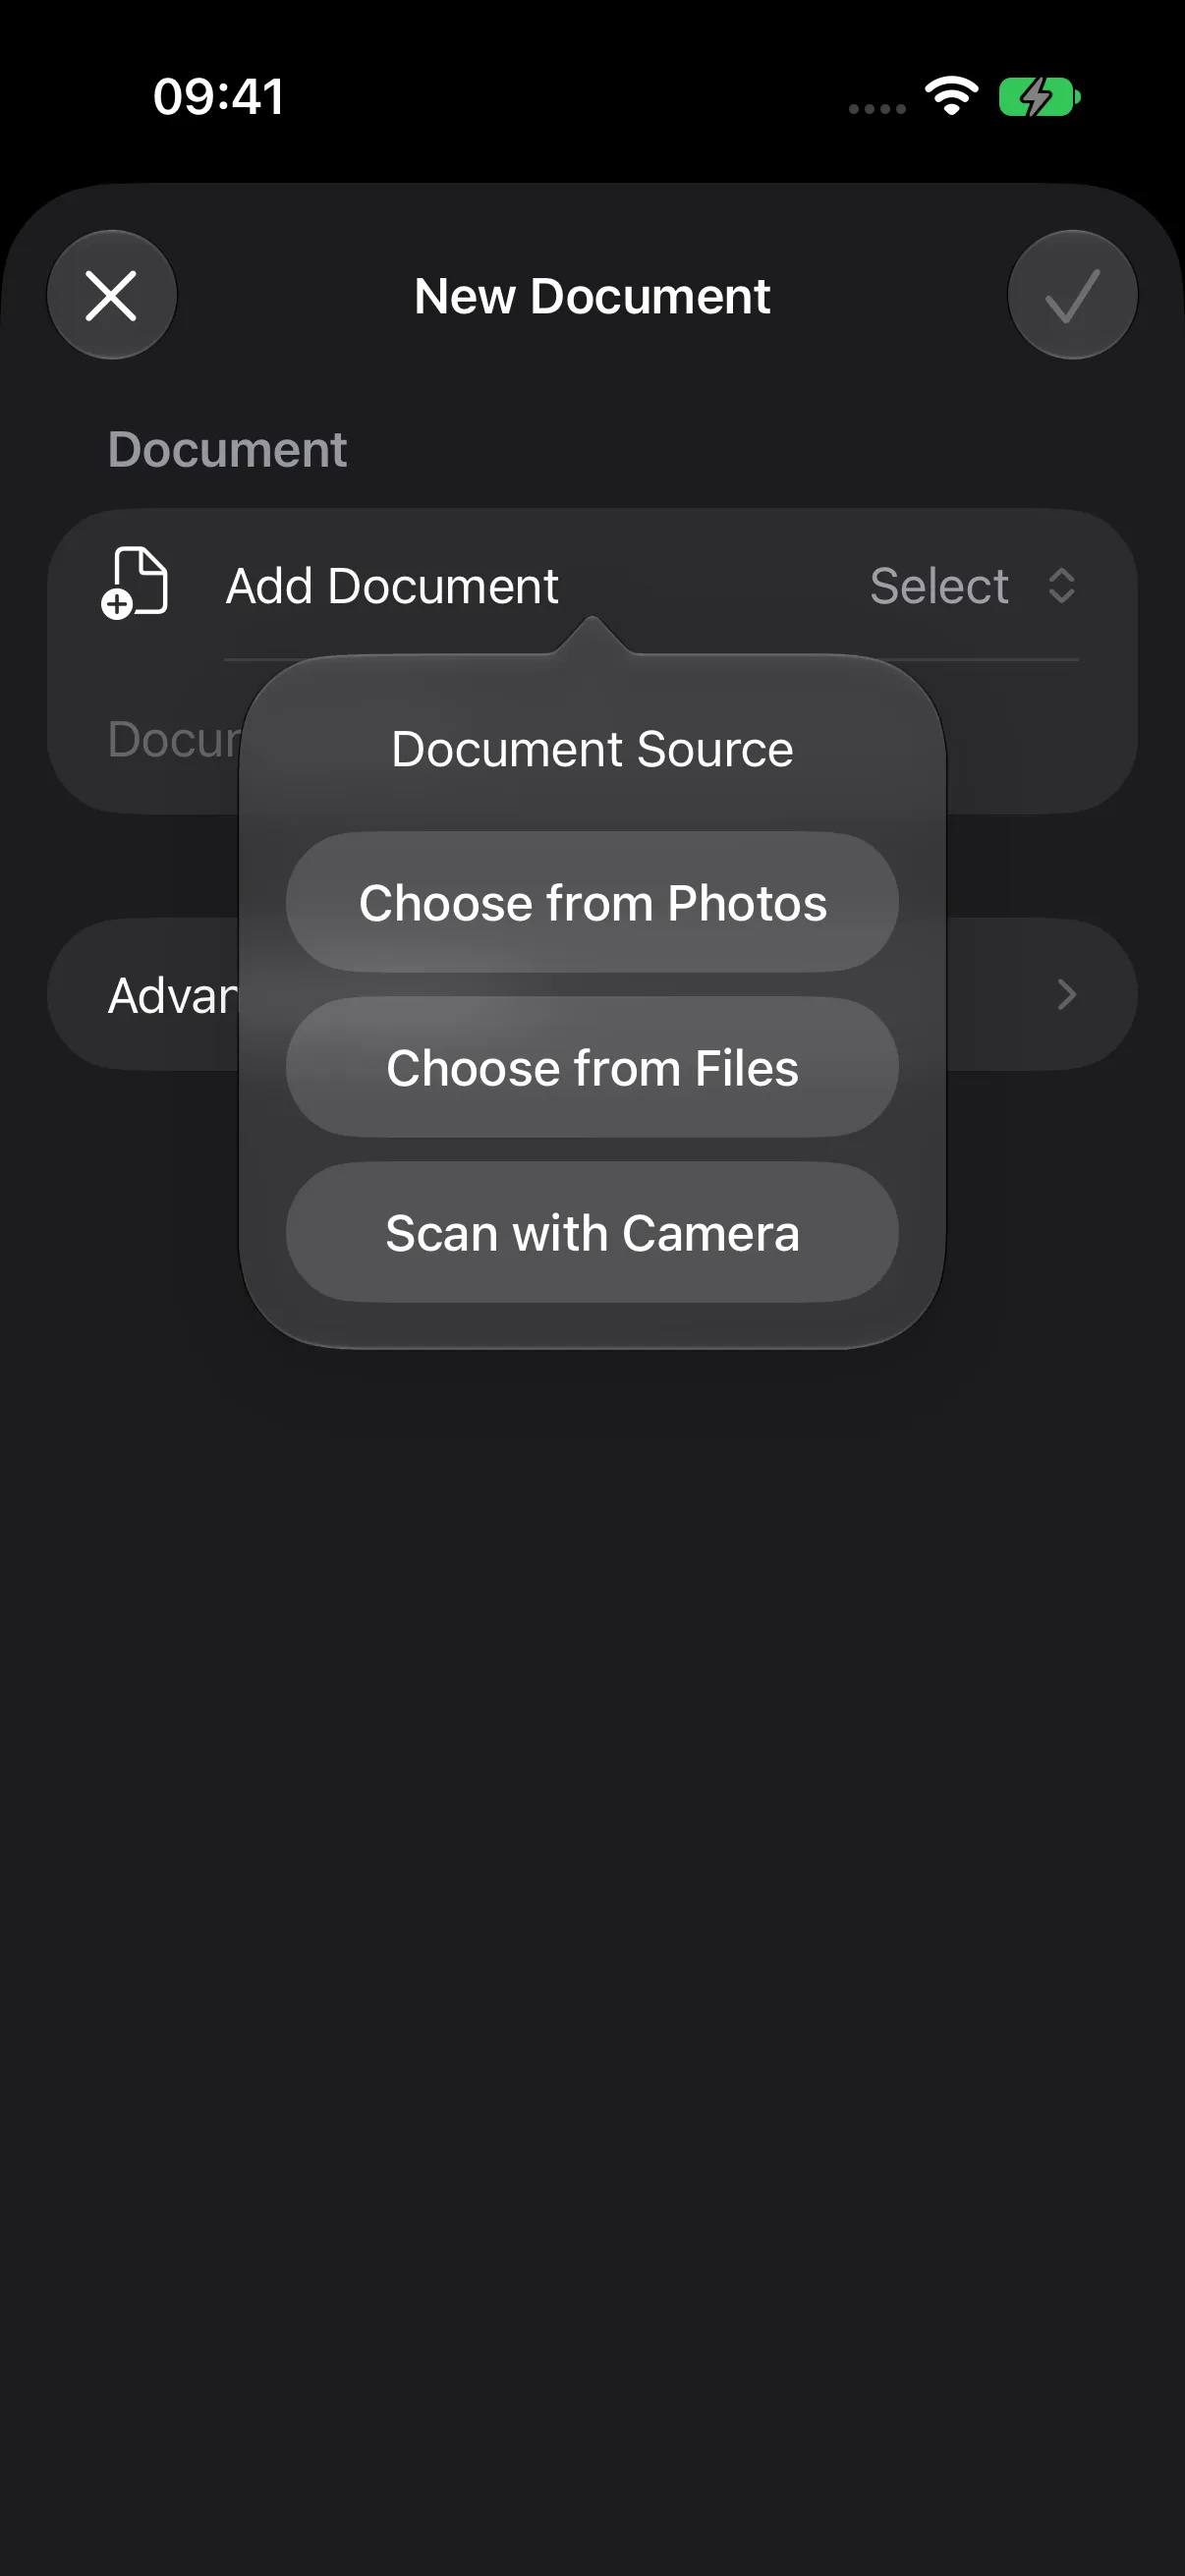
| Source | How to use it |
|---|---|
| Choose from Photos | Select an image from your photo library. |
| Choose from Files | Browse Files and select a document from an available location. |
| Scan with Camera | Capture document pages using the camera scanner. |
The system file picker gives you access to locations available on your device.
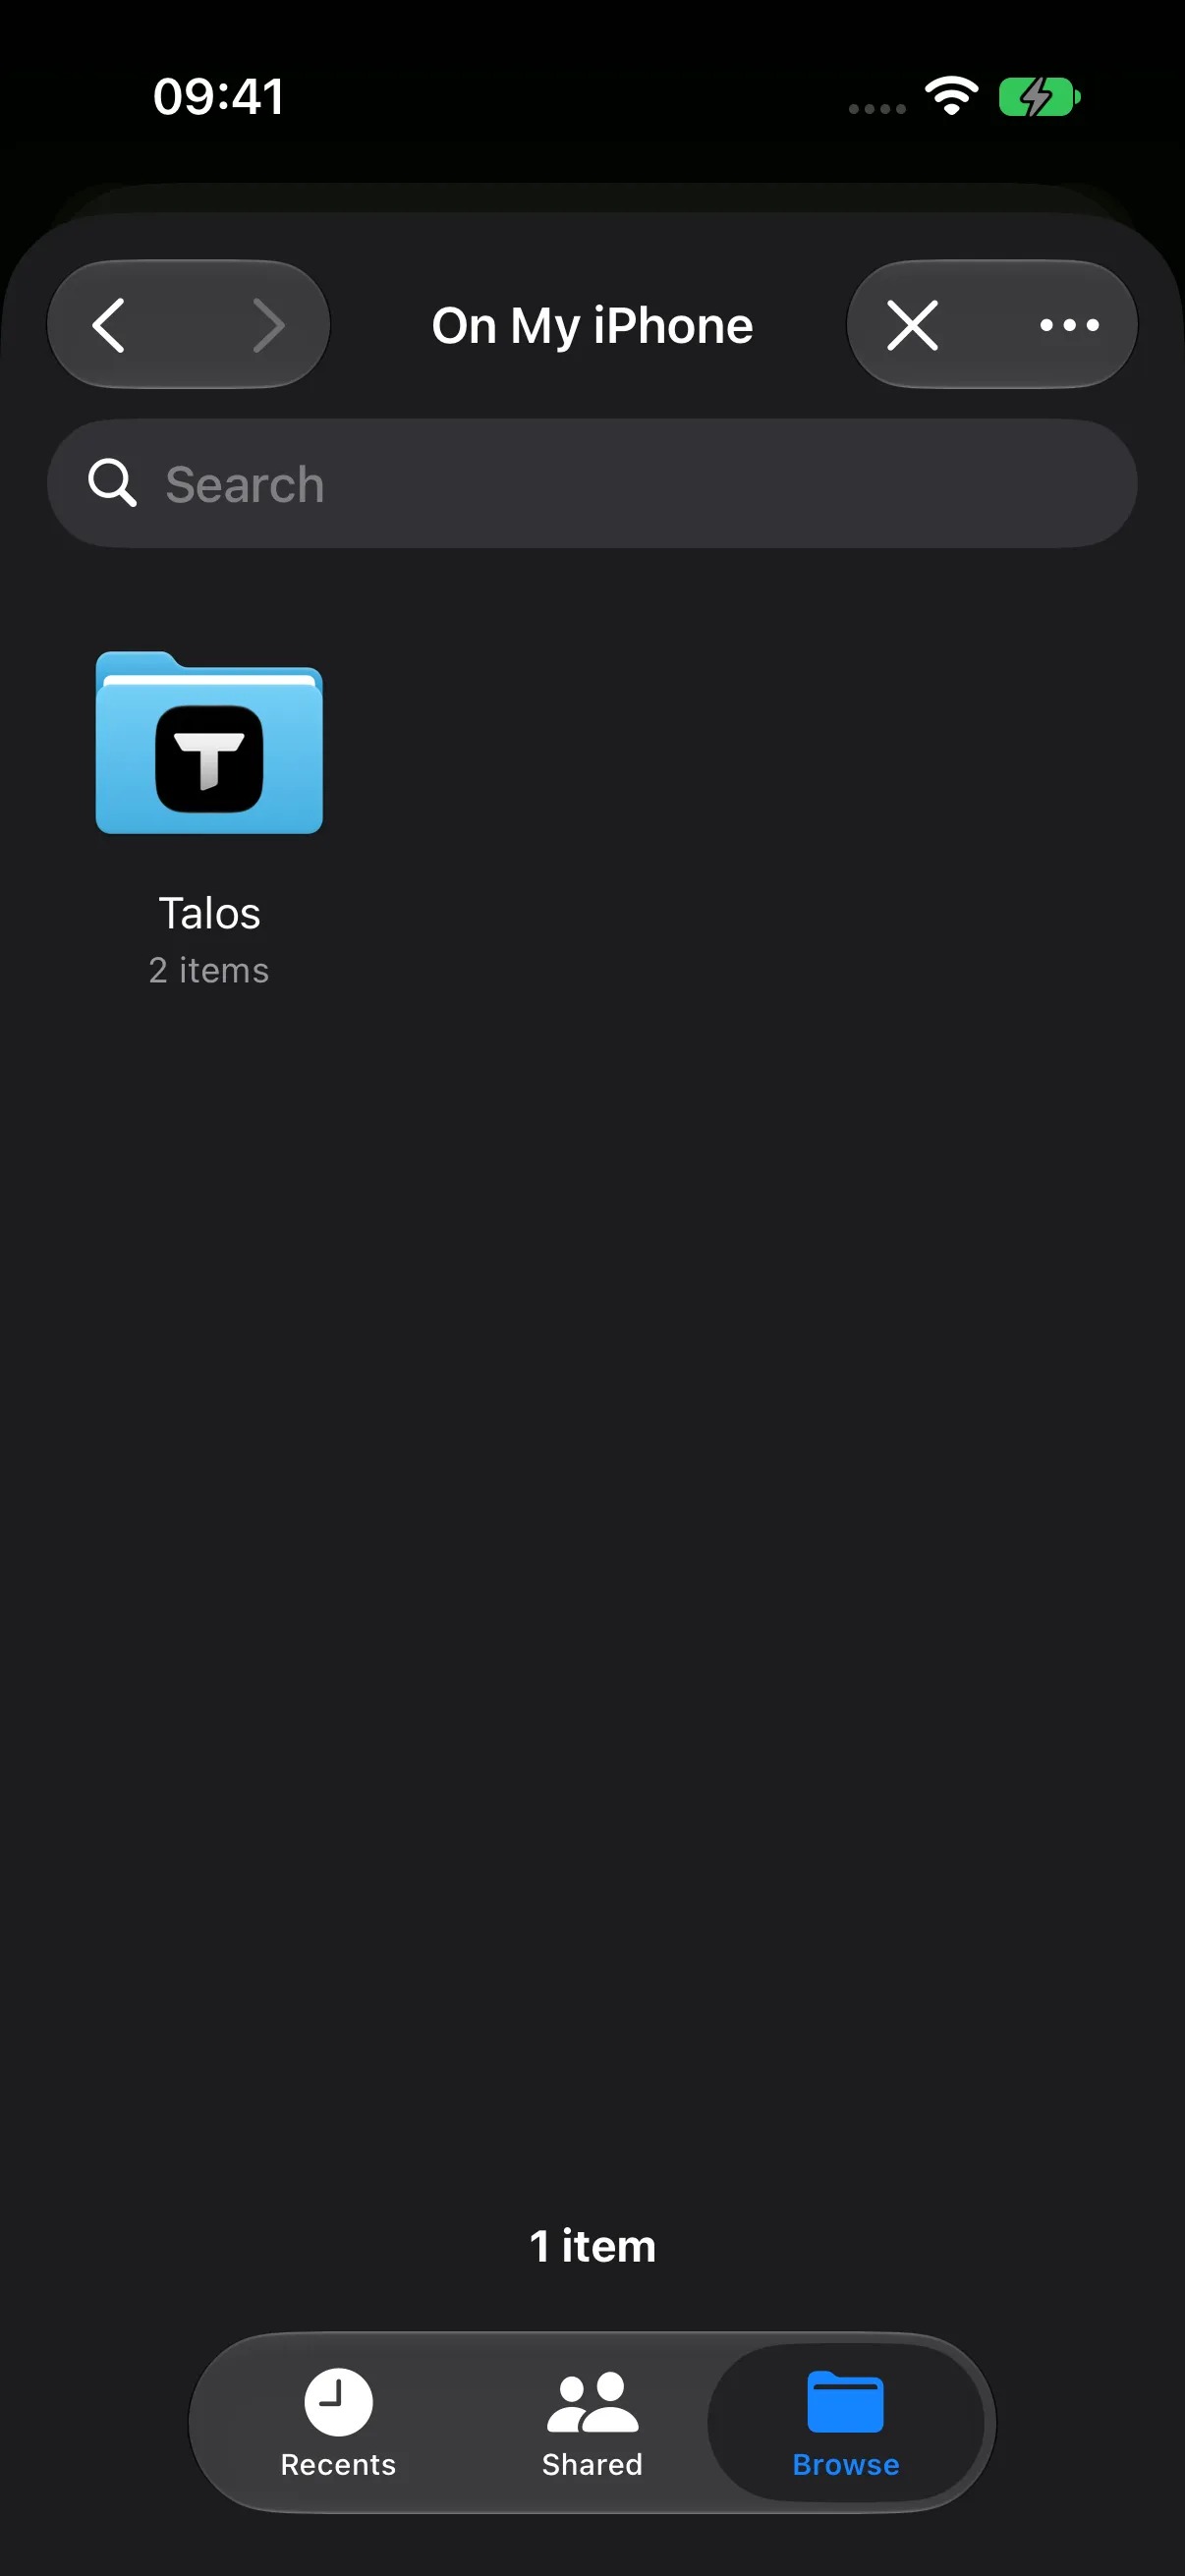
For this example, choose the meeting-note image from Photos. Talos analyzes the document and displays its import summary. Review the suggested information and enter Northstar Meeting Notes as Document Title.
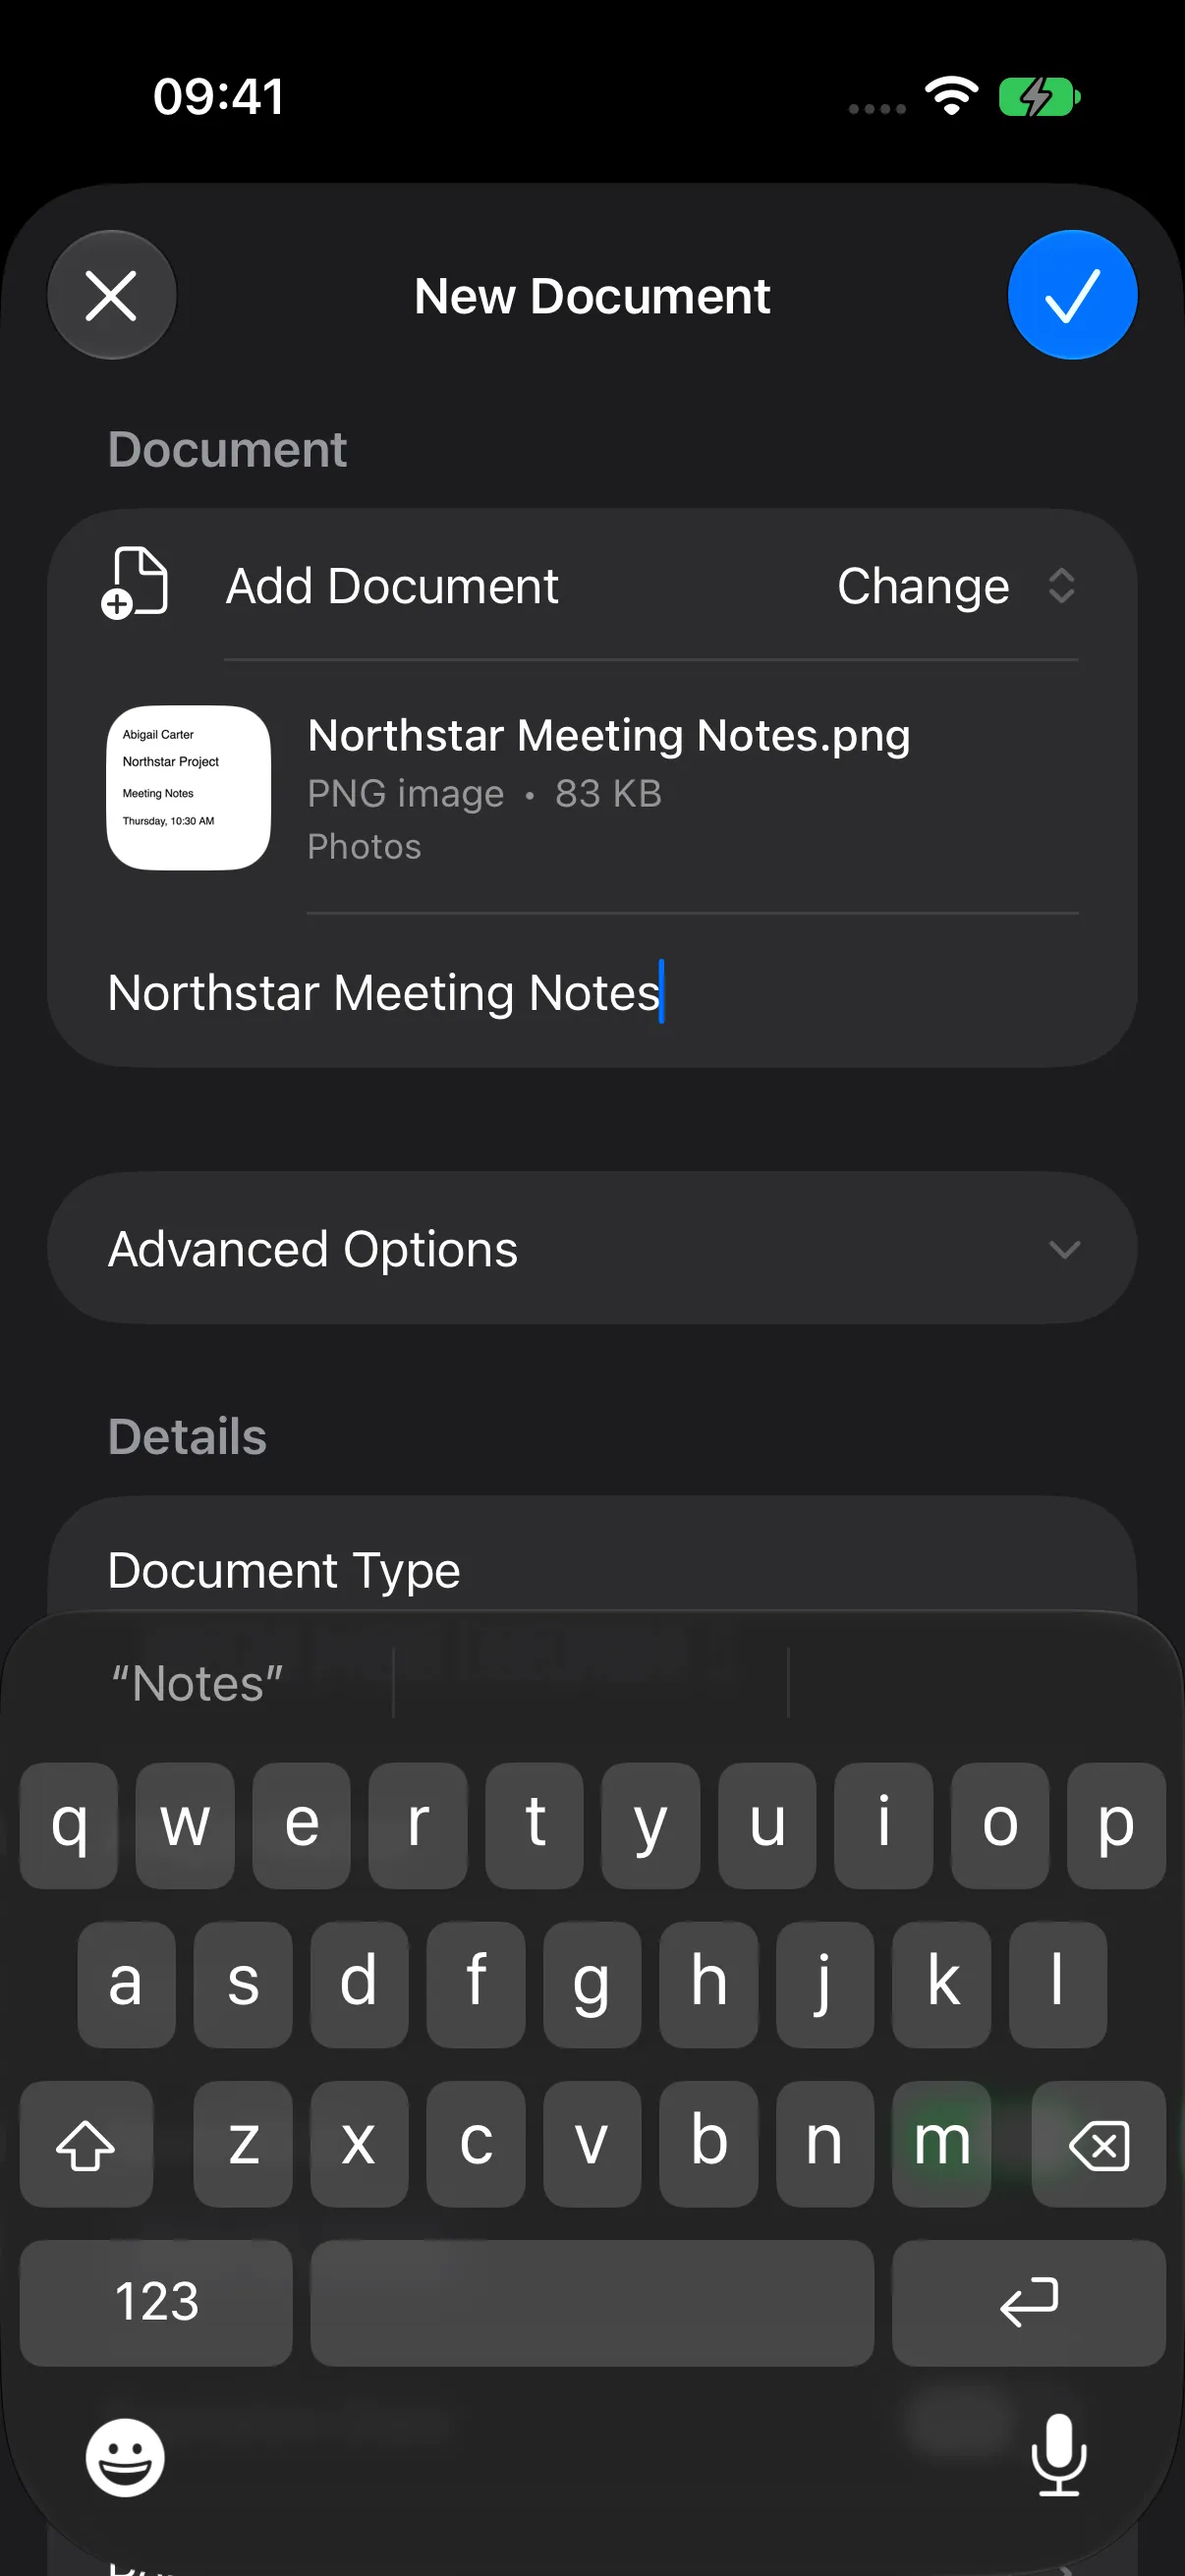
A selected file and a title enable Save. To choose a different file, tap Change in the Add Document row.
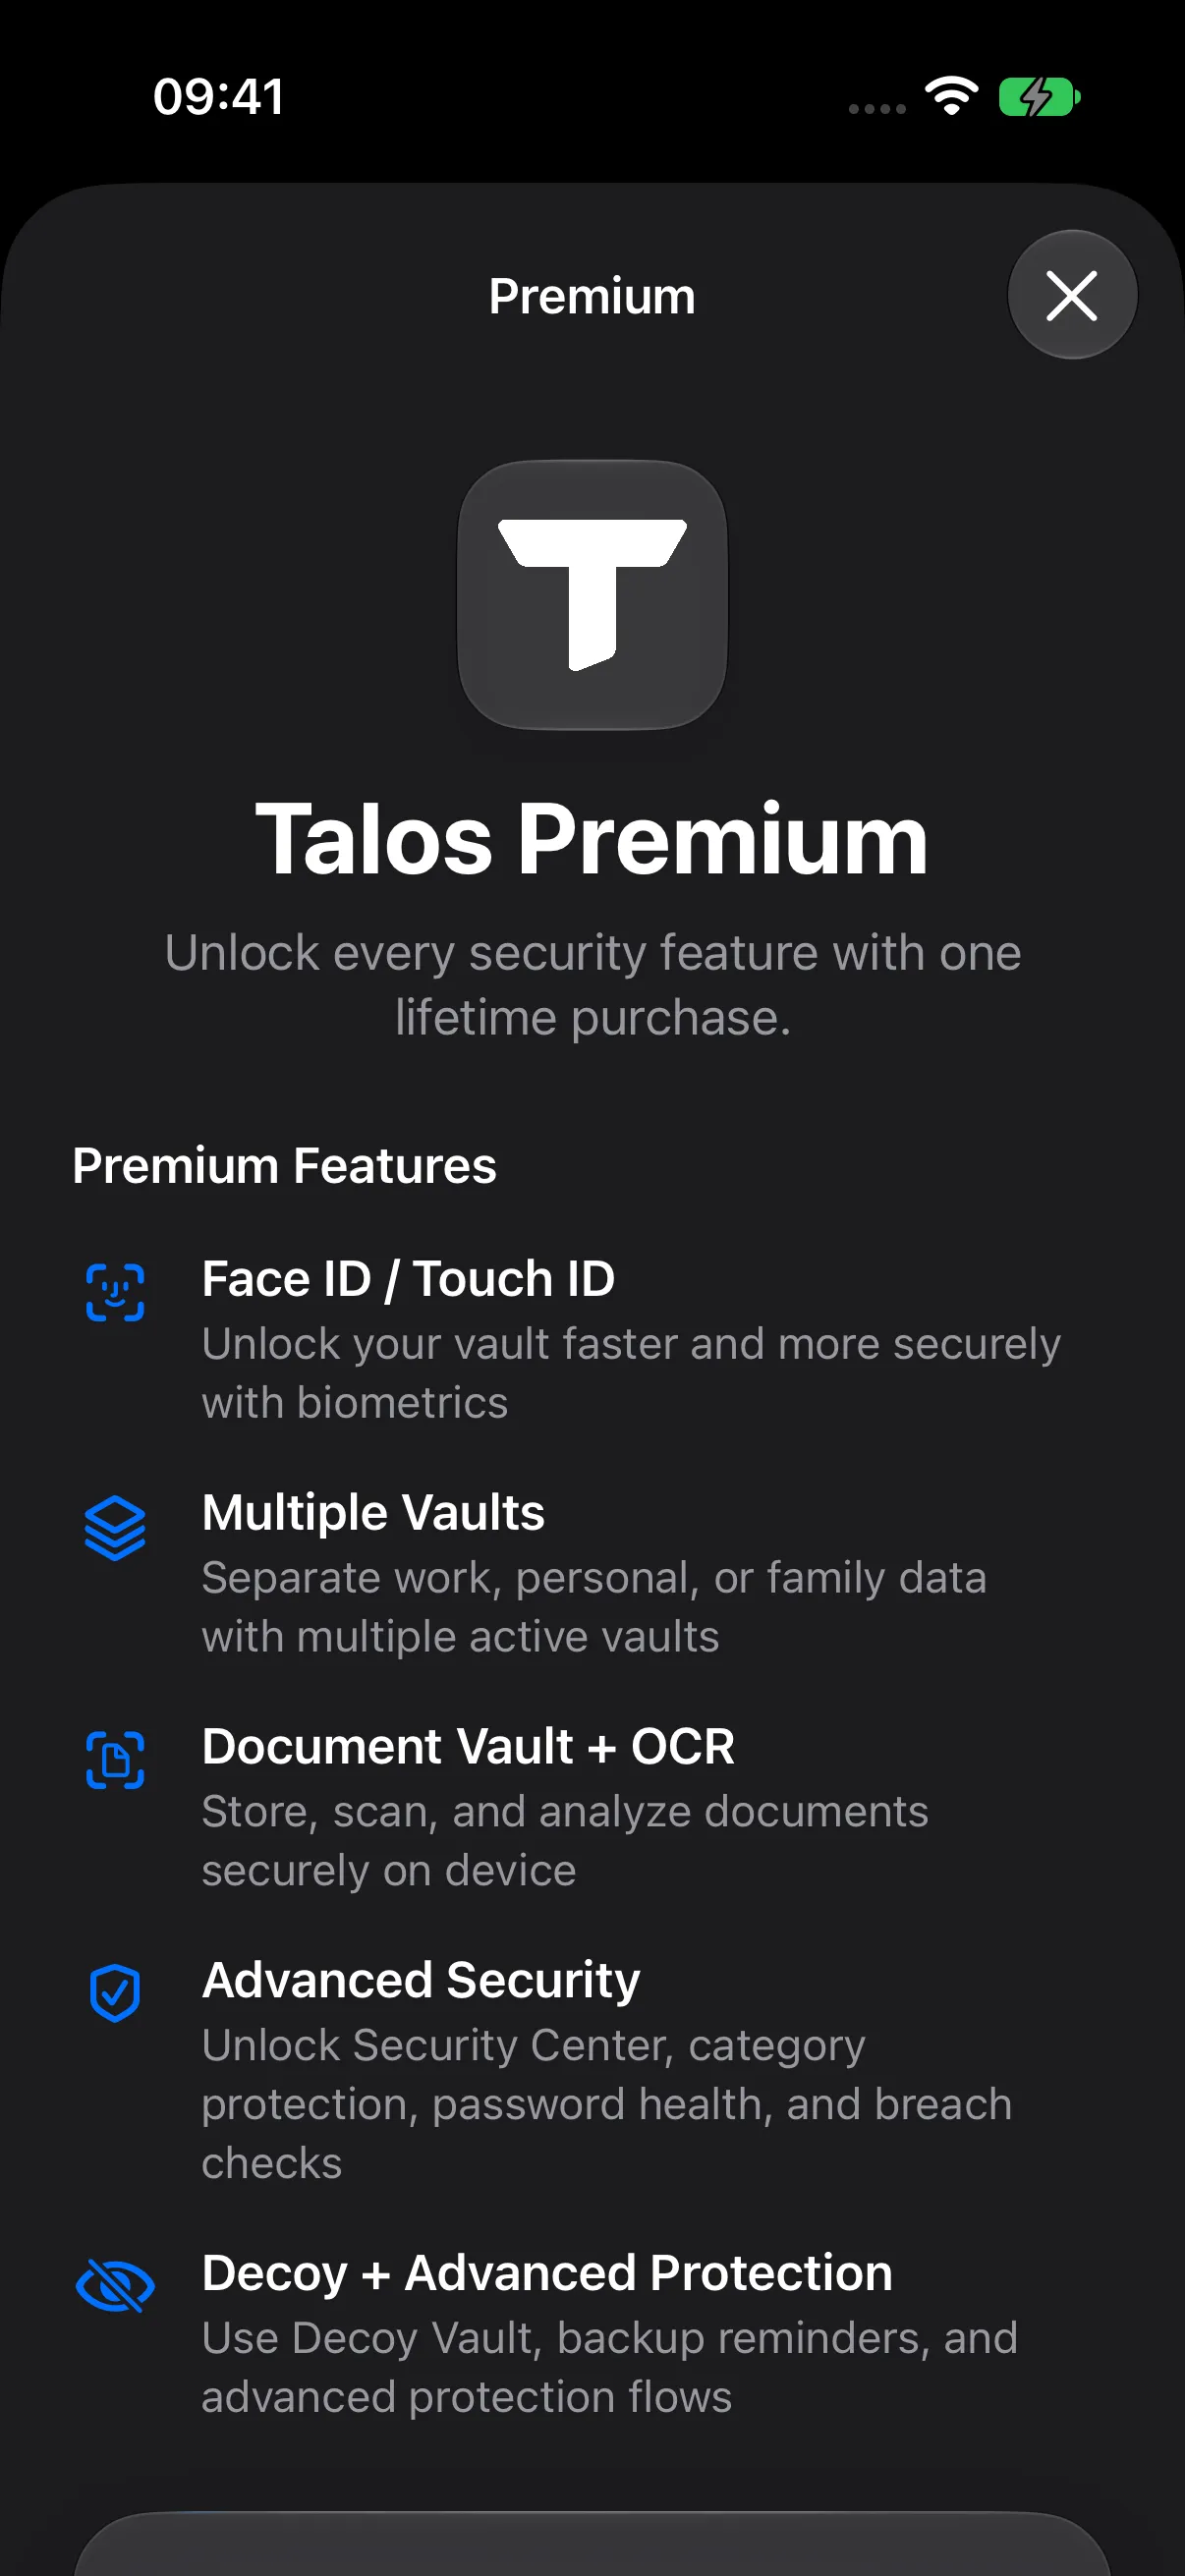
Document Vault and OCR are included with eligible Premium access. The Premium screen lists these features.
Step 2 — Organize Document Details
Expand Advanced Options to add useful metadata.
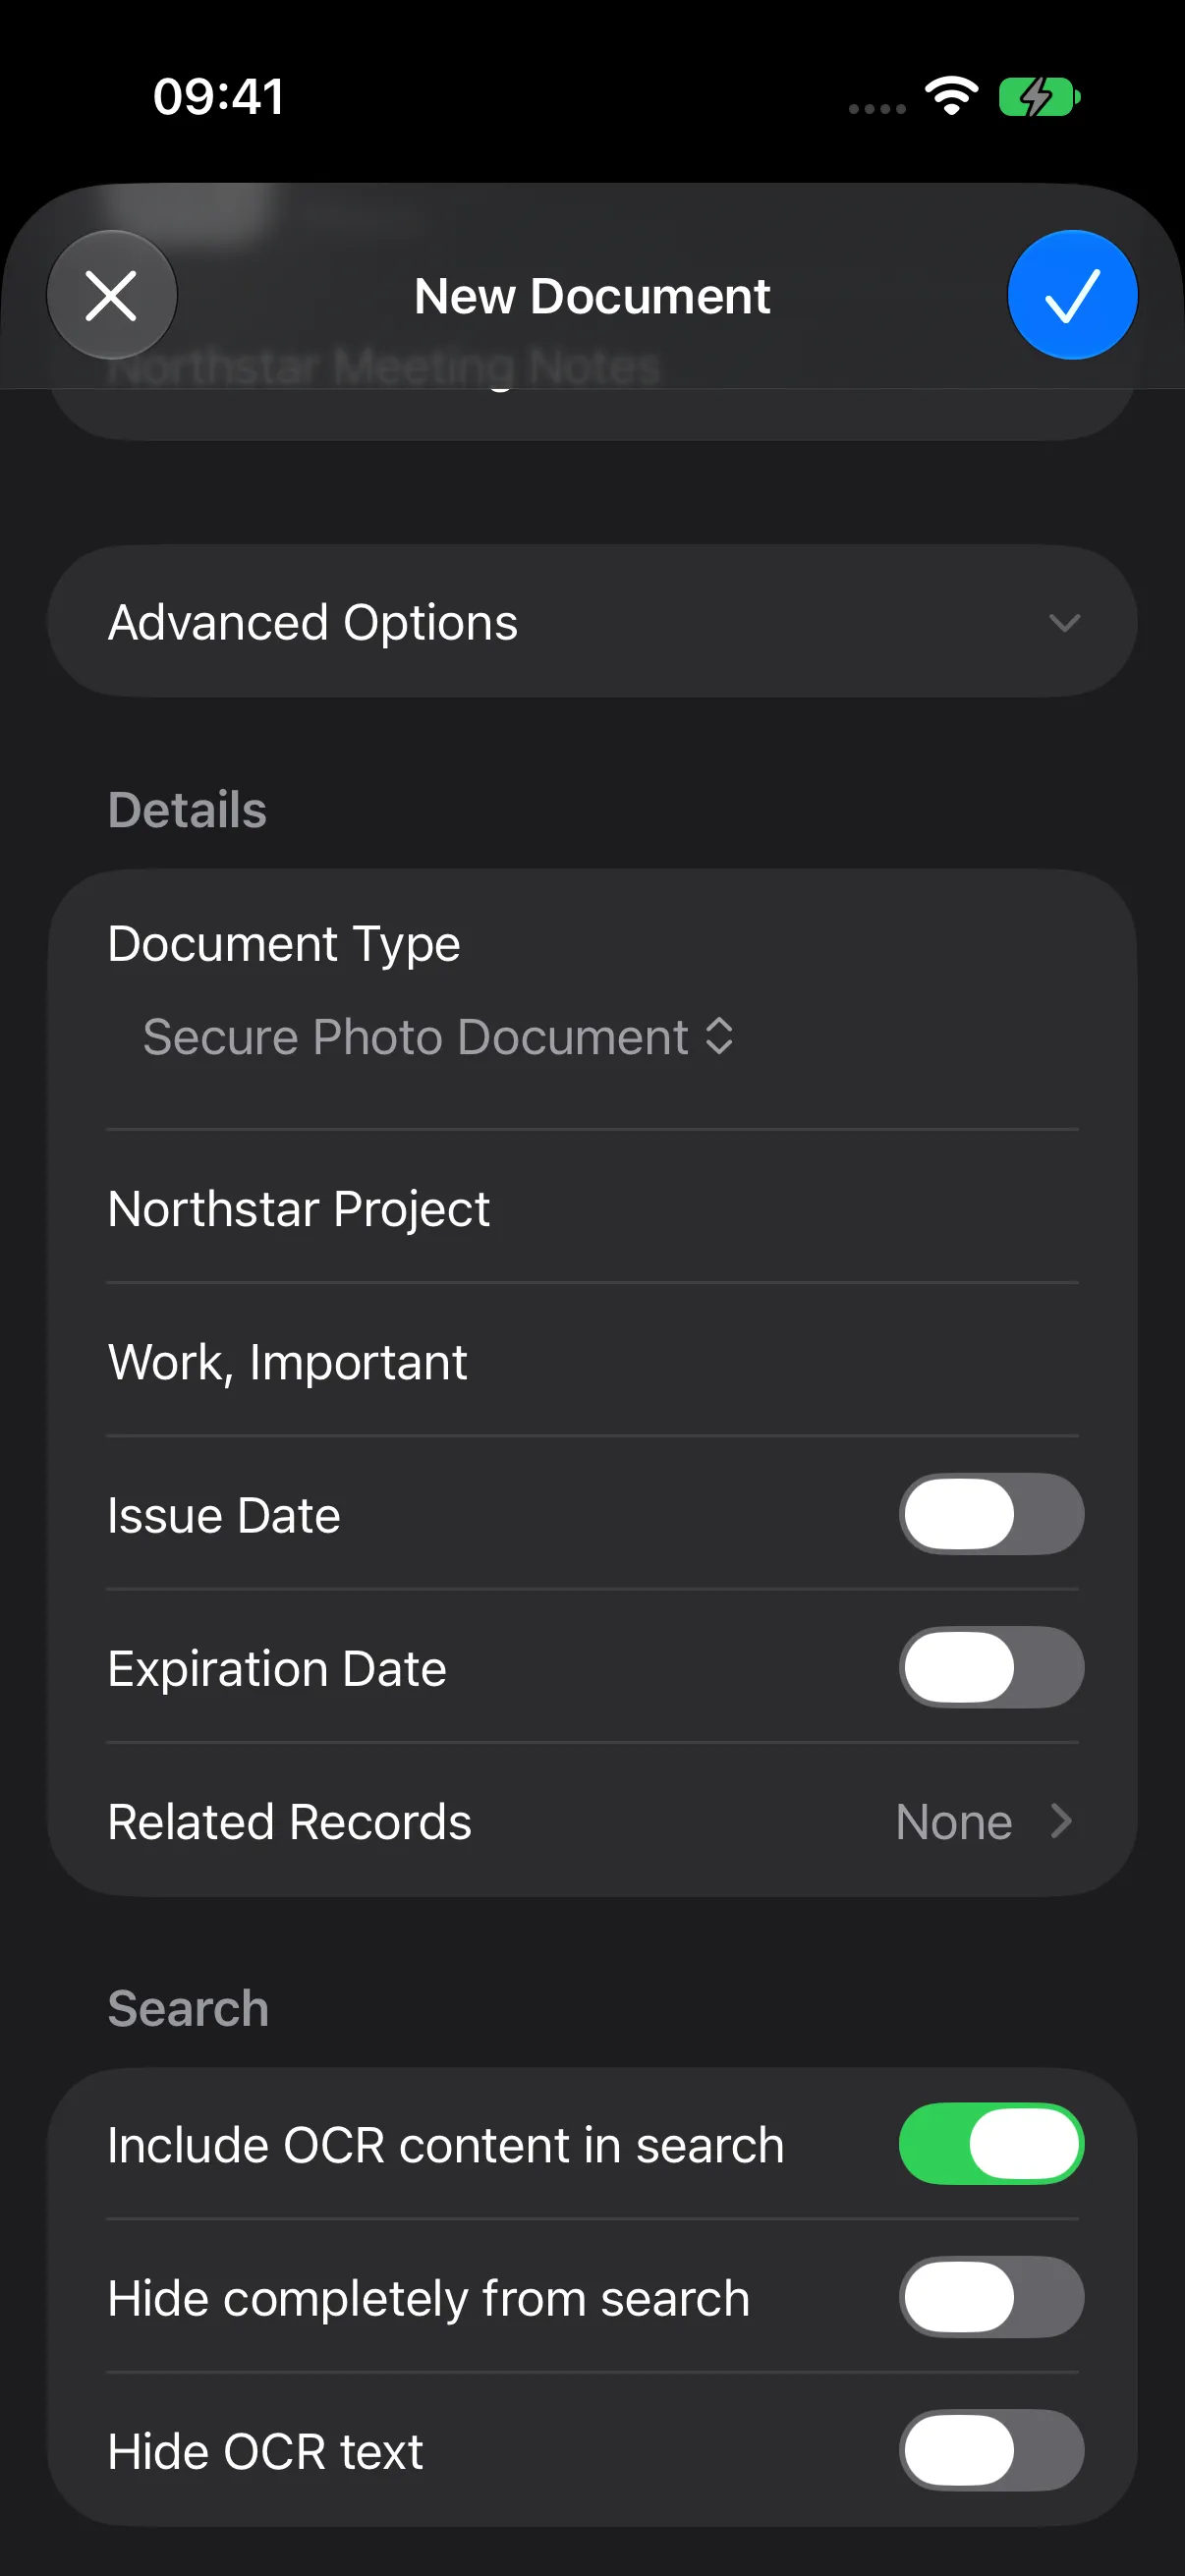
| Option | How to use it |
|---|---|
| Document Type | Choose a classification that describes the document. |
| Issuer / Source | Add its organization or source, such as Northstar Project. |
| Tags | Enter comma-separated labels, such as Work, Important. |
| Issue Date | Enable the control and select a date when applicable. |
| Expiration Date | Record an expiration date; past dates are highlighted in the detail screen. |
| Related Records | Associate the document with eligible records already in your vault. |
Available classifications are Secure Document, Passport, ID Card, Driver’s License, Insurance, Contract, Invoice / Receipt, Recovery Codes, Certificate, Statement / Report, License Document, and Secure Photo Document.
Use Secure Photo Document for the example image. Review suggested dates and fields against your document, and keep the metadata relevant to what you are saving.
Step 3 — Choose Search Visibility
| Setting | Purpose |
|---|---|
| Include OCR content in search | Make eligible recognized text, summaries, and extracted values available to document search. |
| Hide completely from search | Keep the document out of search results. |
| Hide OCR text | Protect derived text behind document verification and keep that hidden text out of the normal search index. |
To find this example by its recognized text, enable OCR inclusion and leave the two hiding options off. Authorize any protected Files category before searching. See Search Your Vault for category and tag filters.
Step 4 — Set Document Protection
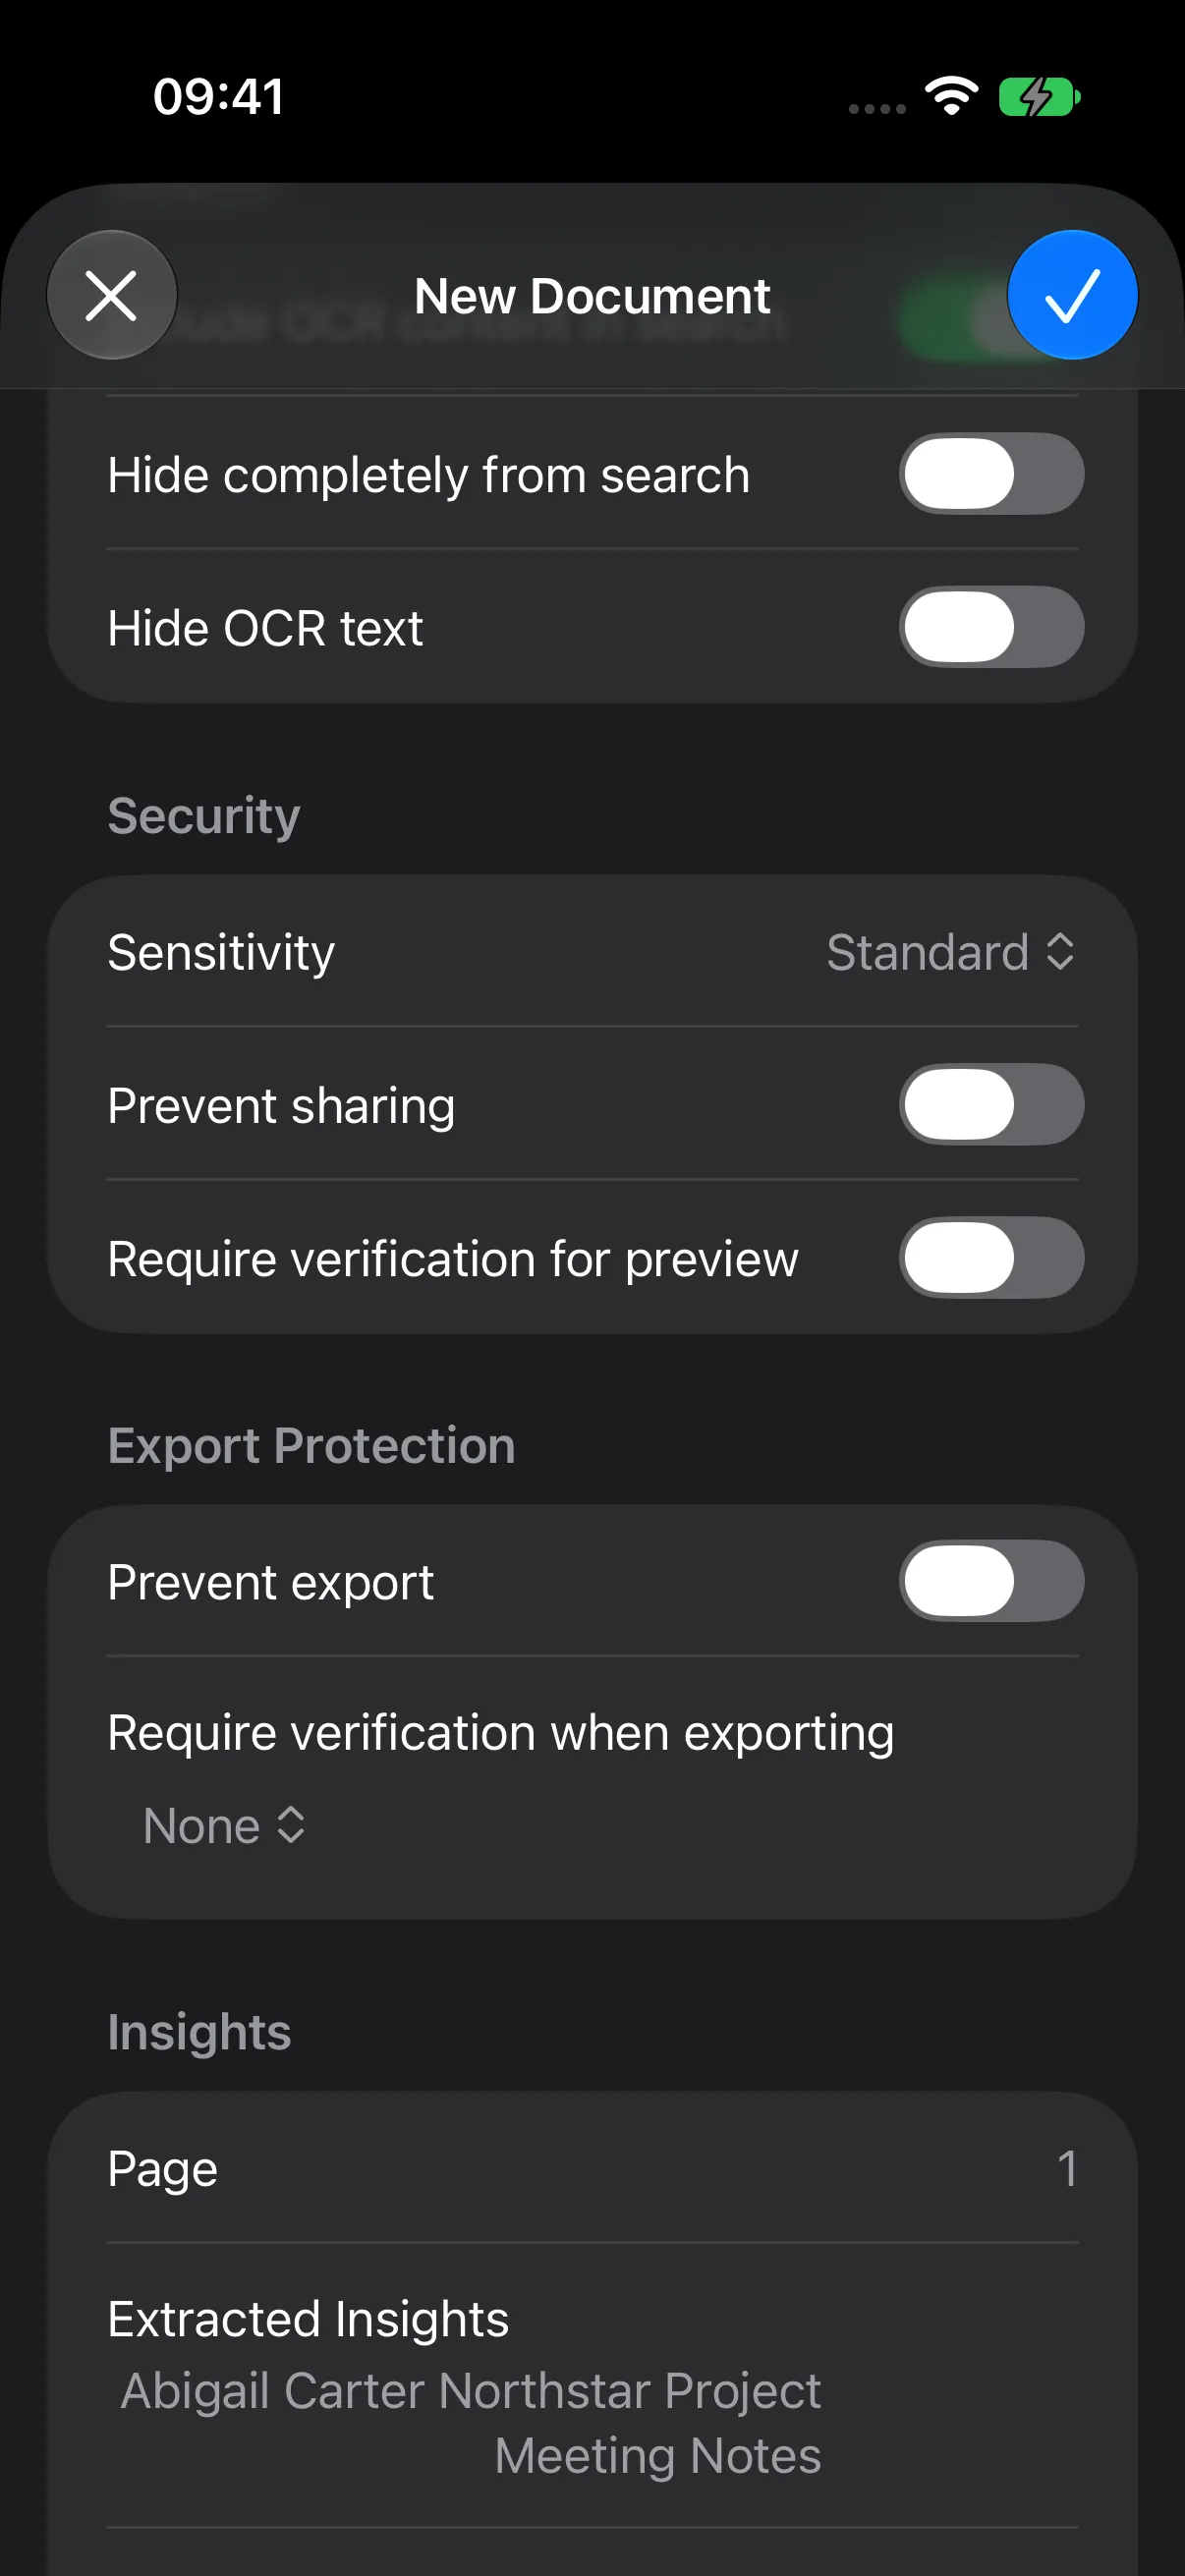
Choose a sensitivity preset, then adjust individual controls as needed.
Sensitivity Presets
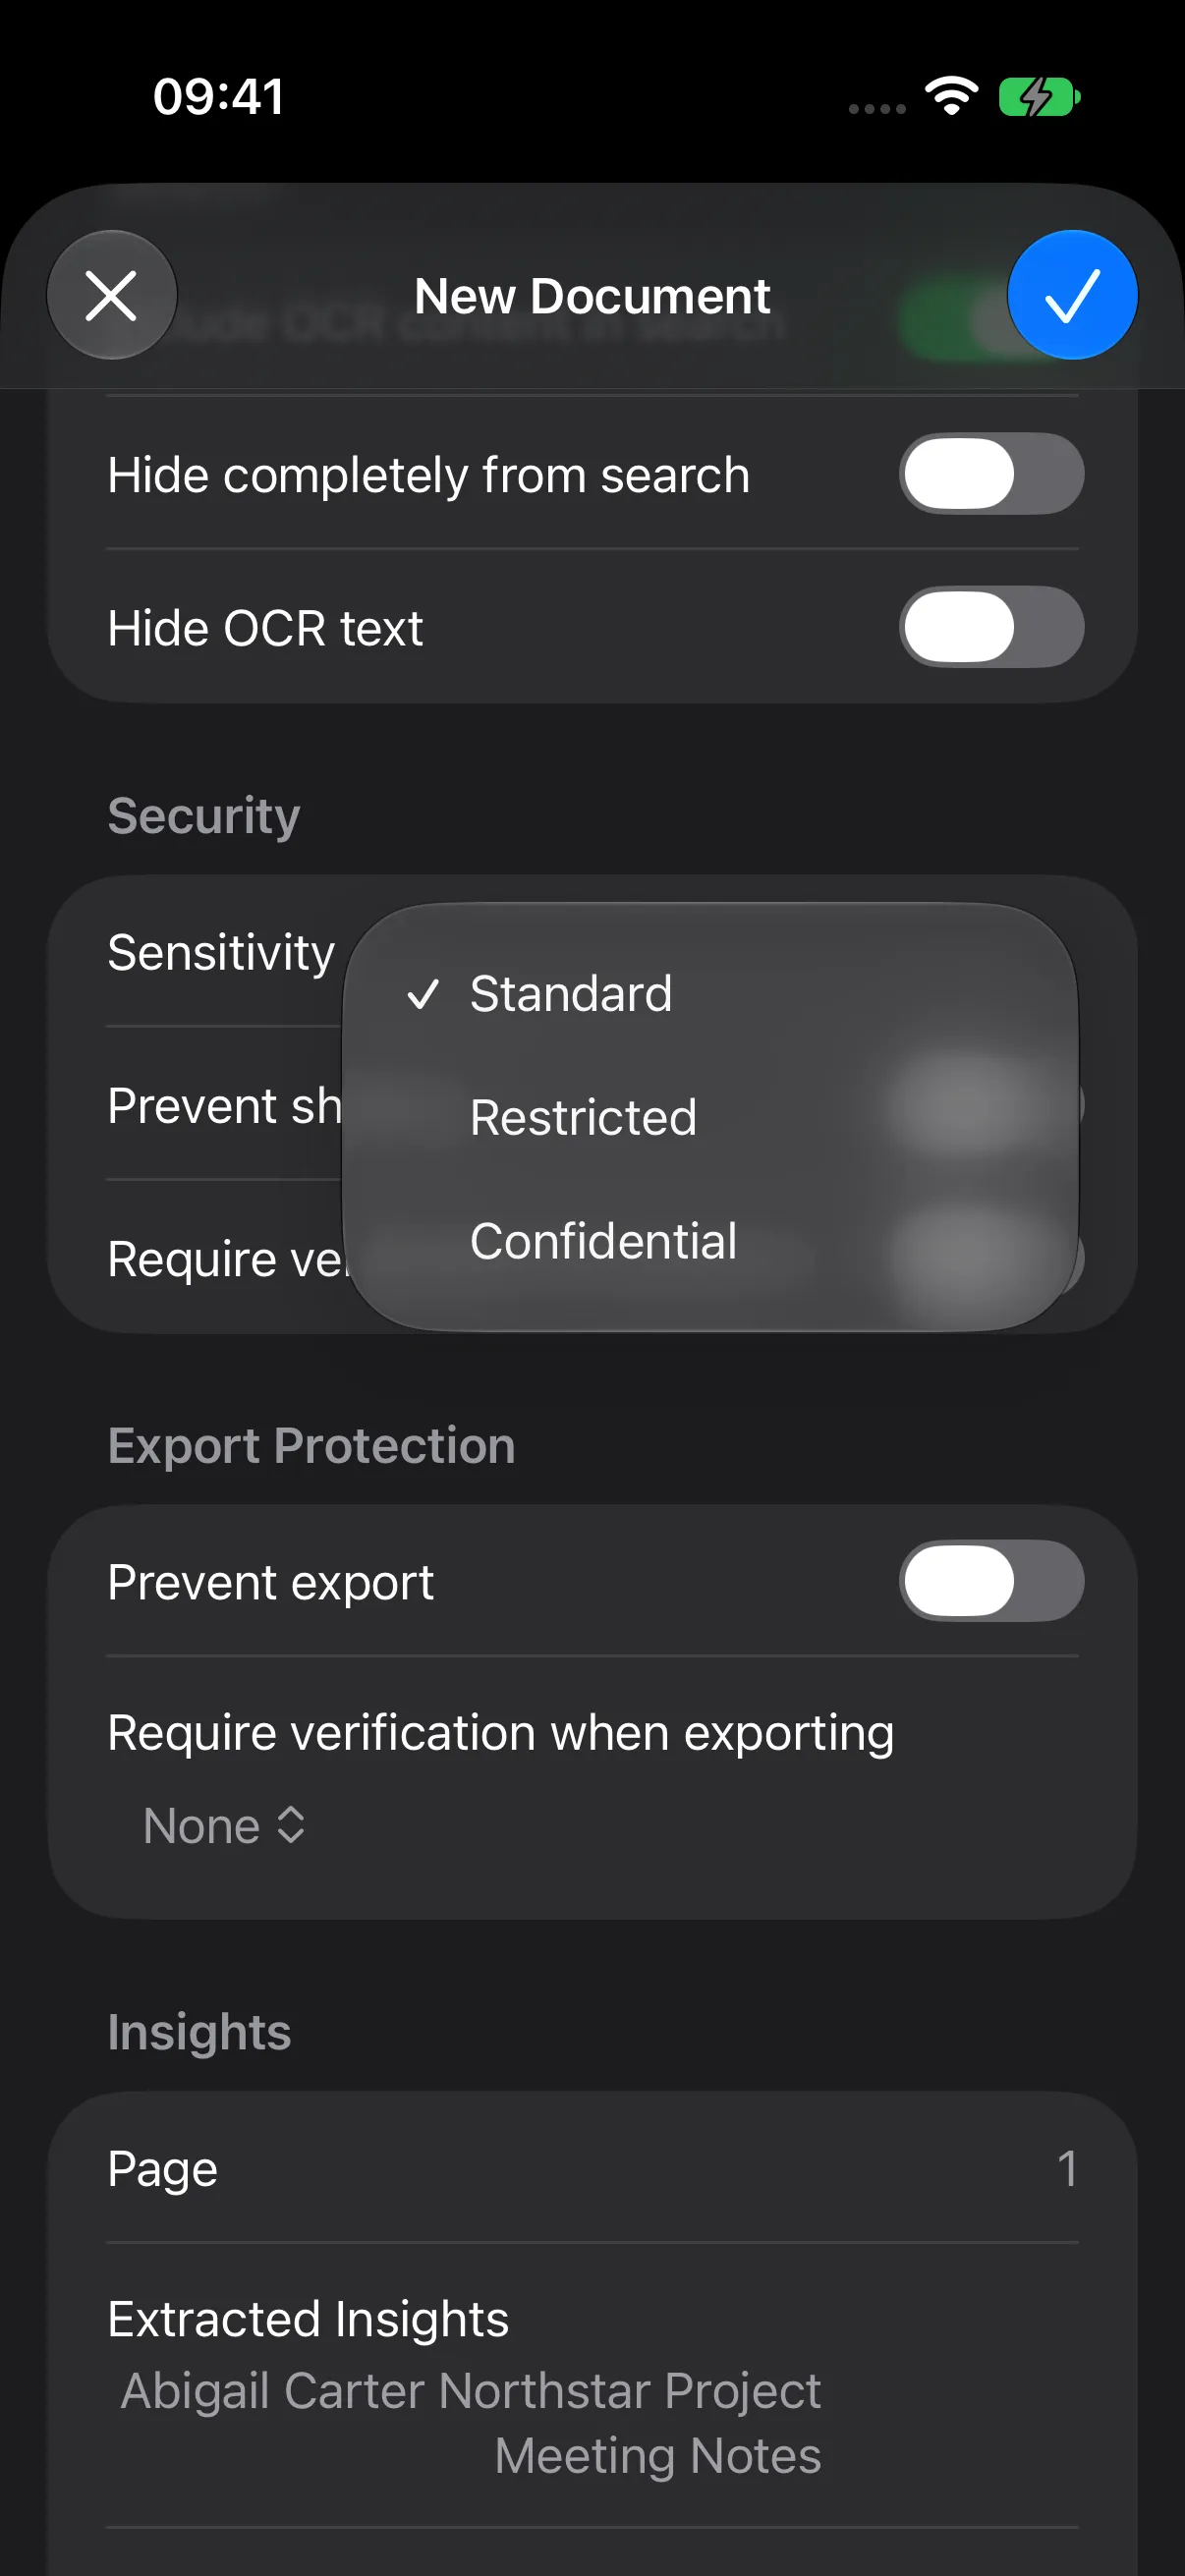
Standard, Restricted, and Confidential apply a set of search, preview, sharing, and export settings.
| Preset setting | Standard | Restricted | Confidential |
|---|---|---|---|
| Include OCR content in search | On | On | Off |
| Hide completely from search | Off | Off | On |
| Hide OCR text | Off | On | On |
| Prevent sharing | Off | On | On |
| Require verification for preview | Off | Off | On |
| Prevent export | Off | On | On |
| Export verification mode | None | None | None |
The example below shows Confidential selected in the editor.
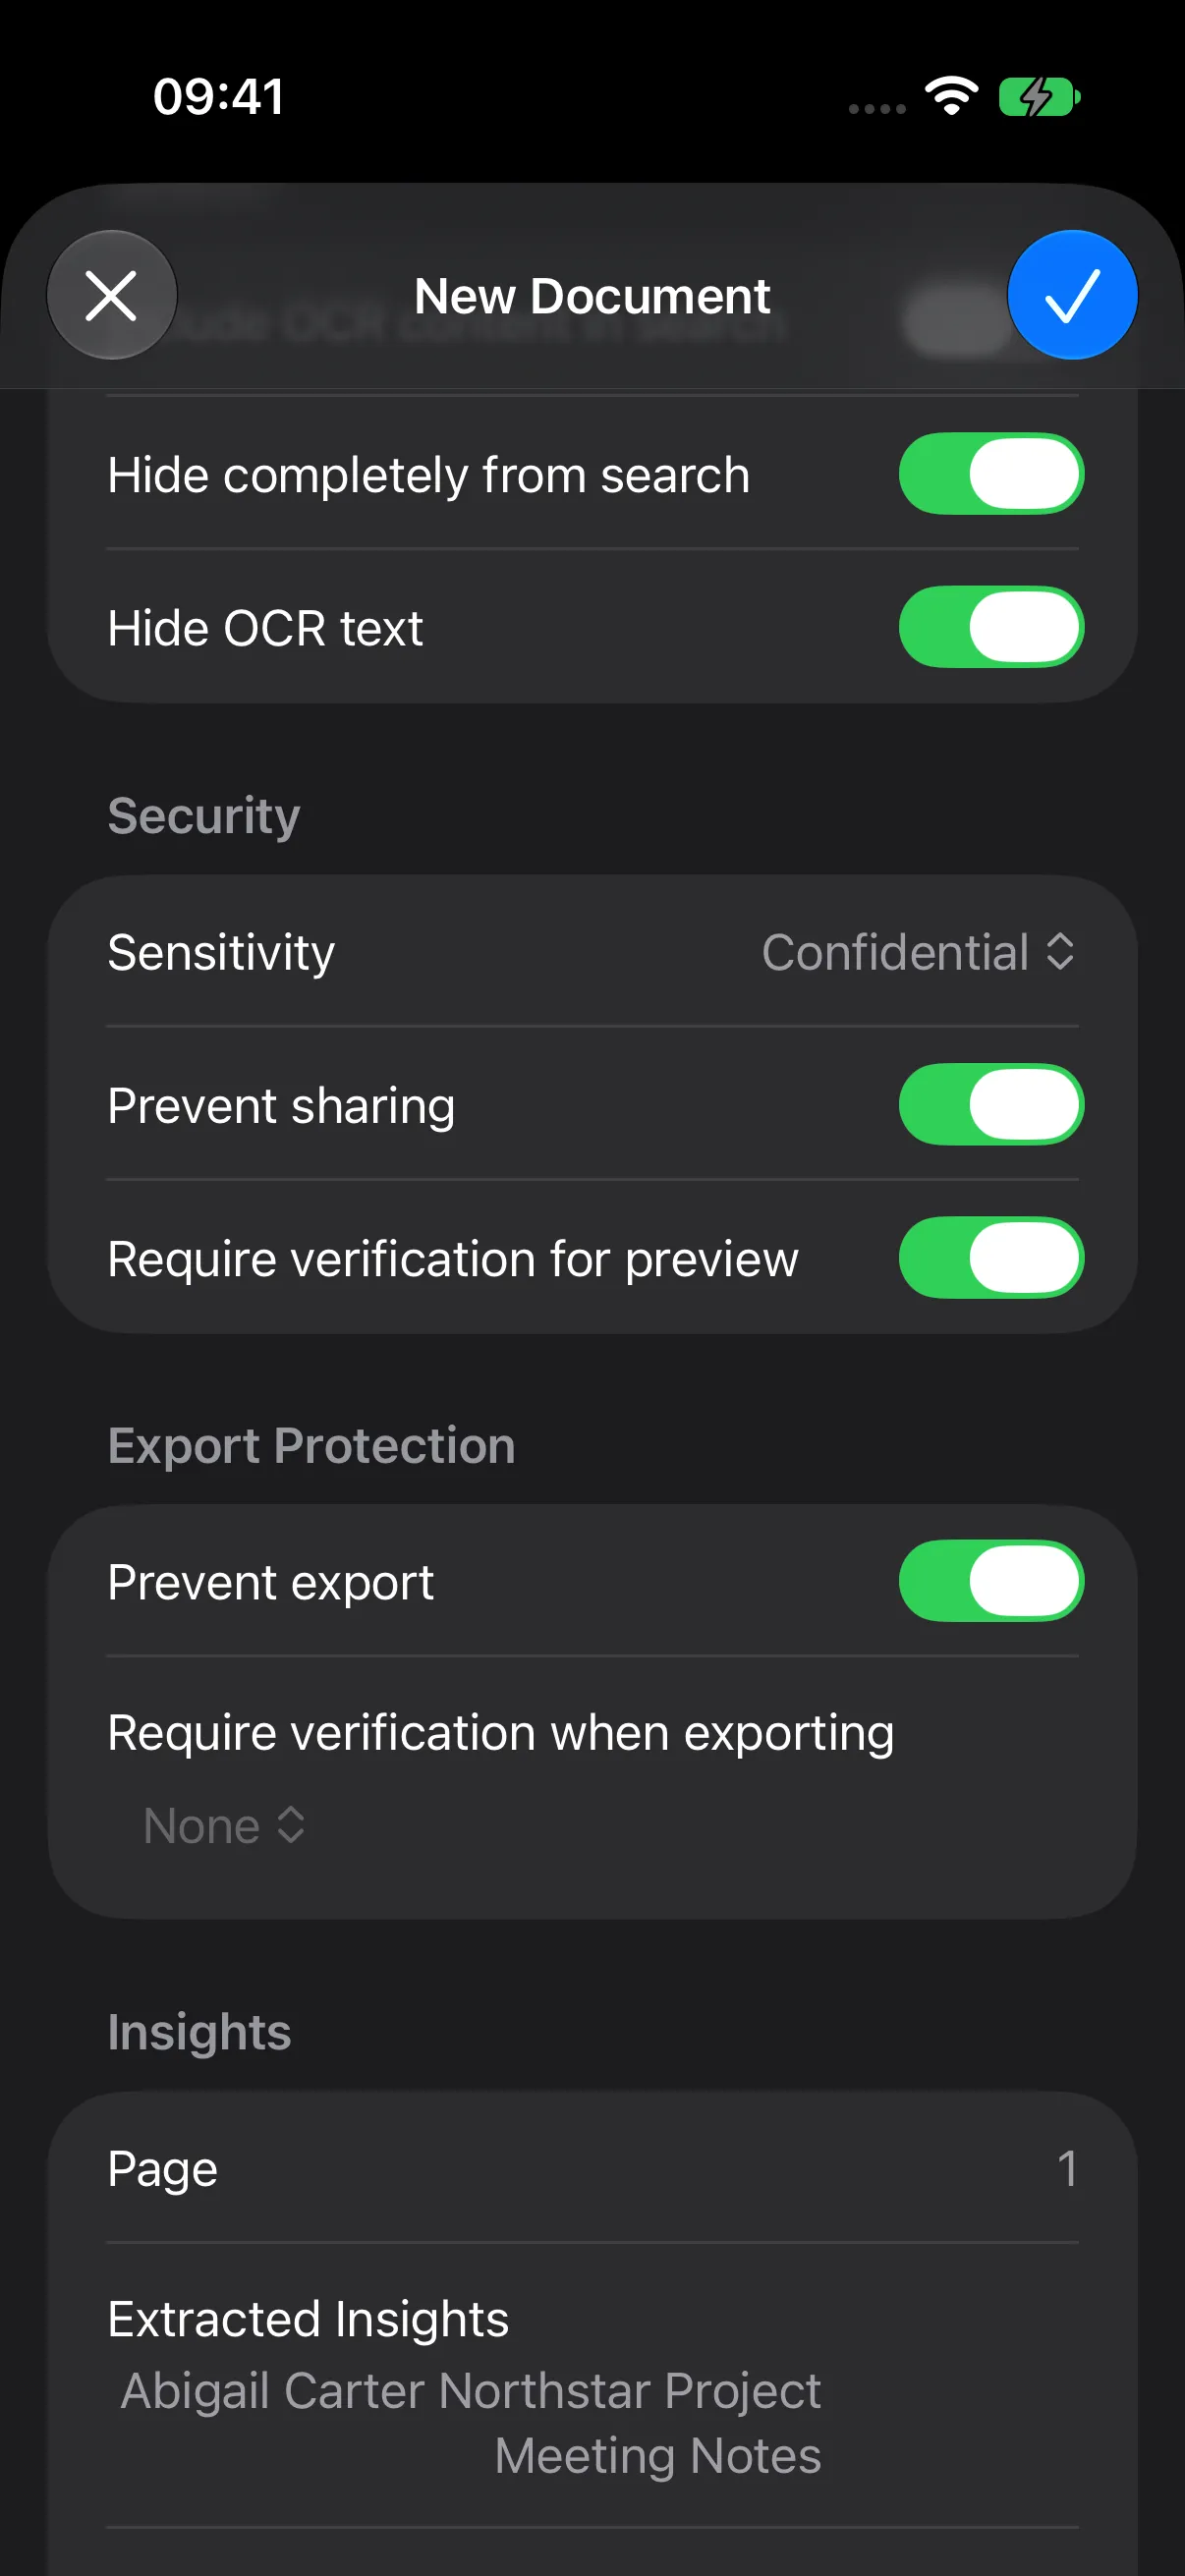
Selecting a preset reapplies its defaults and clears draft PIN input. Choose your preset first, then customize its options and save.
Preview and Sharing
- Prevent sharing controls the document’s Share action.
- Require verification for preview applies the document’s protected-preview policy.
- Prevent export controls the document’s Export action.
These settings let you choose how a document is accessed and handled within Talos.
Export Verification
With export allowed, choose None, Require PIN, or Require Biometrics under Require verification when exporting.
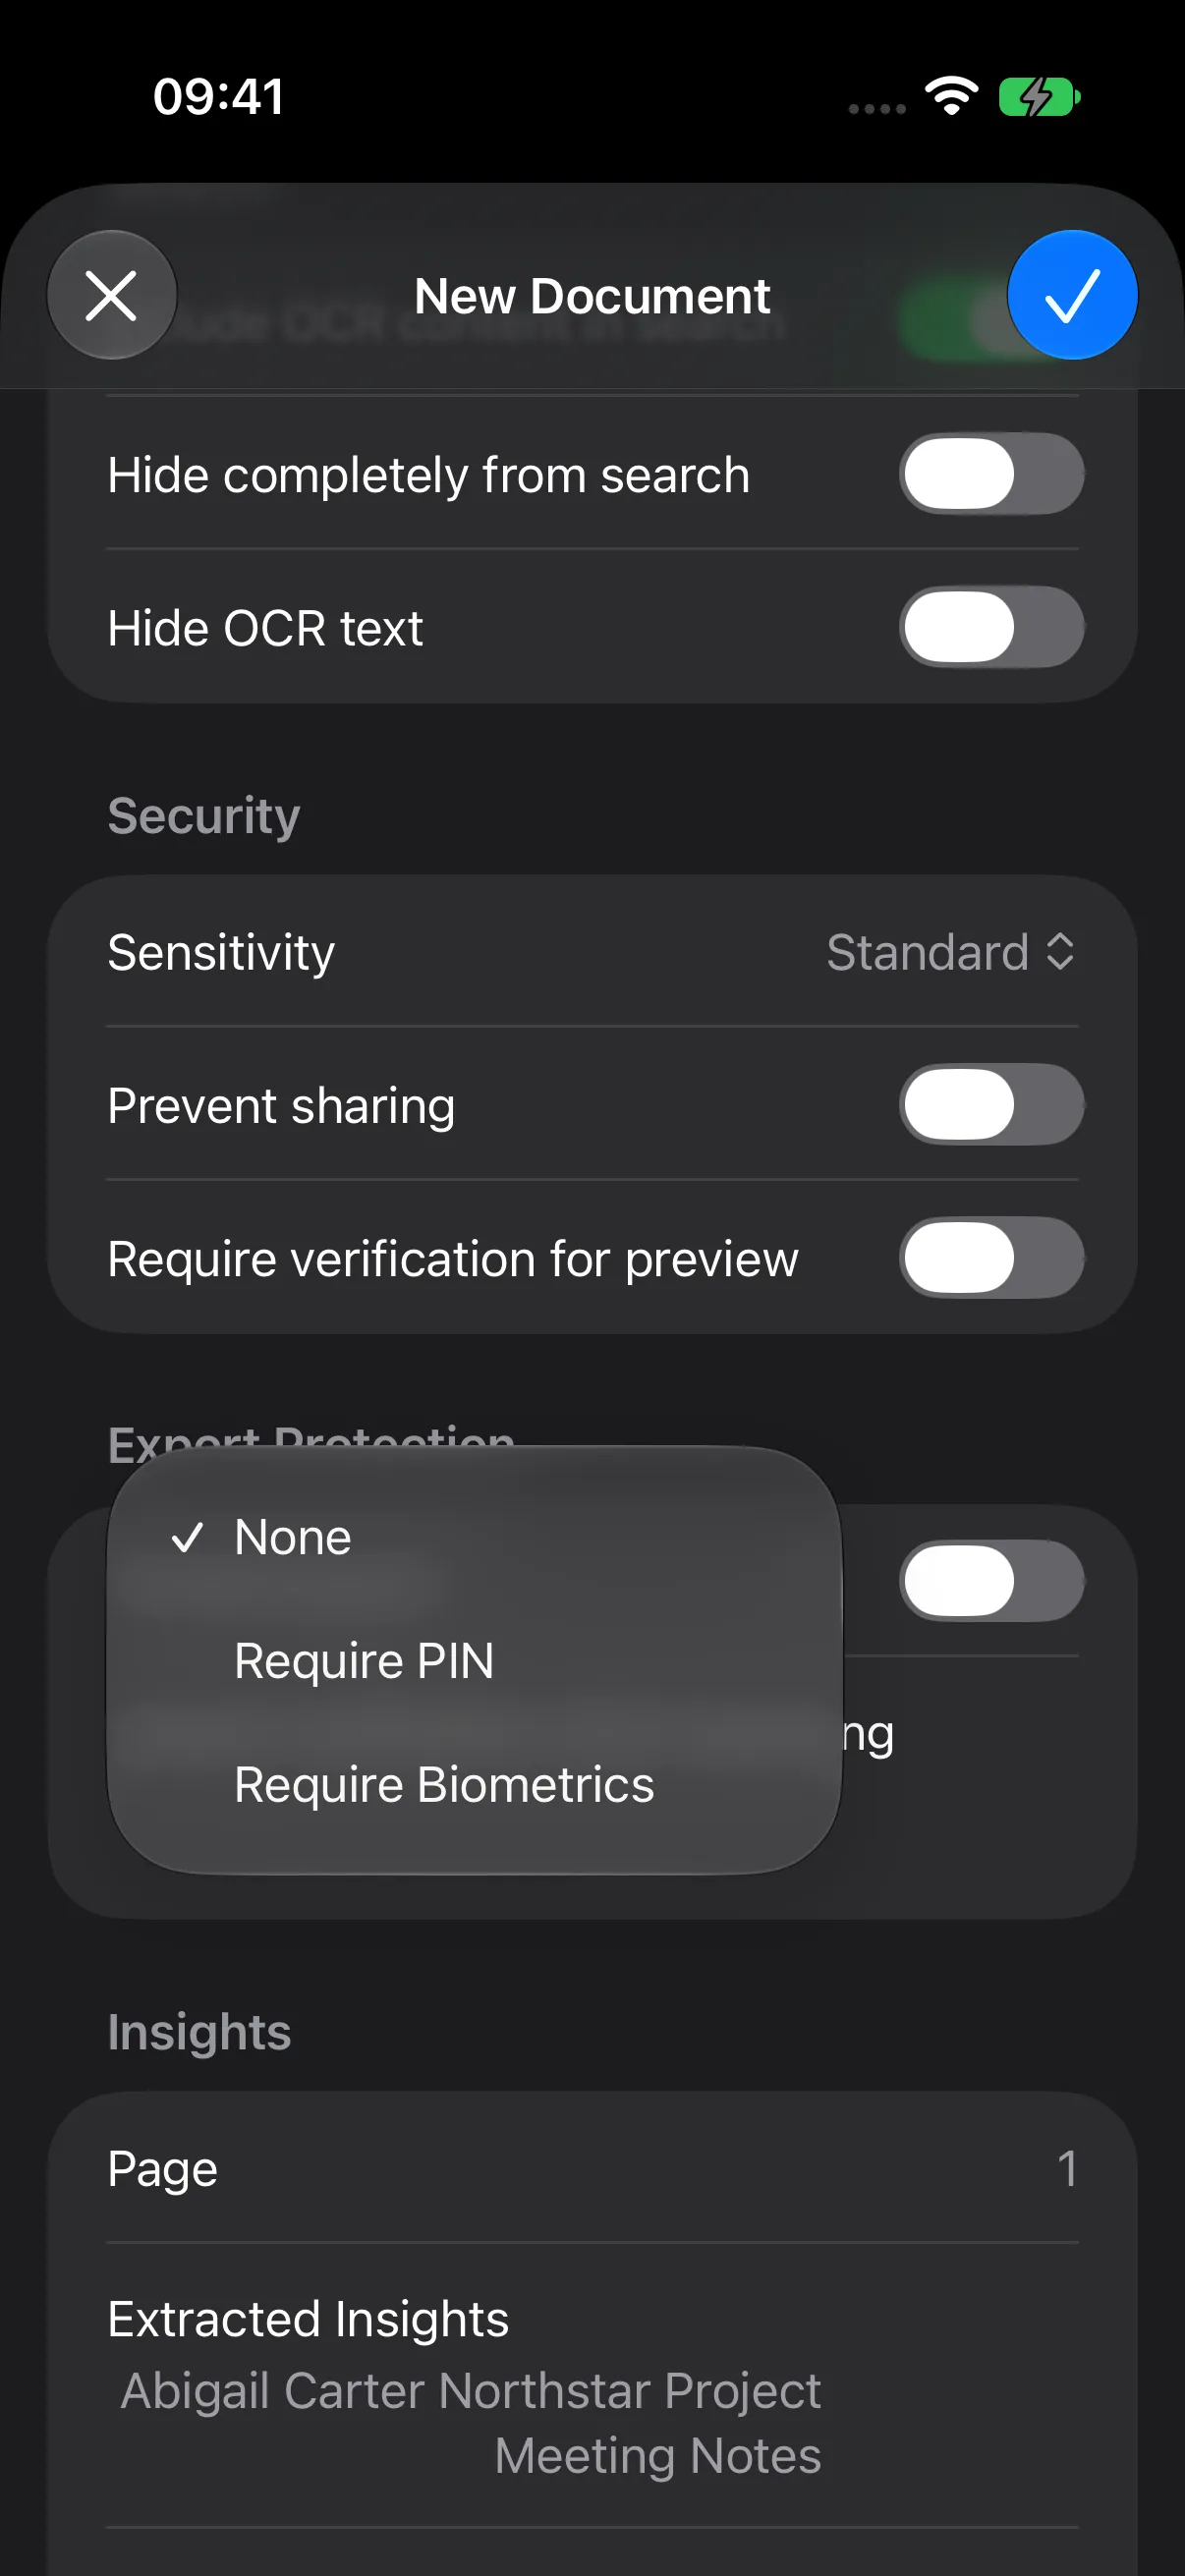
Choose Require PIN to display 6-Digit Export PIN and Repeat PIN. Enter matching values, then save the document.
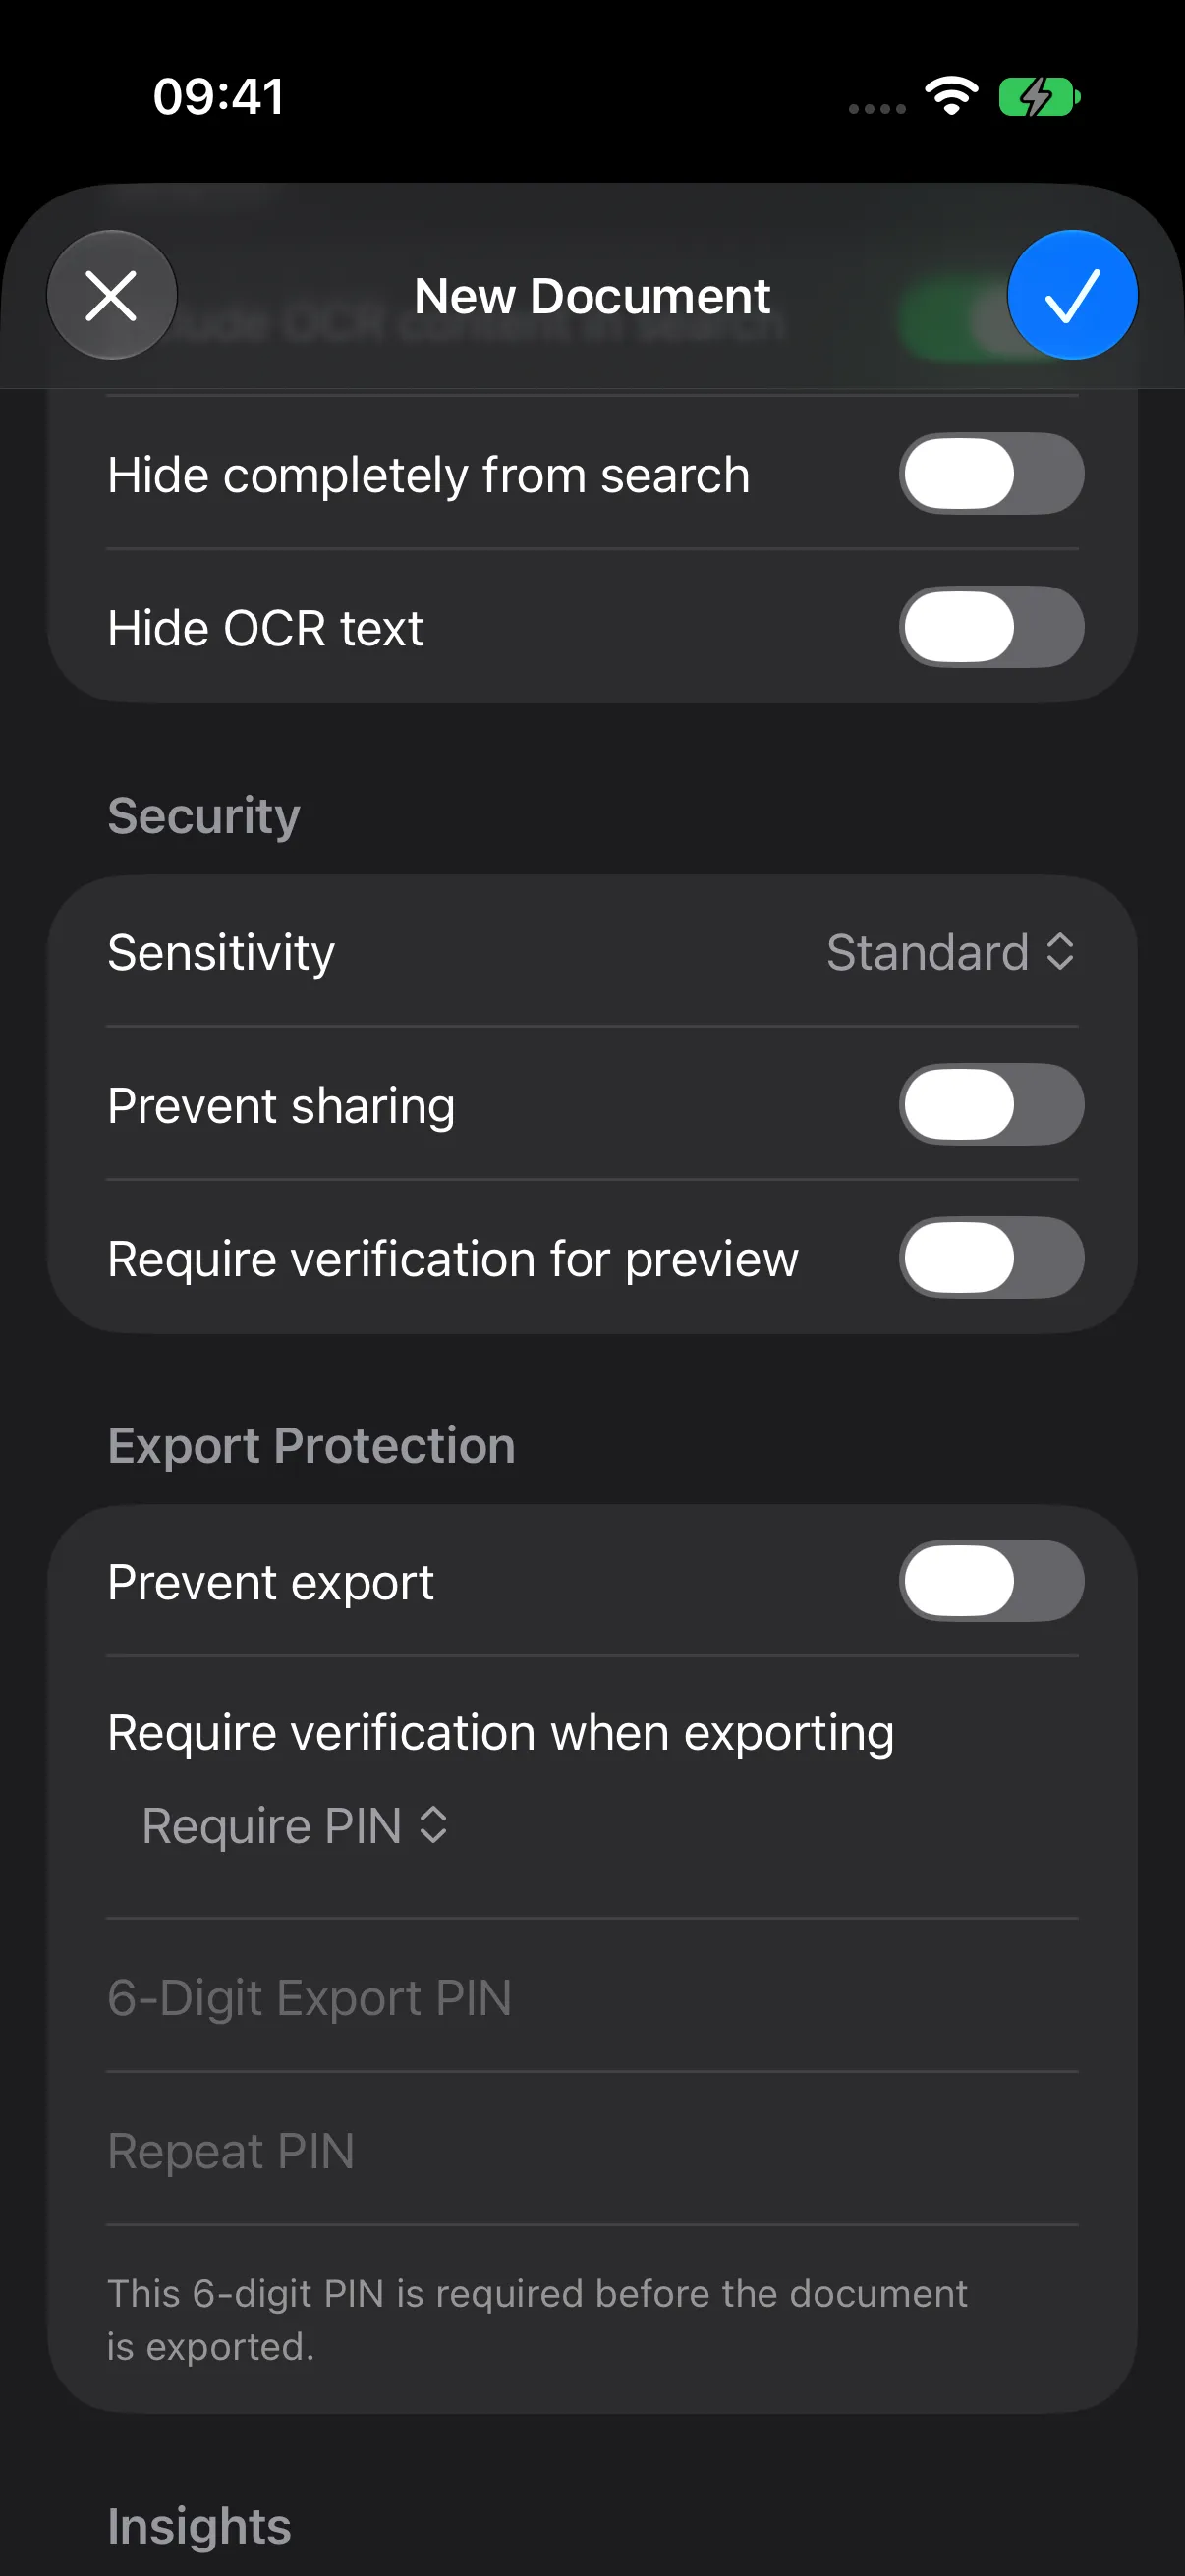
When updating a document that already has an export PIN, leave the optional replacement fields blank to keep it. The export PIN is a dedicated document setting, separate from your master password.
Step 5 — Save and Read Recognized Text
- Review your title, metadata, and policy choices.
- Tap the Save checkmark.
- Open Northstar Meeting Notes from Files.
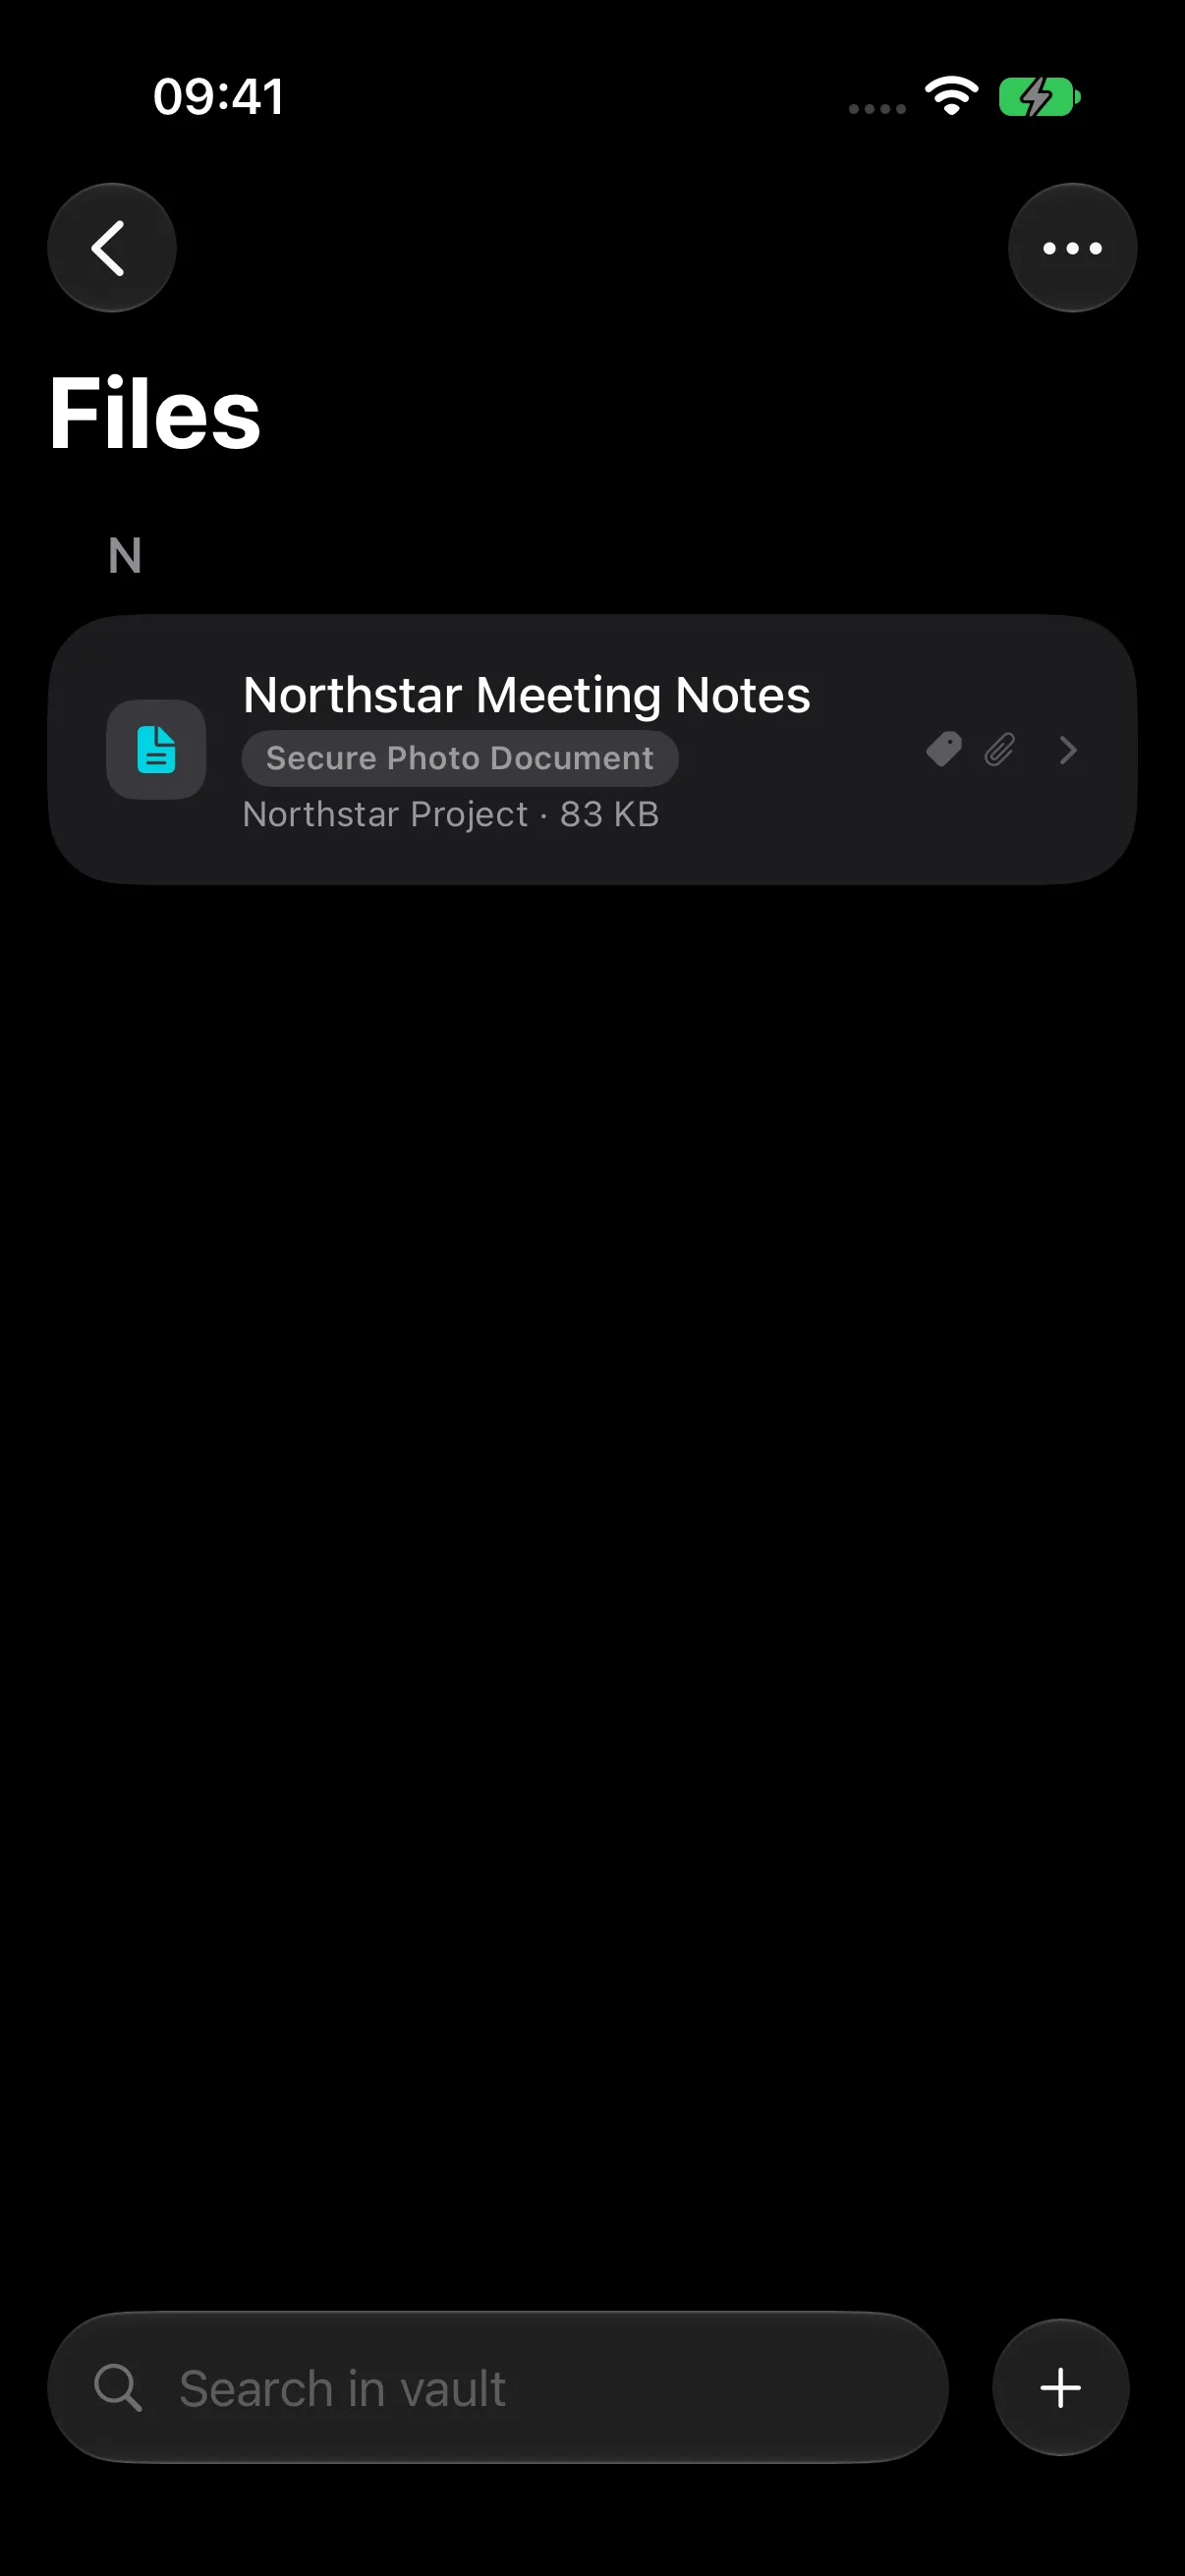
Document Summary shows sensitivity, dates, tags, searchability, and OCR status. Technical Metadata shows format, size, page count, import time, and source.
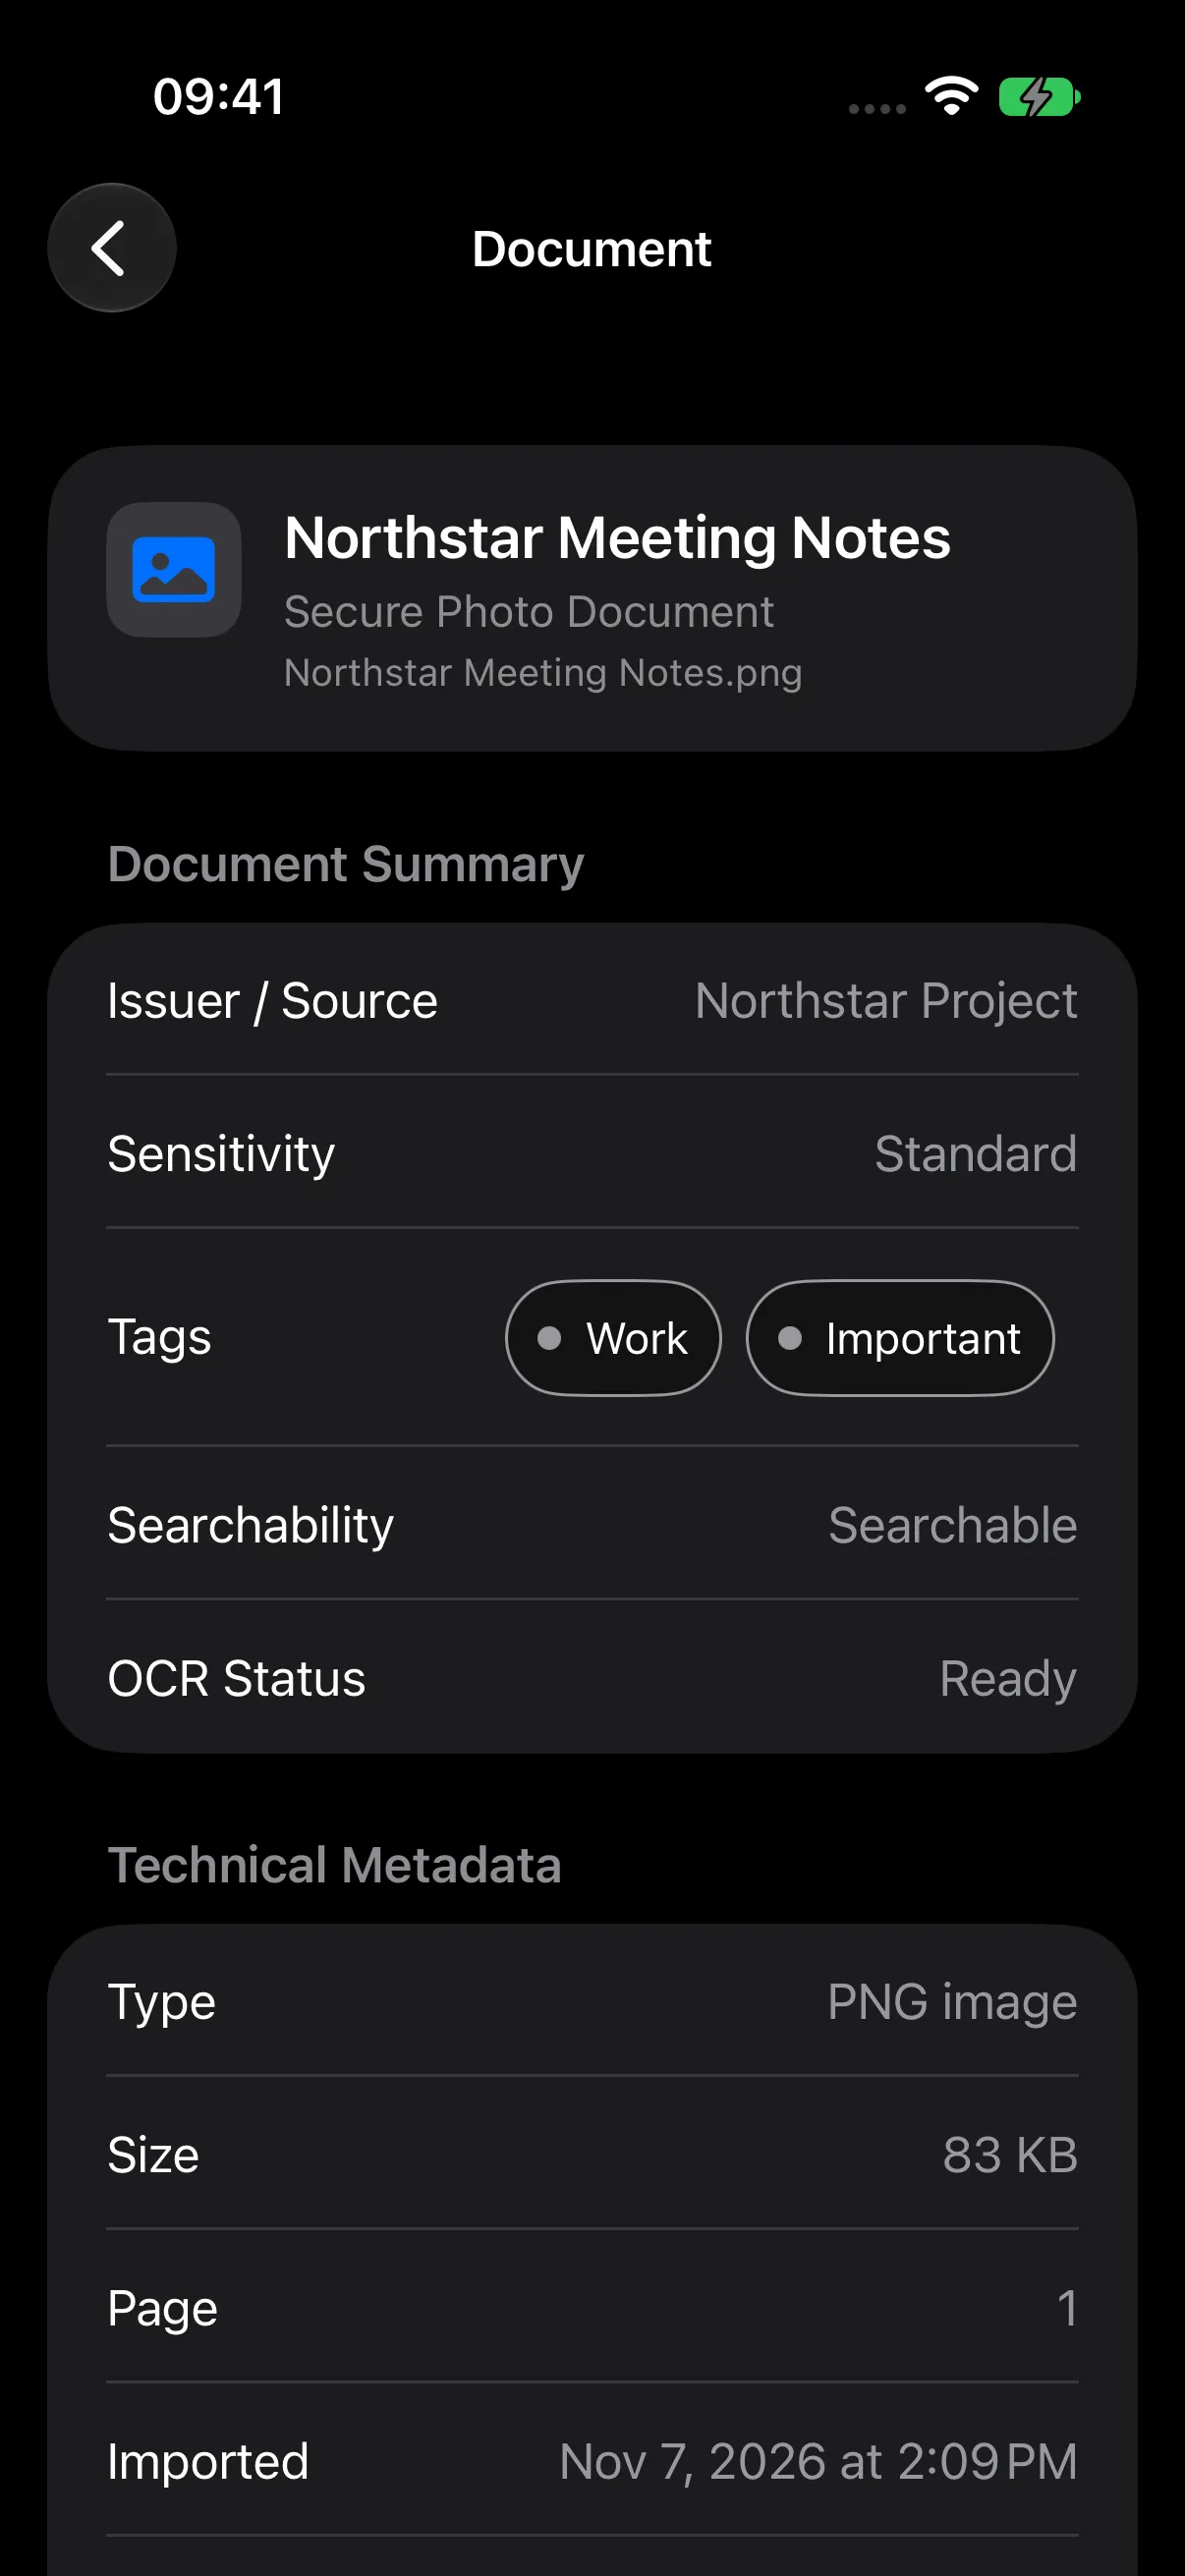
Scroll to Extracted Insights and tap View OCR Text.
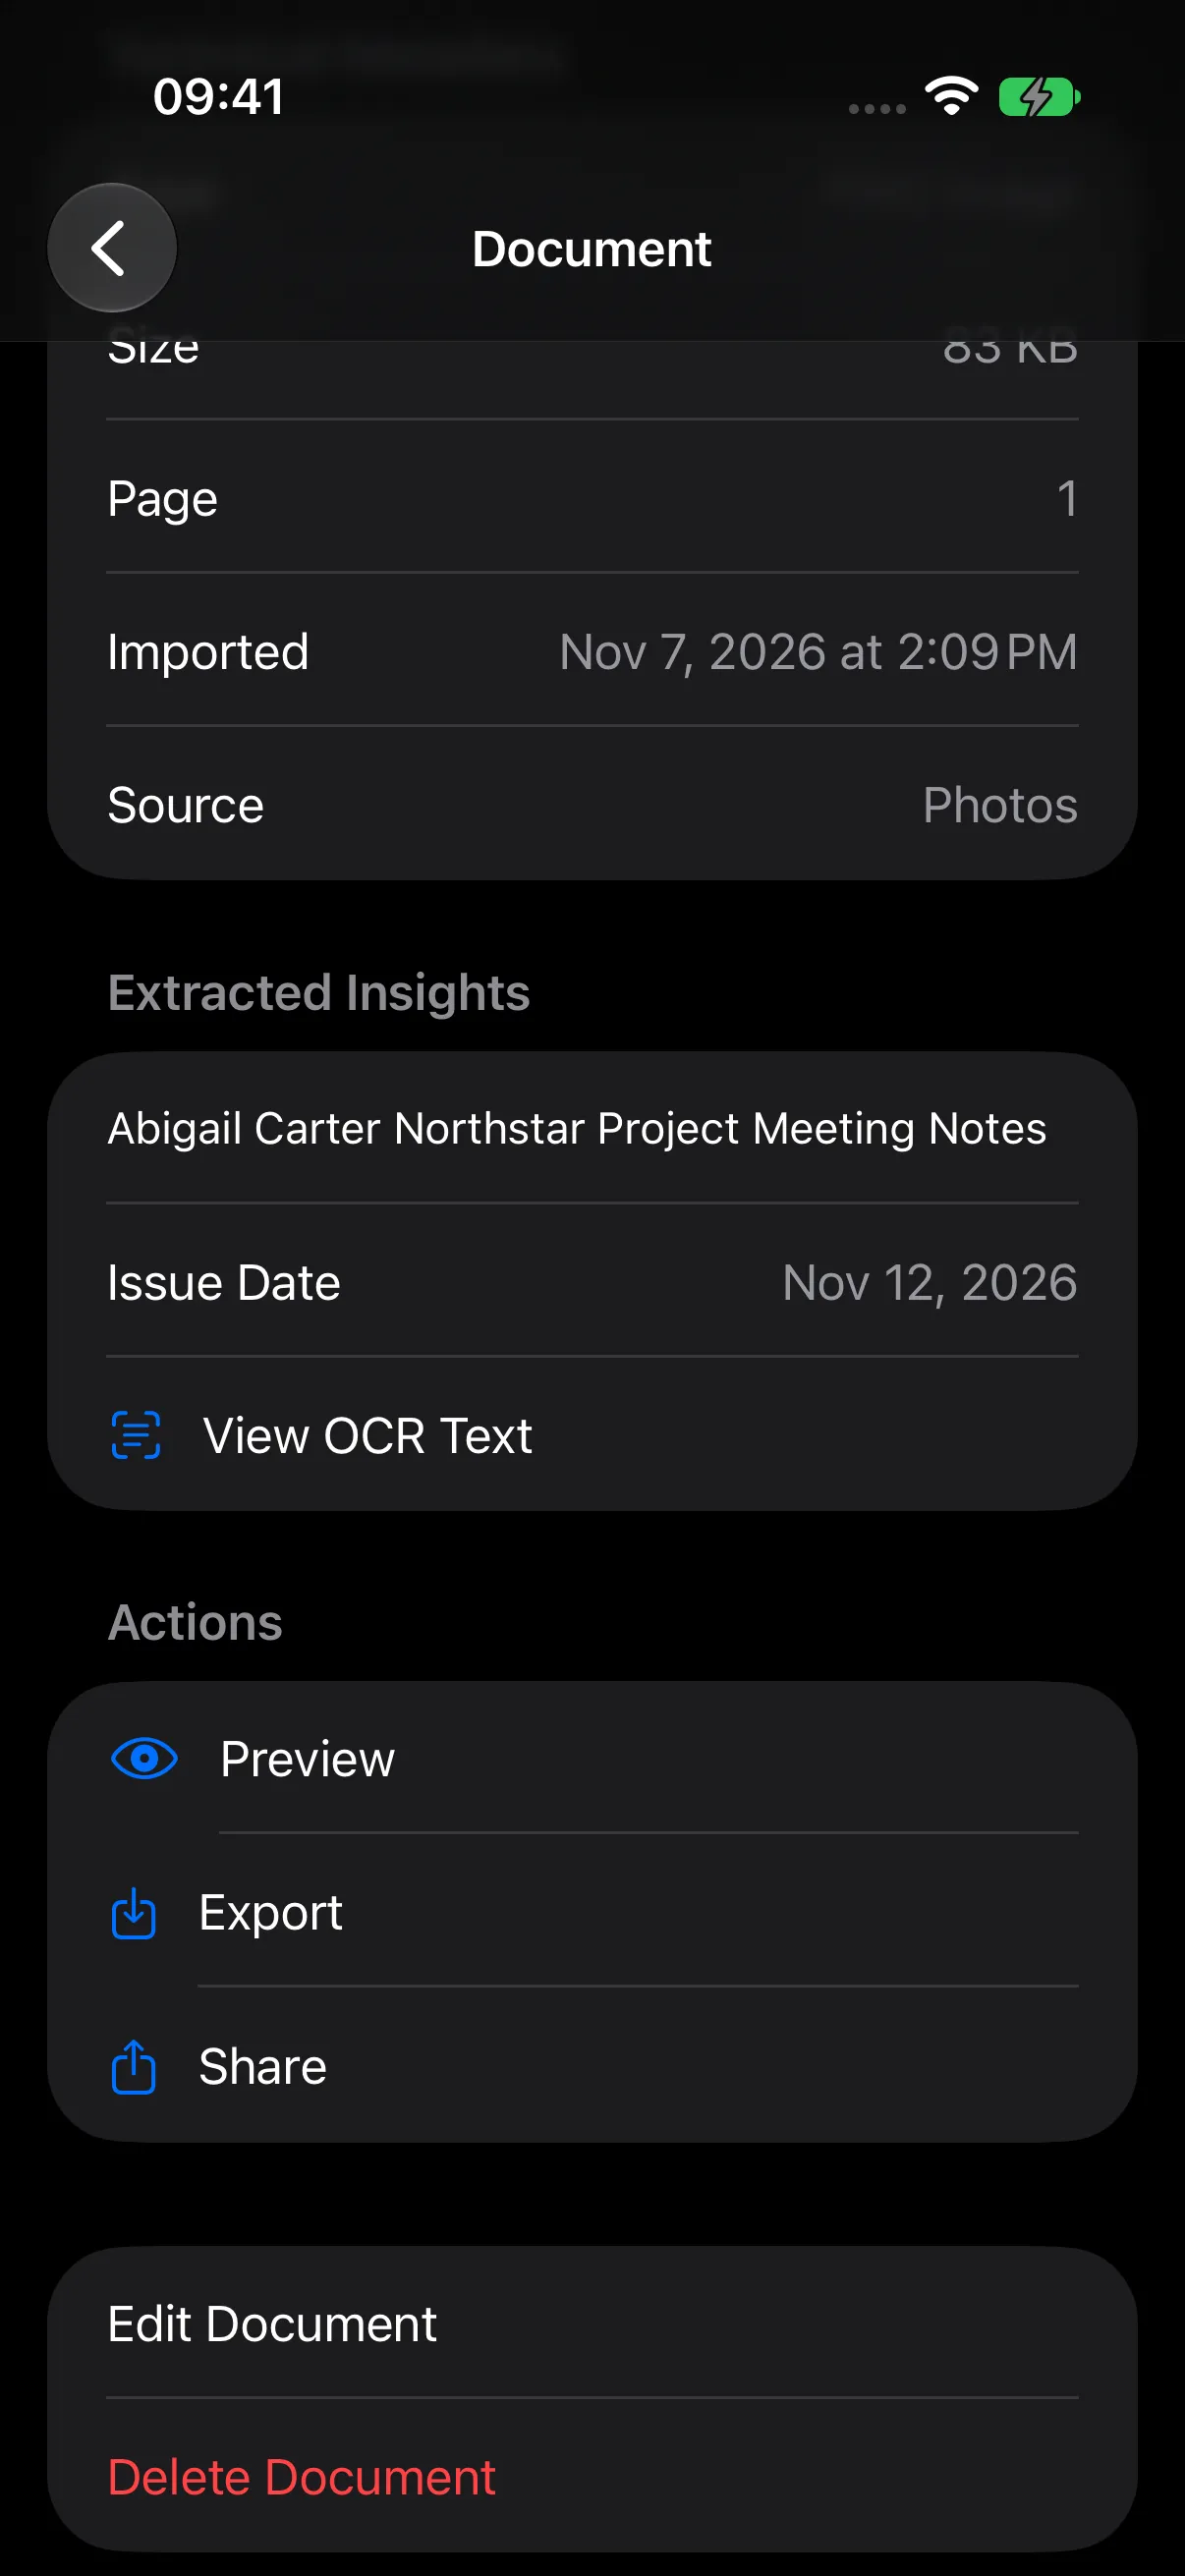
The OCR sheet displays the recognized text. For this example, it contains Abigail Carter, Northstar Project, Meeting Notes, and Thursday, 10:30 AM.
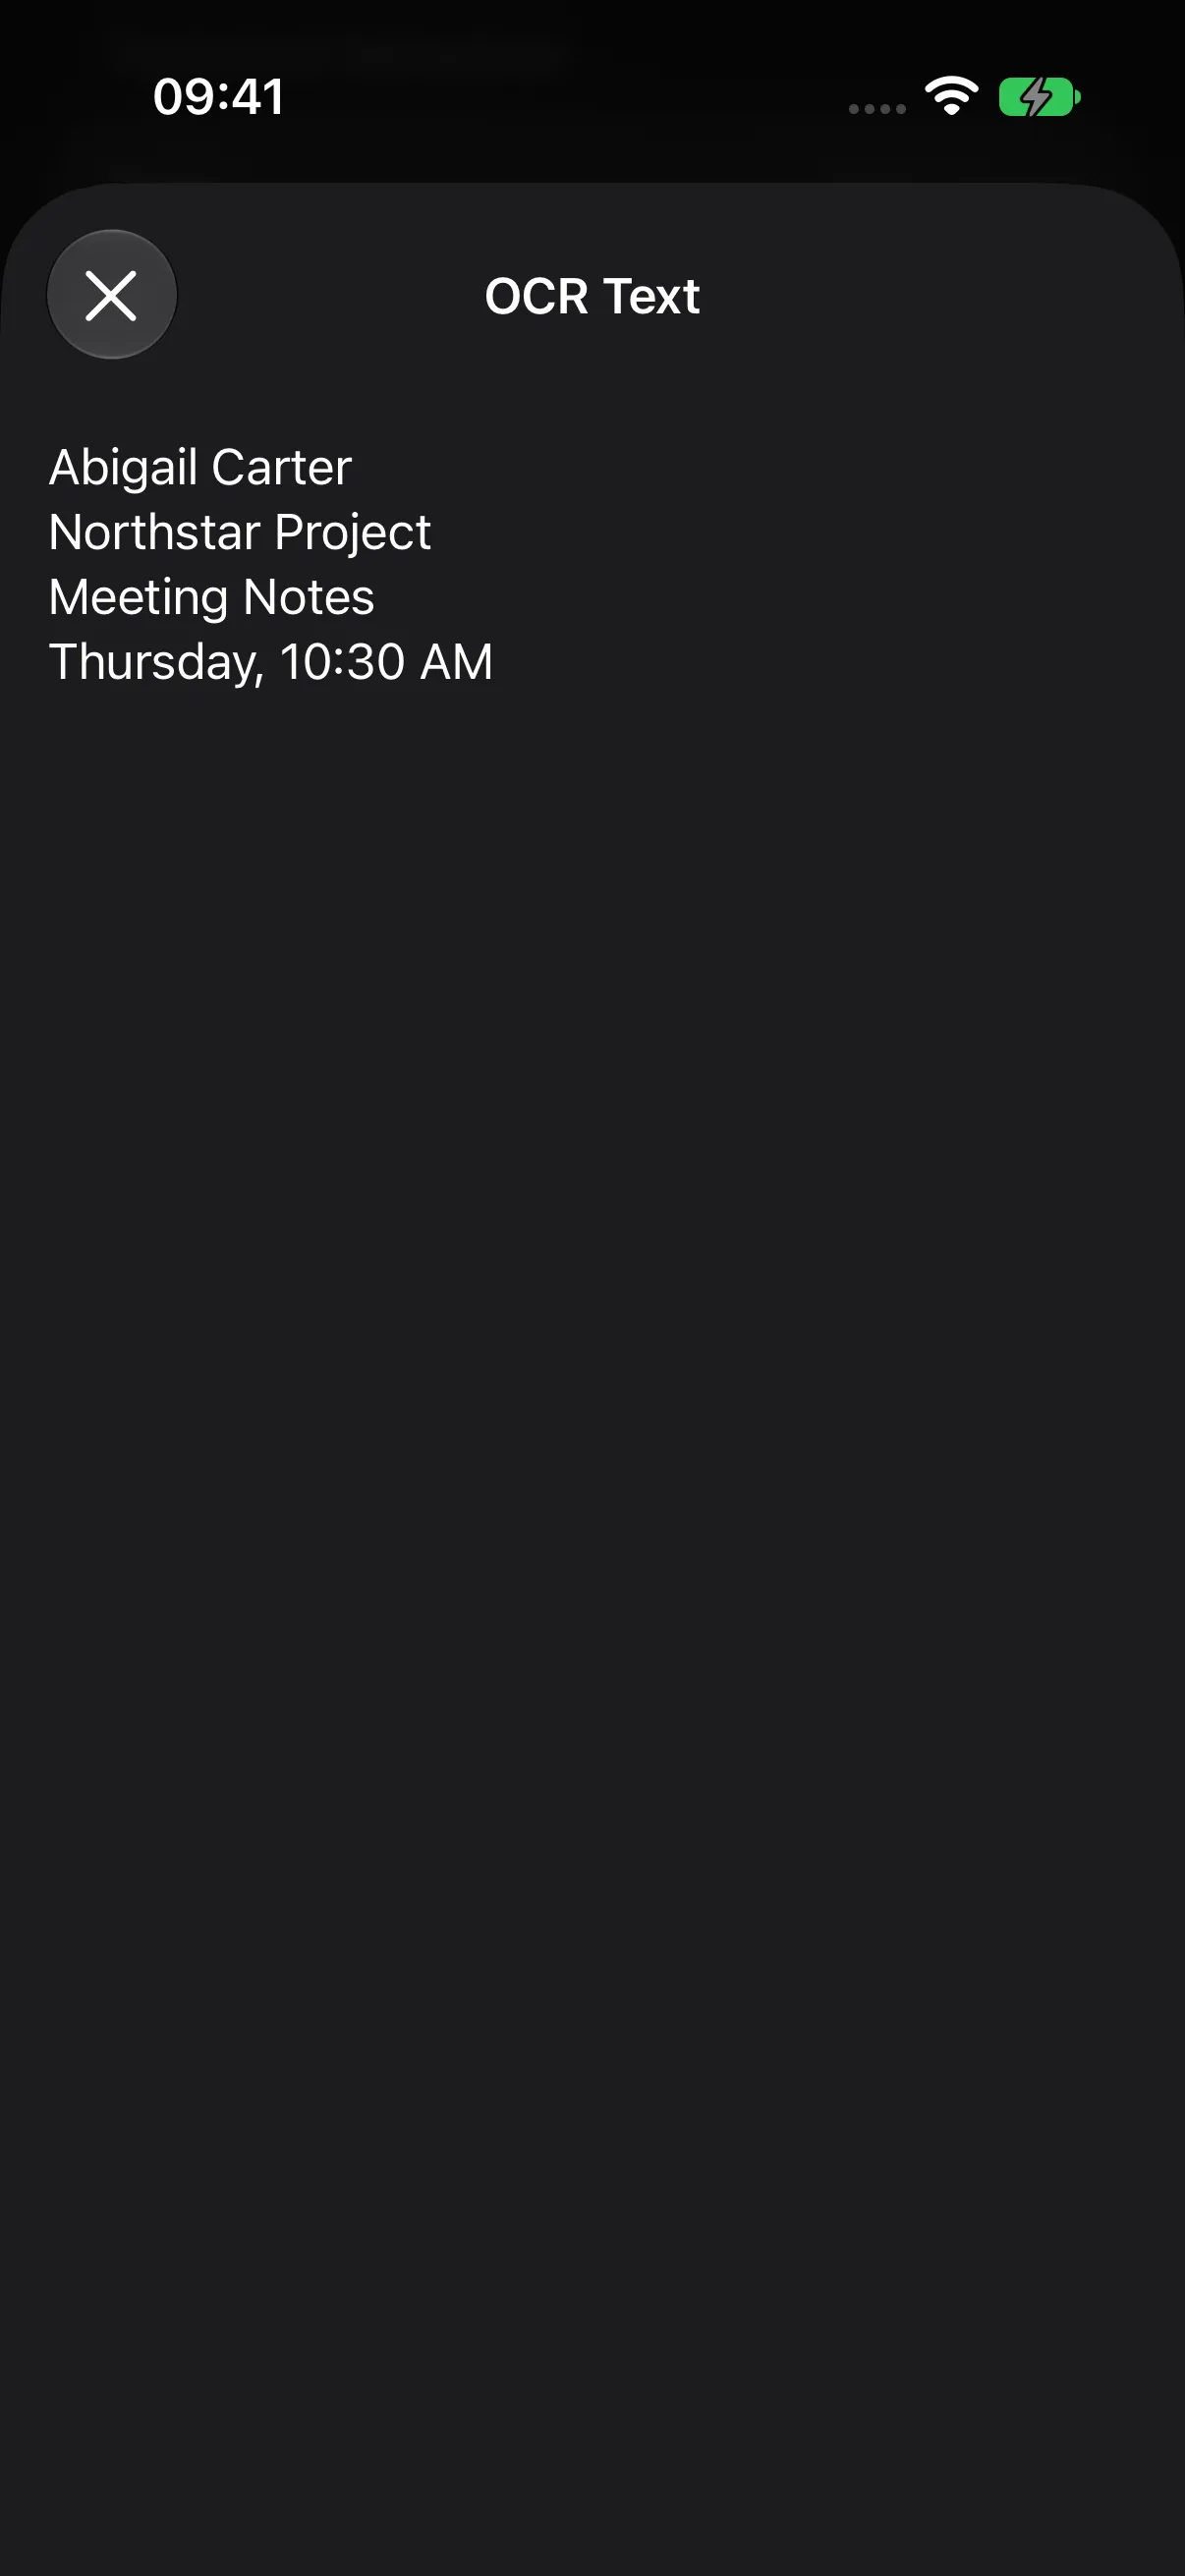
Insights provides a short summary and extracted fields; OCR Text provides the full recognized text. Close the read-only sheet with Close (×).
Talos uses Apple’s on-device text recognition for images. PDF handling can extract embedded text or recognize supported scanned pages; supported text files can provide their text directly.
Preview and Manage Documents
Tap Preview in the document’s Actions section to view it according to its policy.
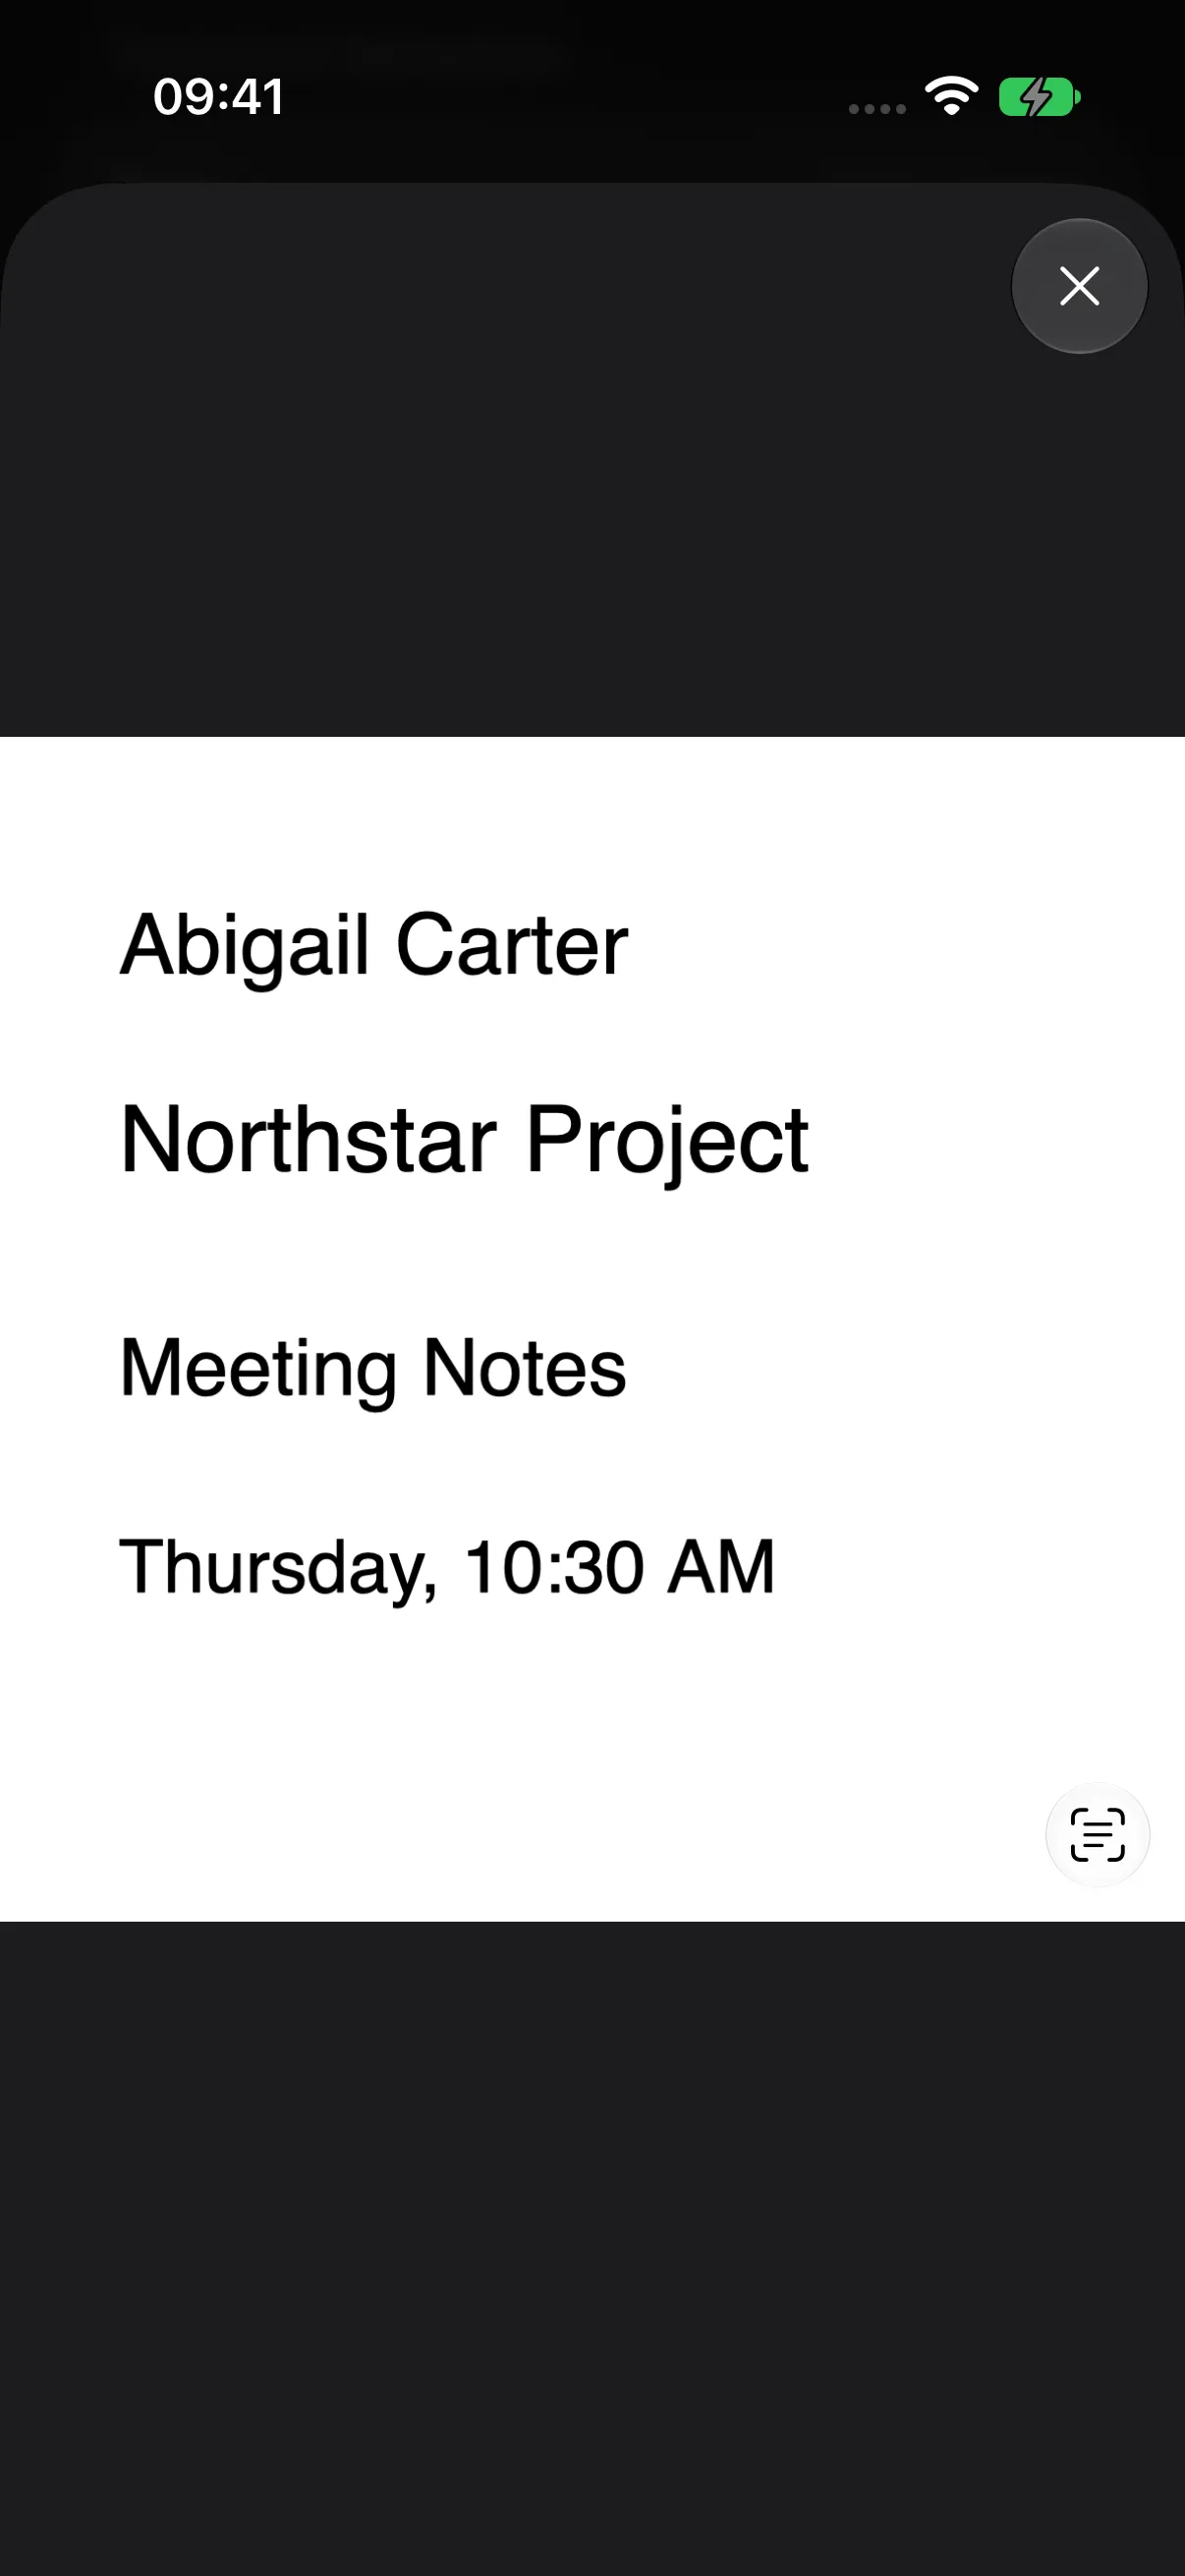
Use Export or Share to send a copy to your chosen destination, Edit Document to update the source or metadata, and Delete Document to remove the record. Talos applies the document’s protection settings to these actions.
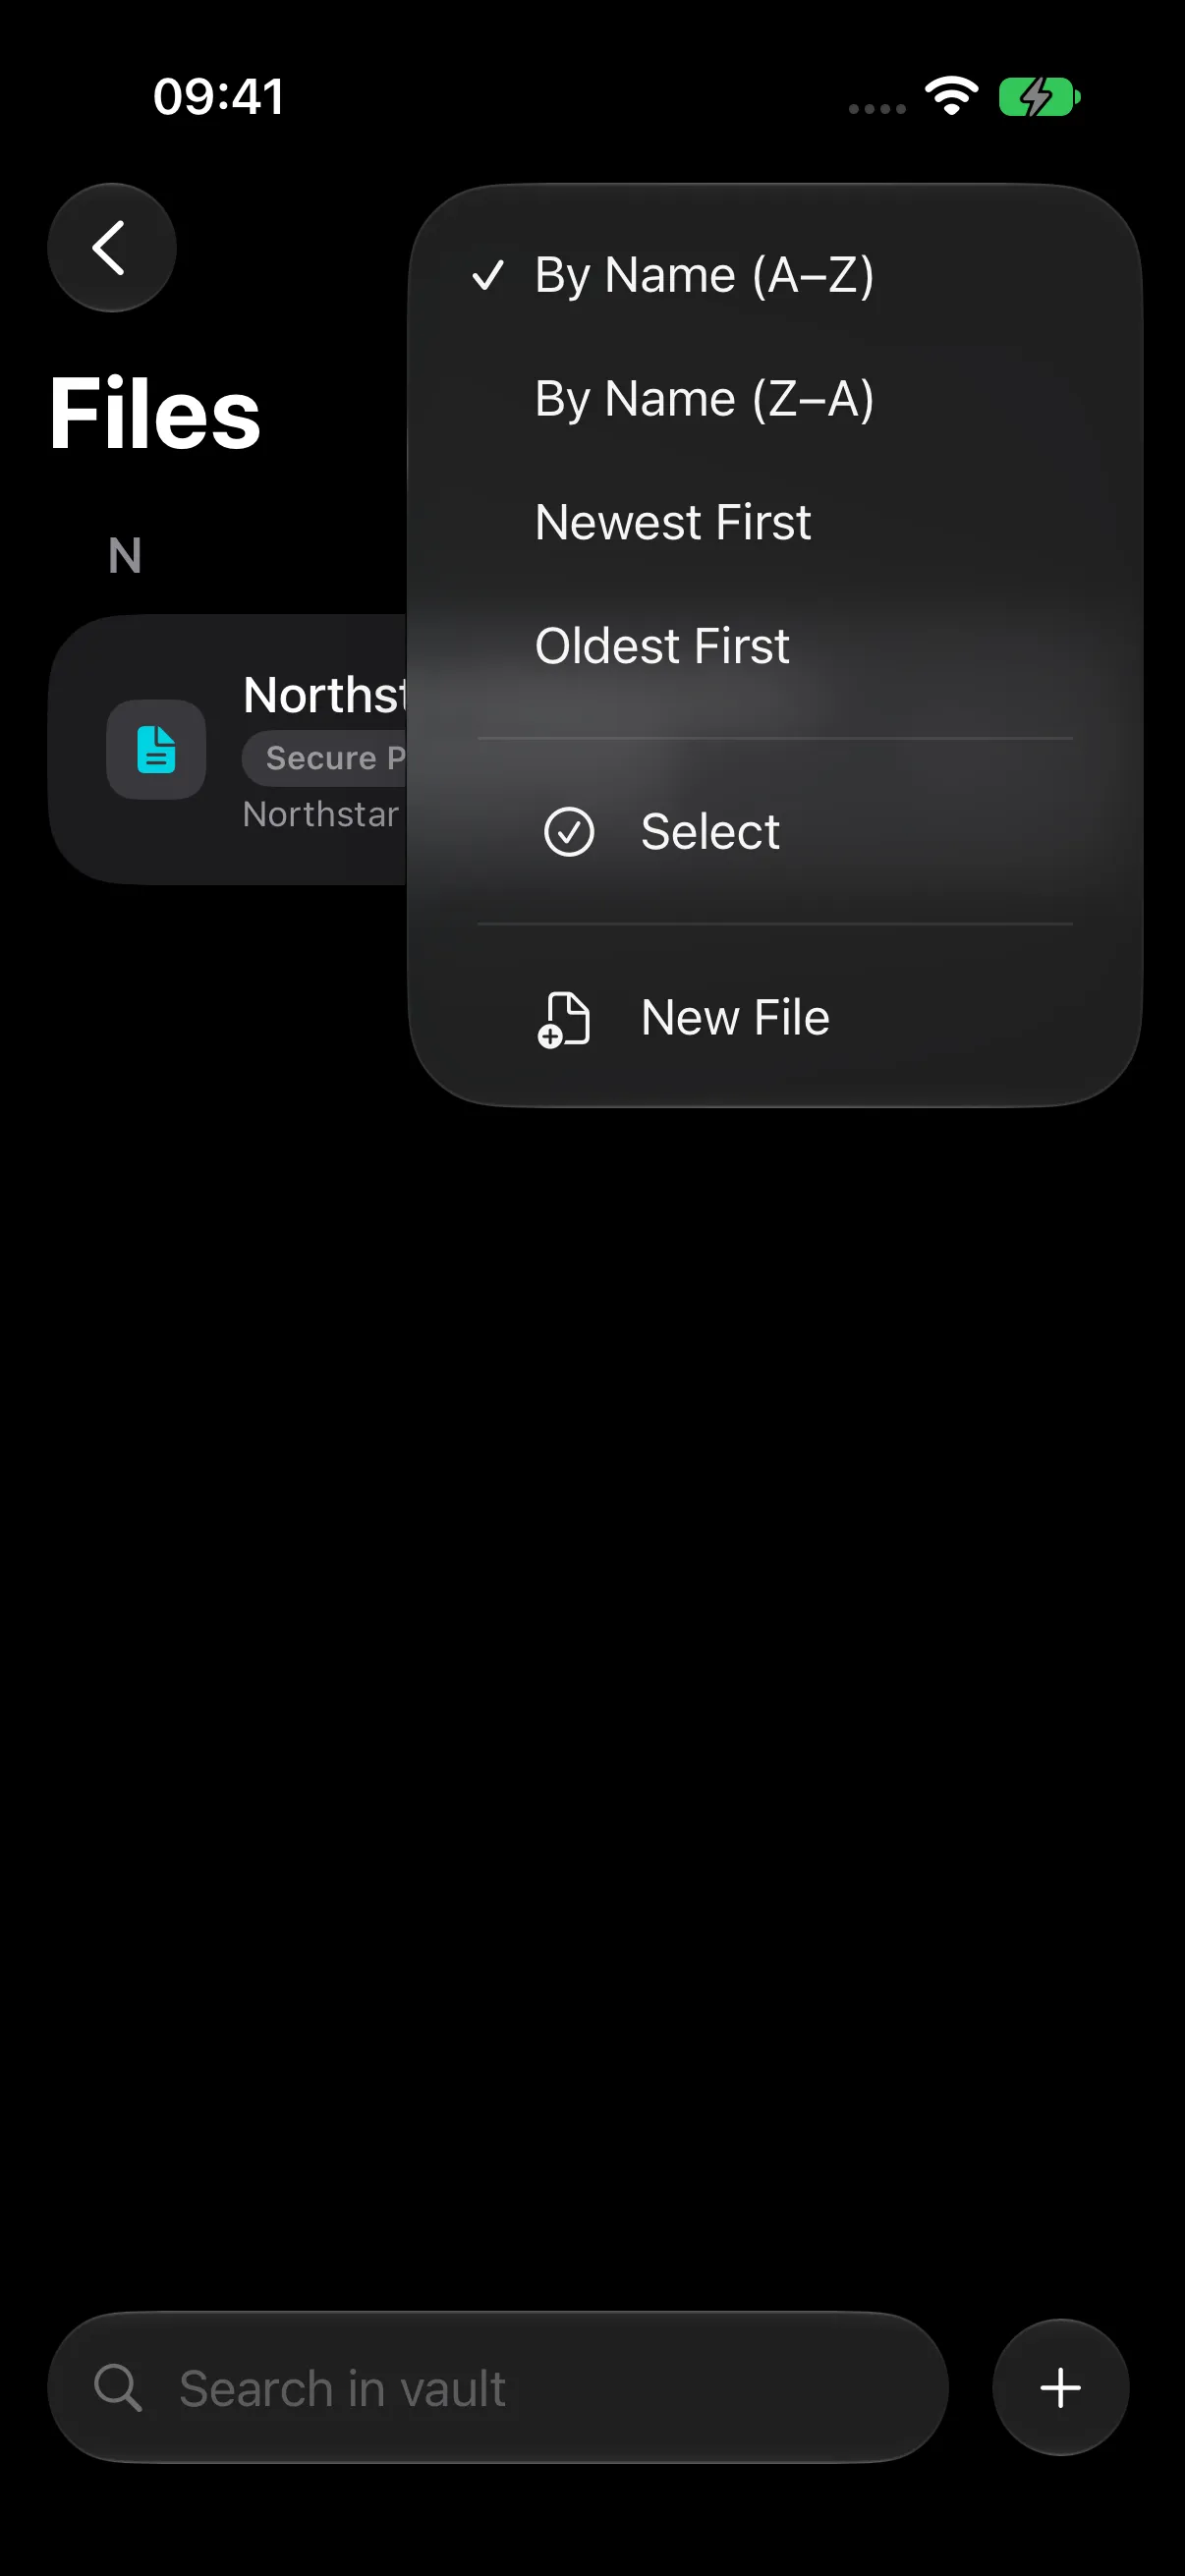
In the Files list, Menu (…) offers By Name (A–Z), By Name (Z–A), Newest First, Oldest First, Select, and New File. Date sorting uses the records’ last modification time.
Add a Gallery Photo
- Open Photos on Vault Home.
- Choose Add (+) > New Photo.
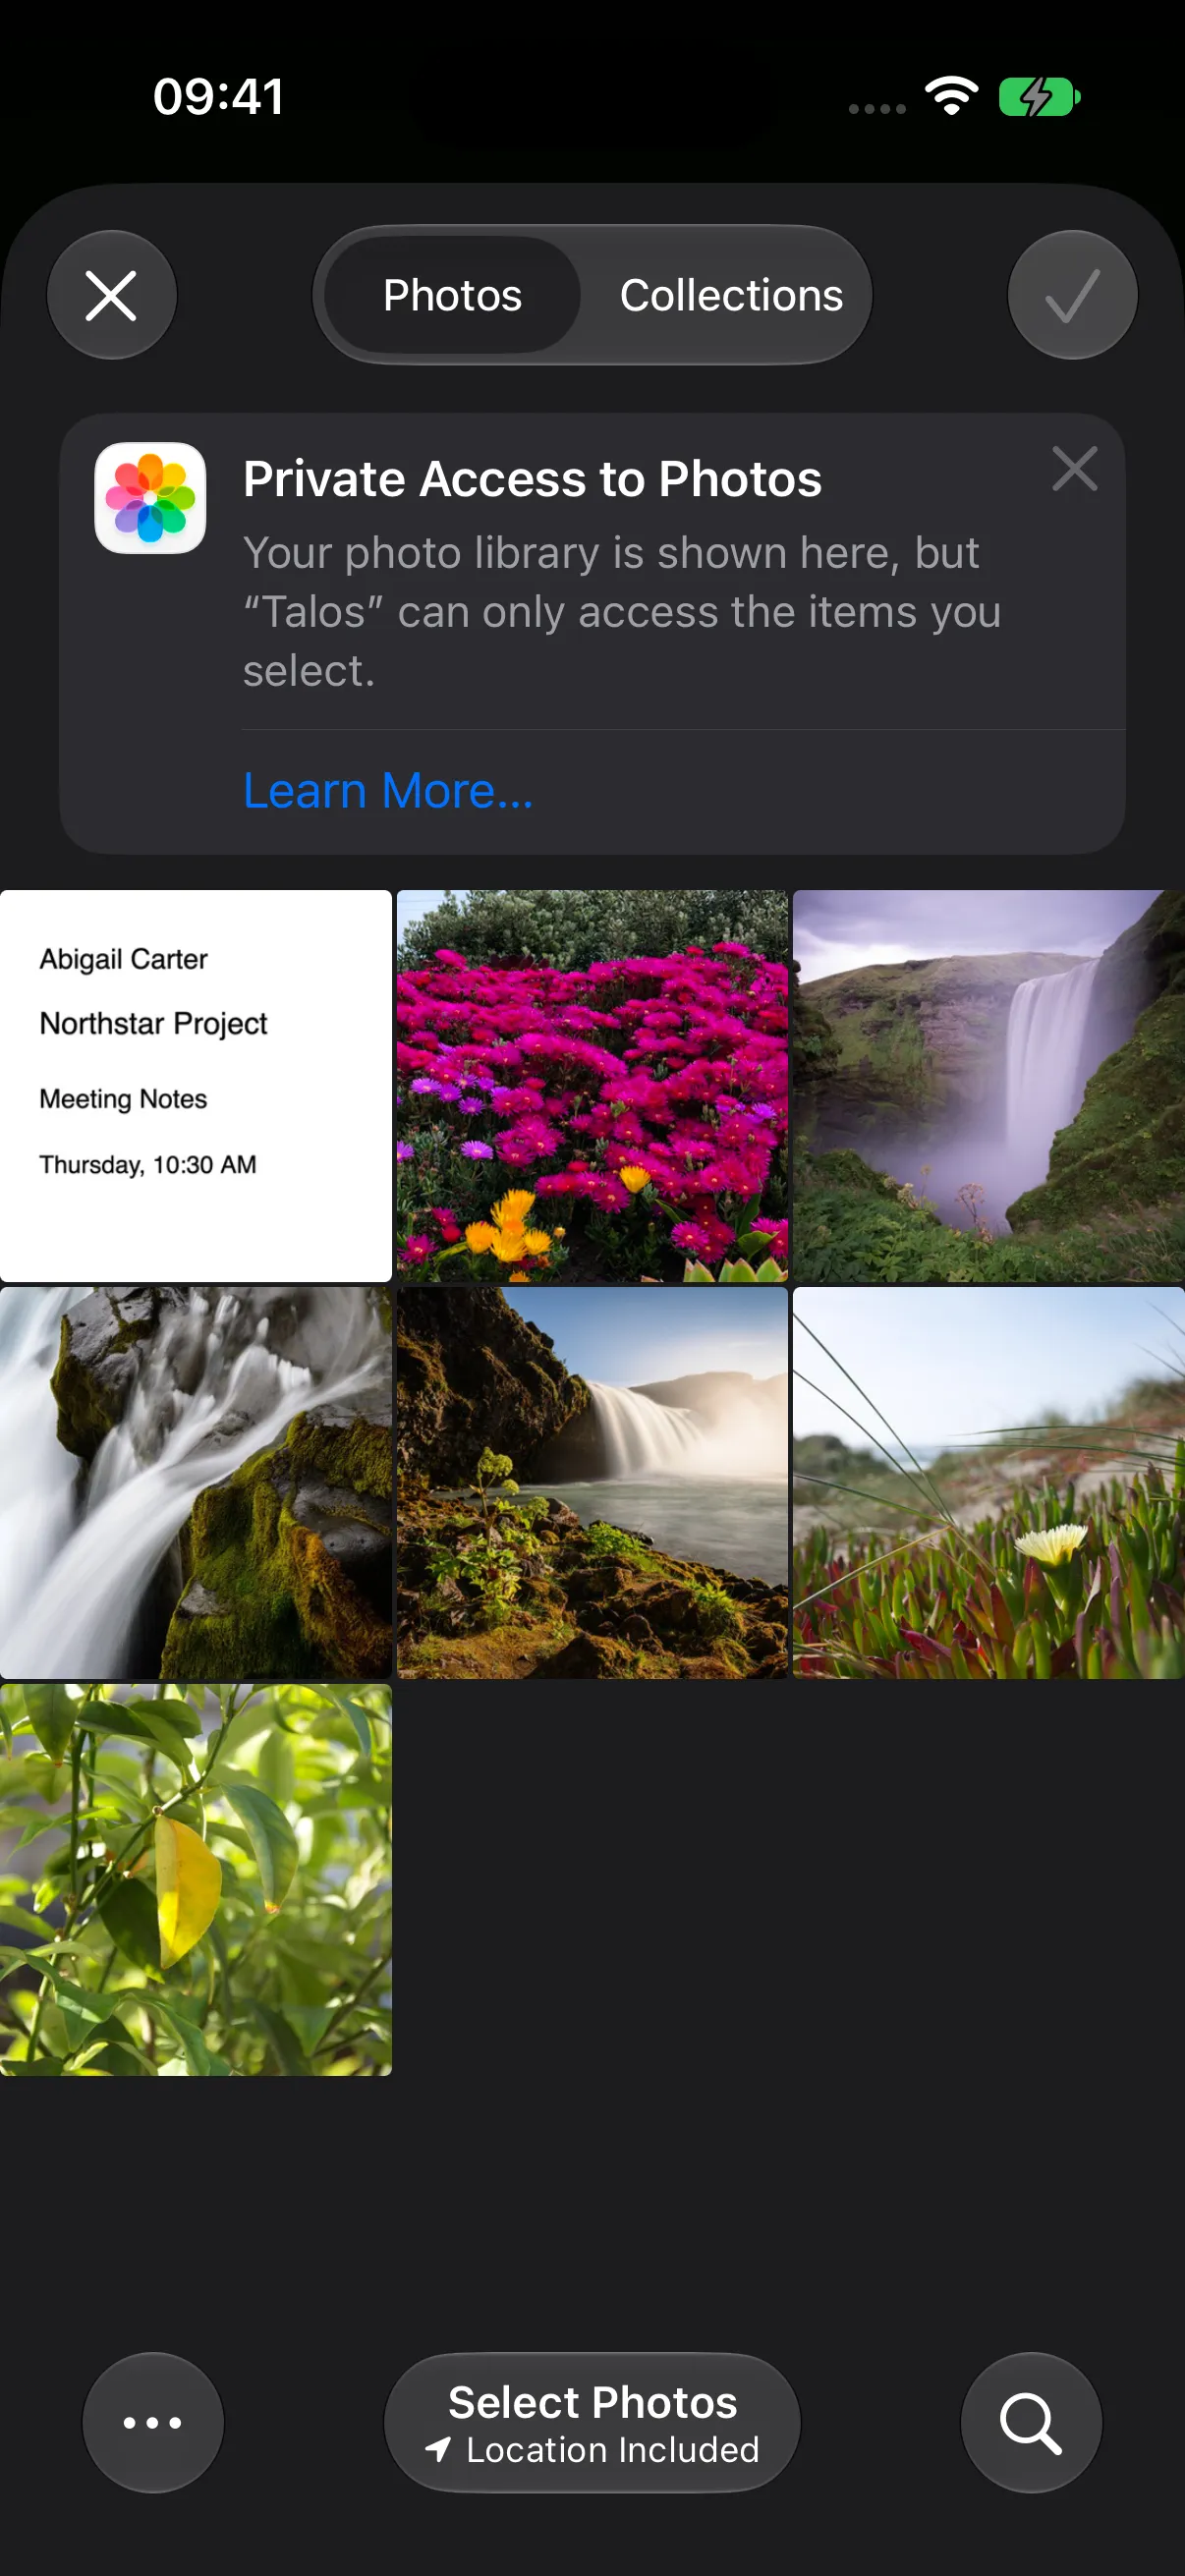
- Select an image in the system Photos picker.
- Tap the picker’s confirmation checkmark to import it.
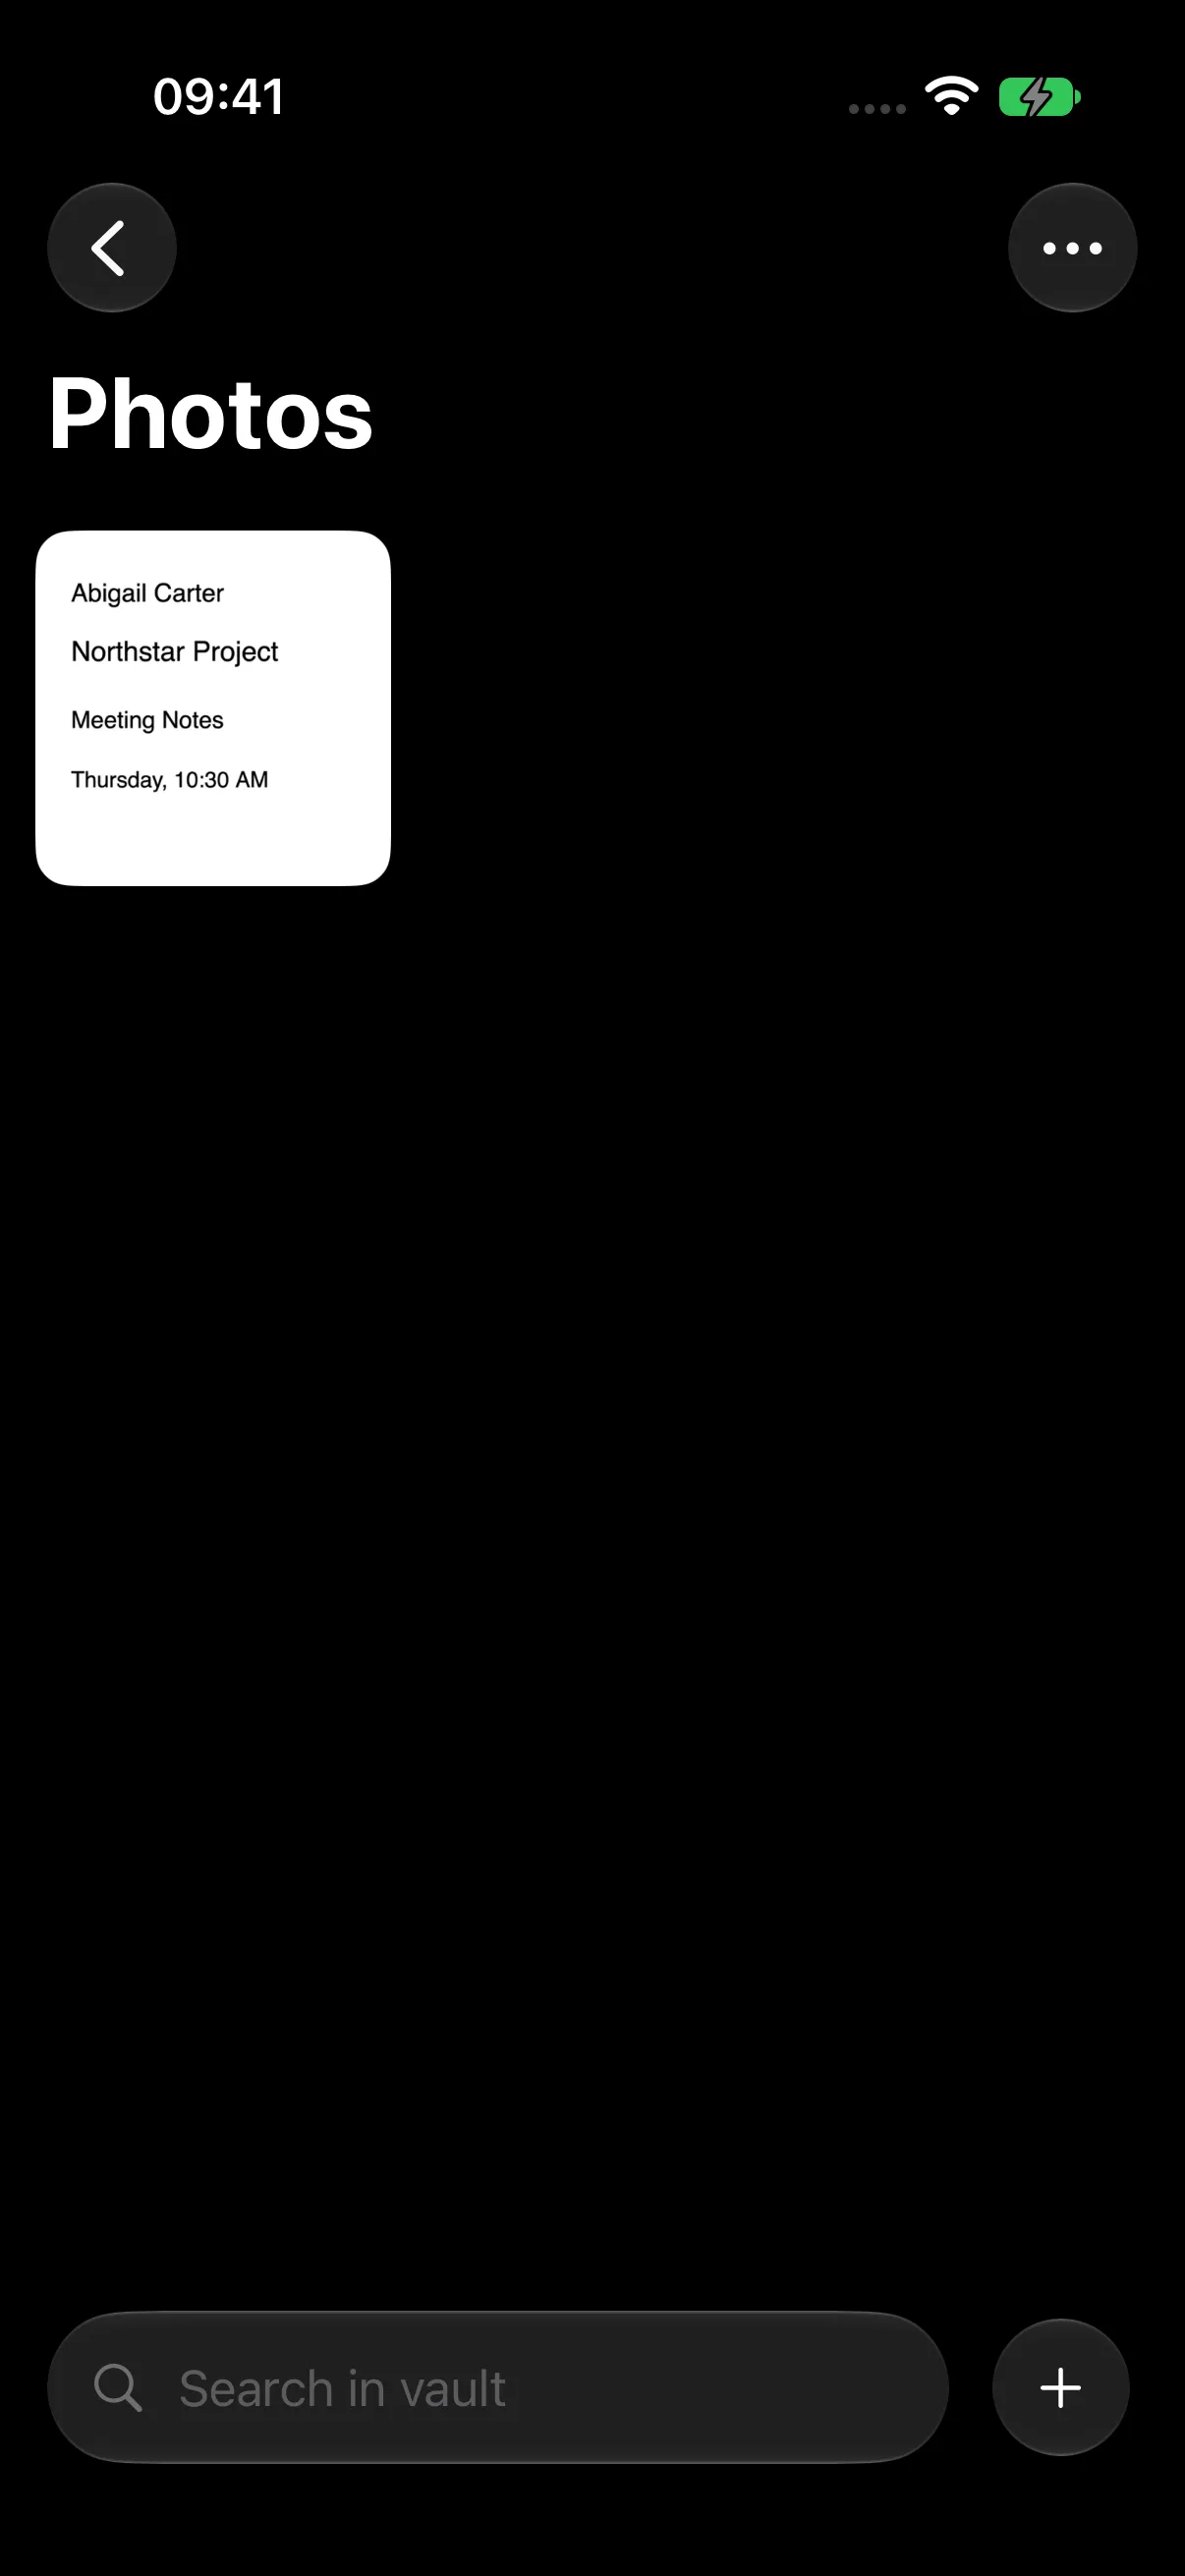
Your image appears in the vault’s gallery.
Tap a thumbnail to open the viewer.
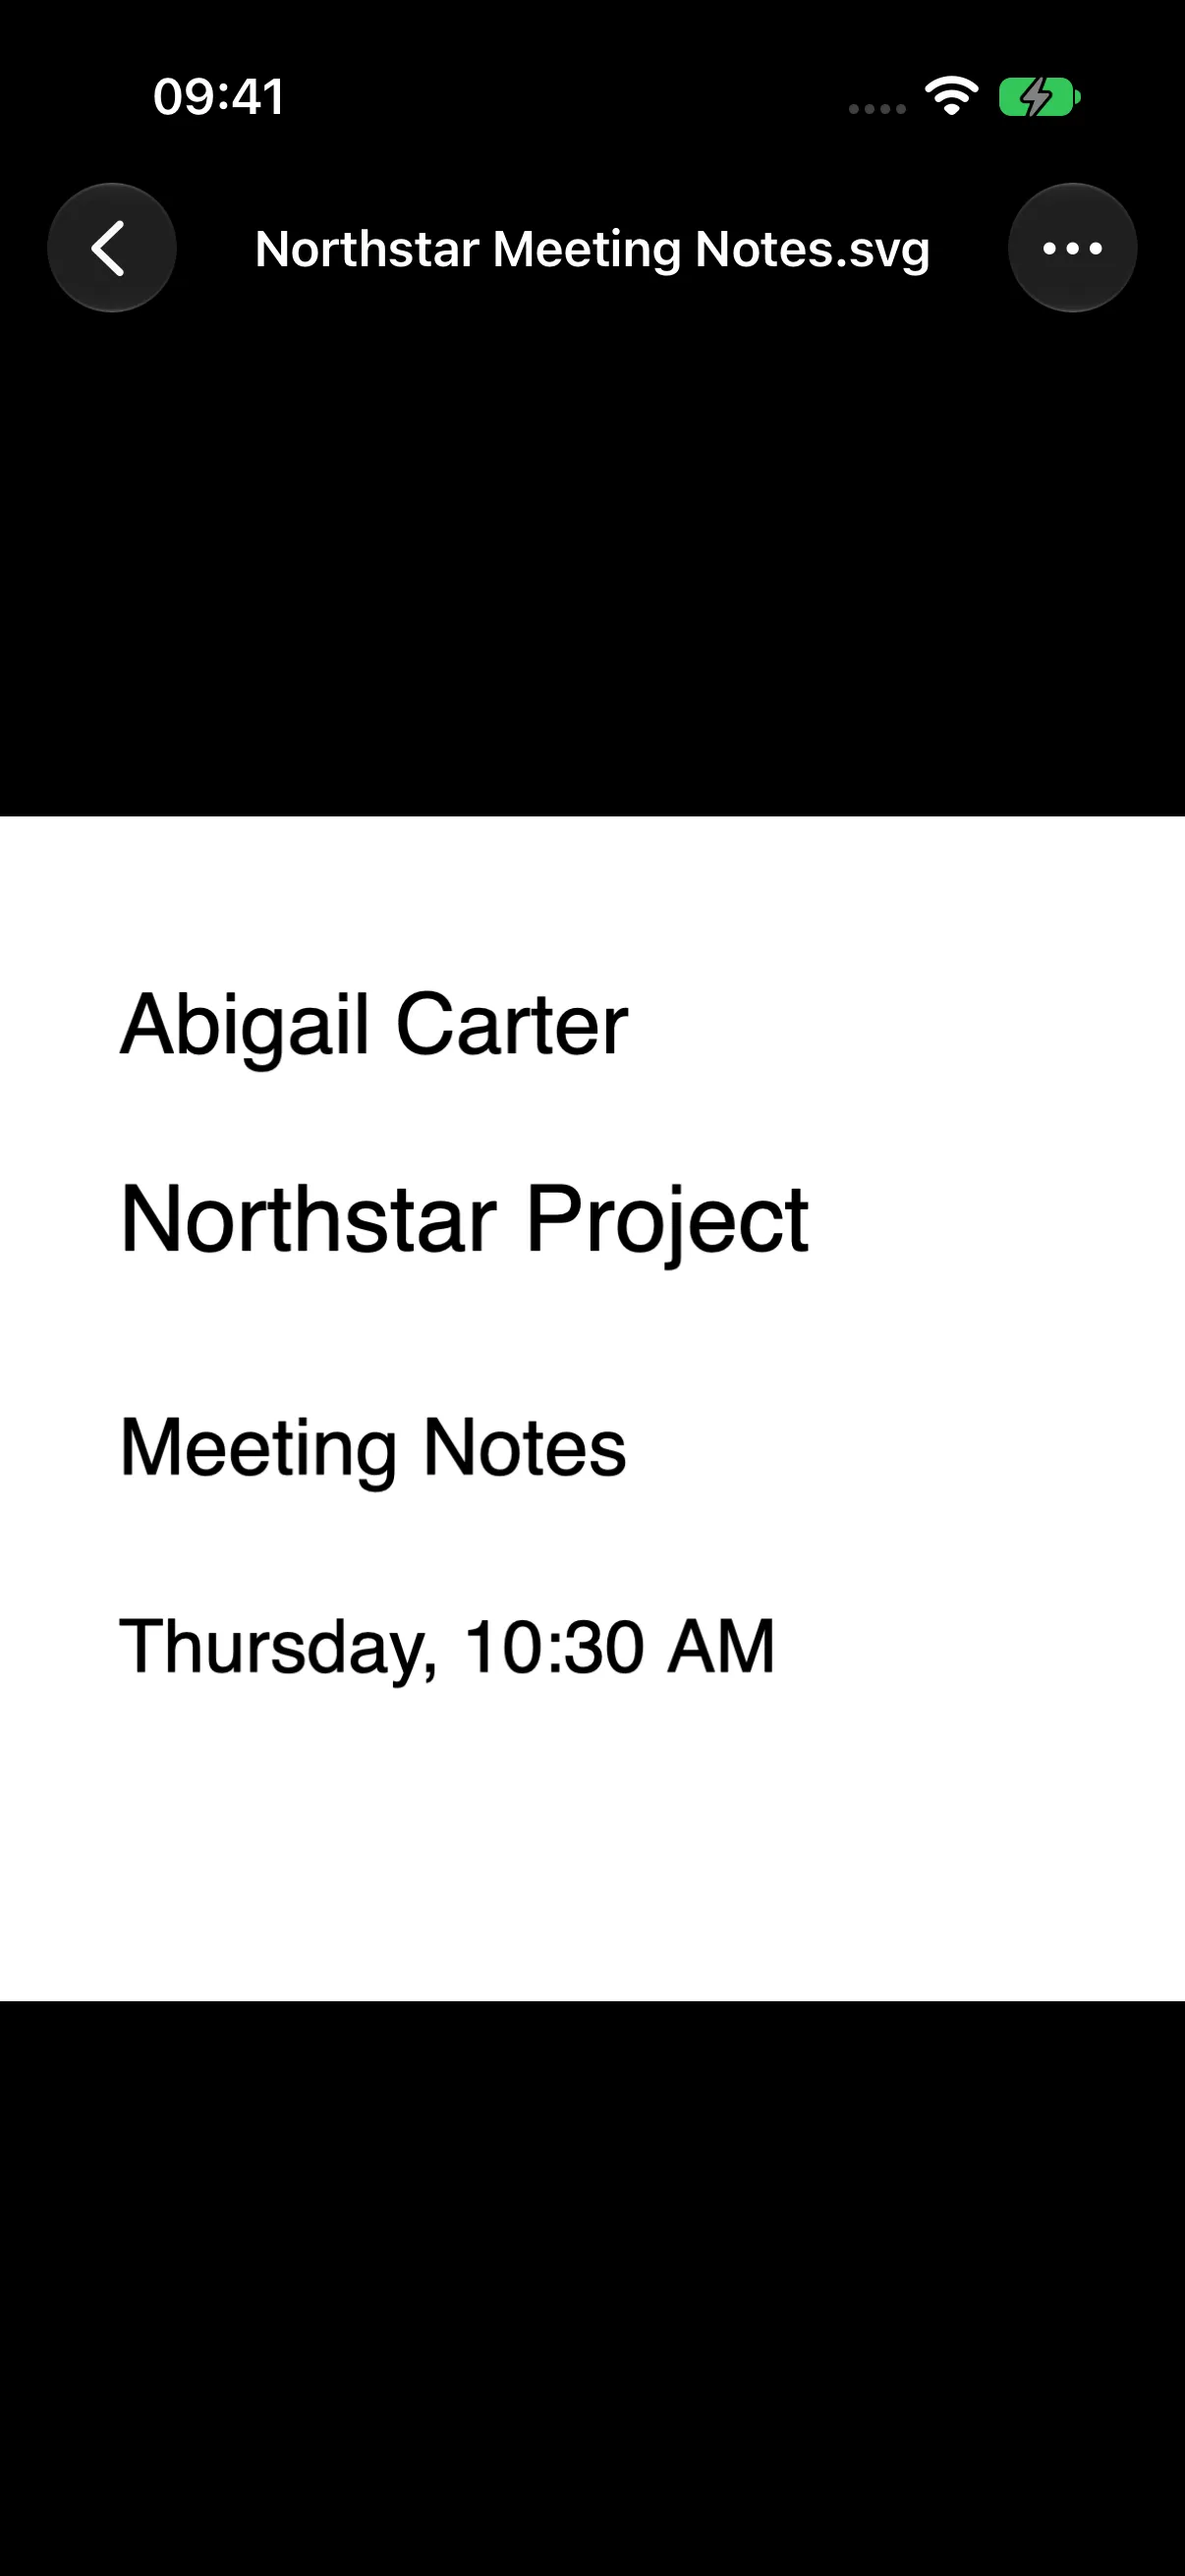
The viewer’s Menu (…) offers Details, Save to Photos, and Delete. Save to Photos creates a copy in your system photo library.
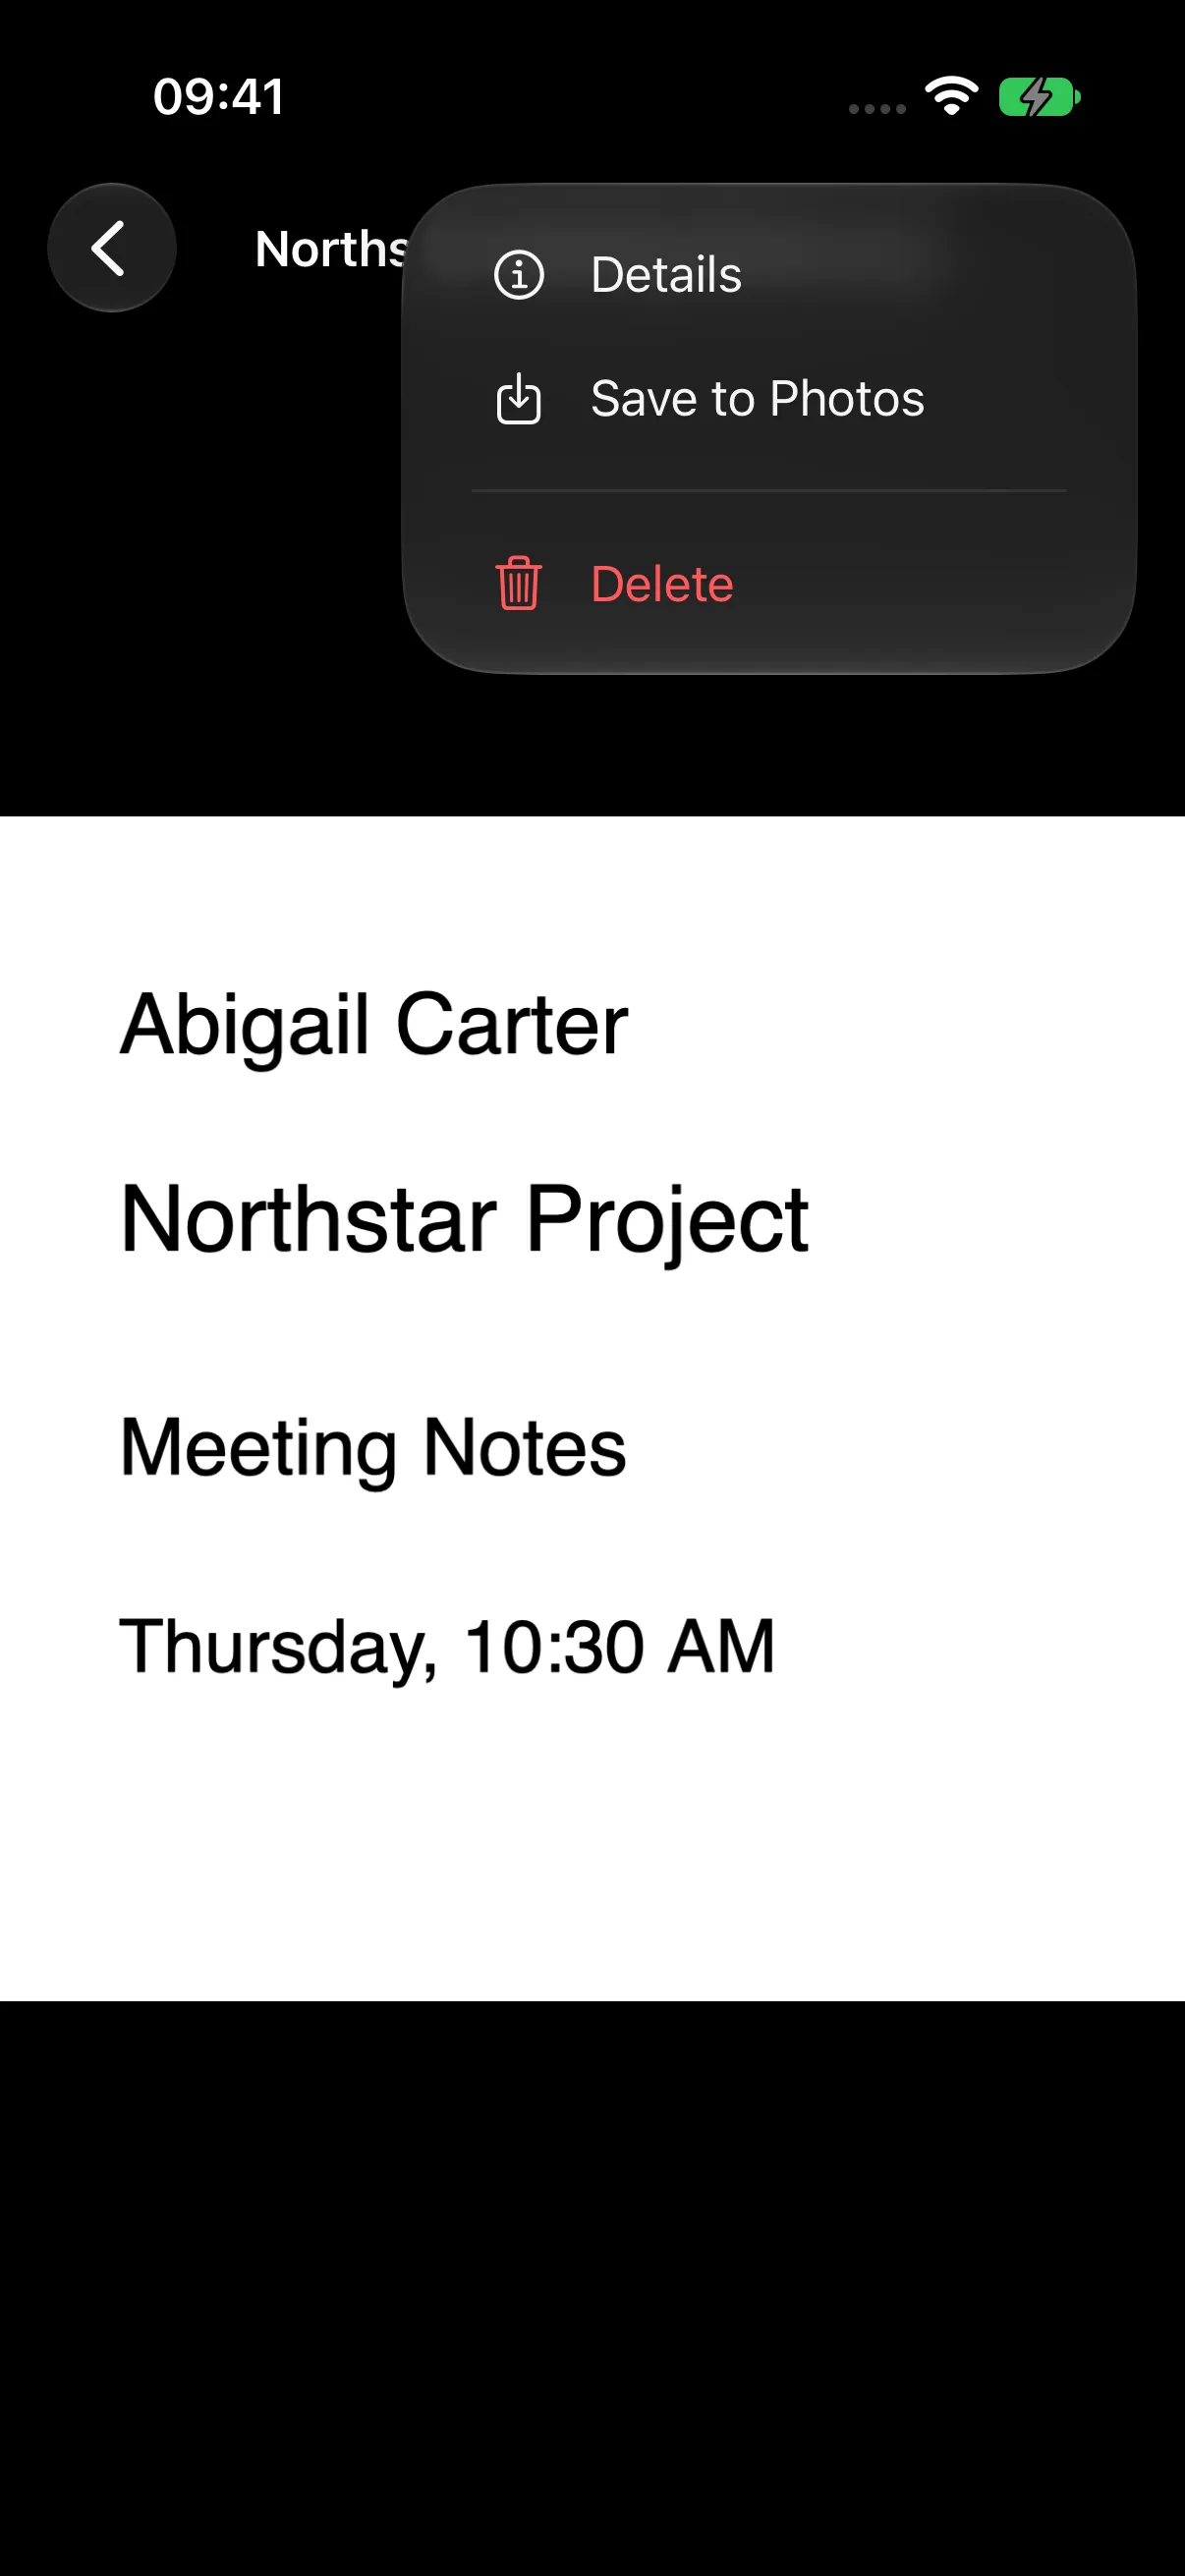
Photo Details
Choose Menu (…) > Details to read the file information. Expand the sheet using its grabber and tap OK to close it.
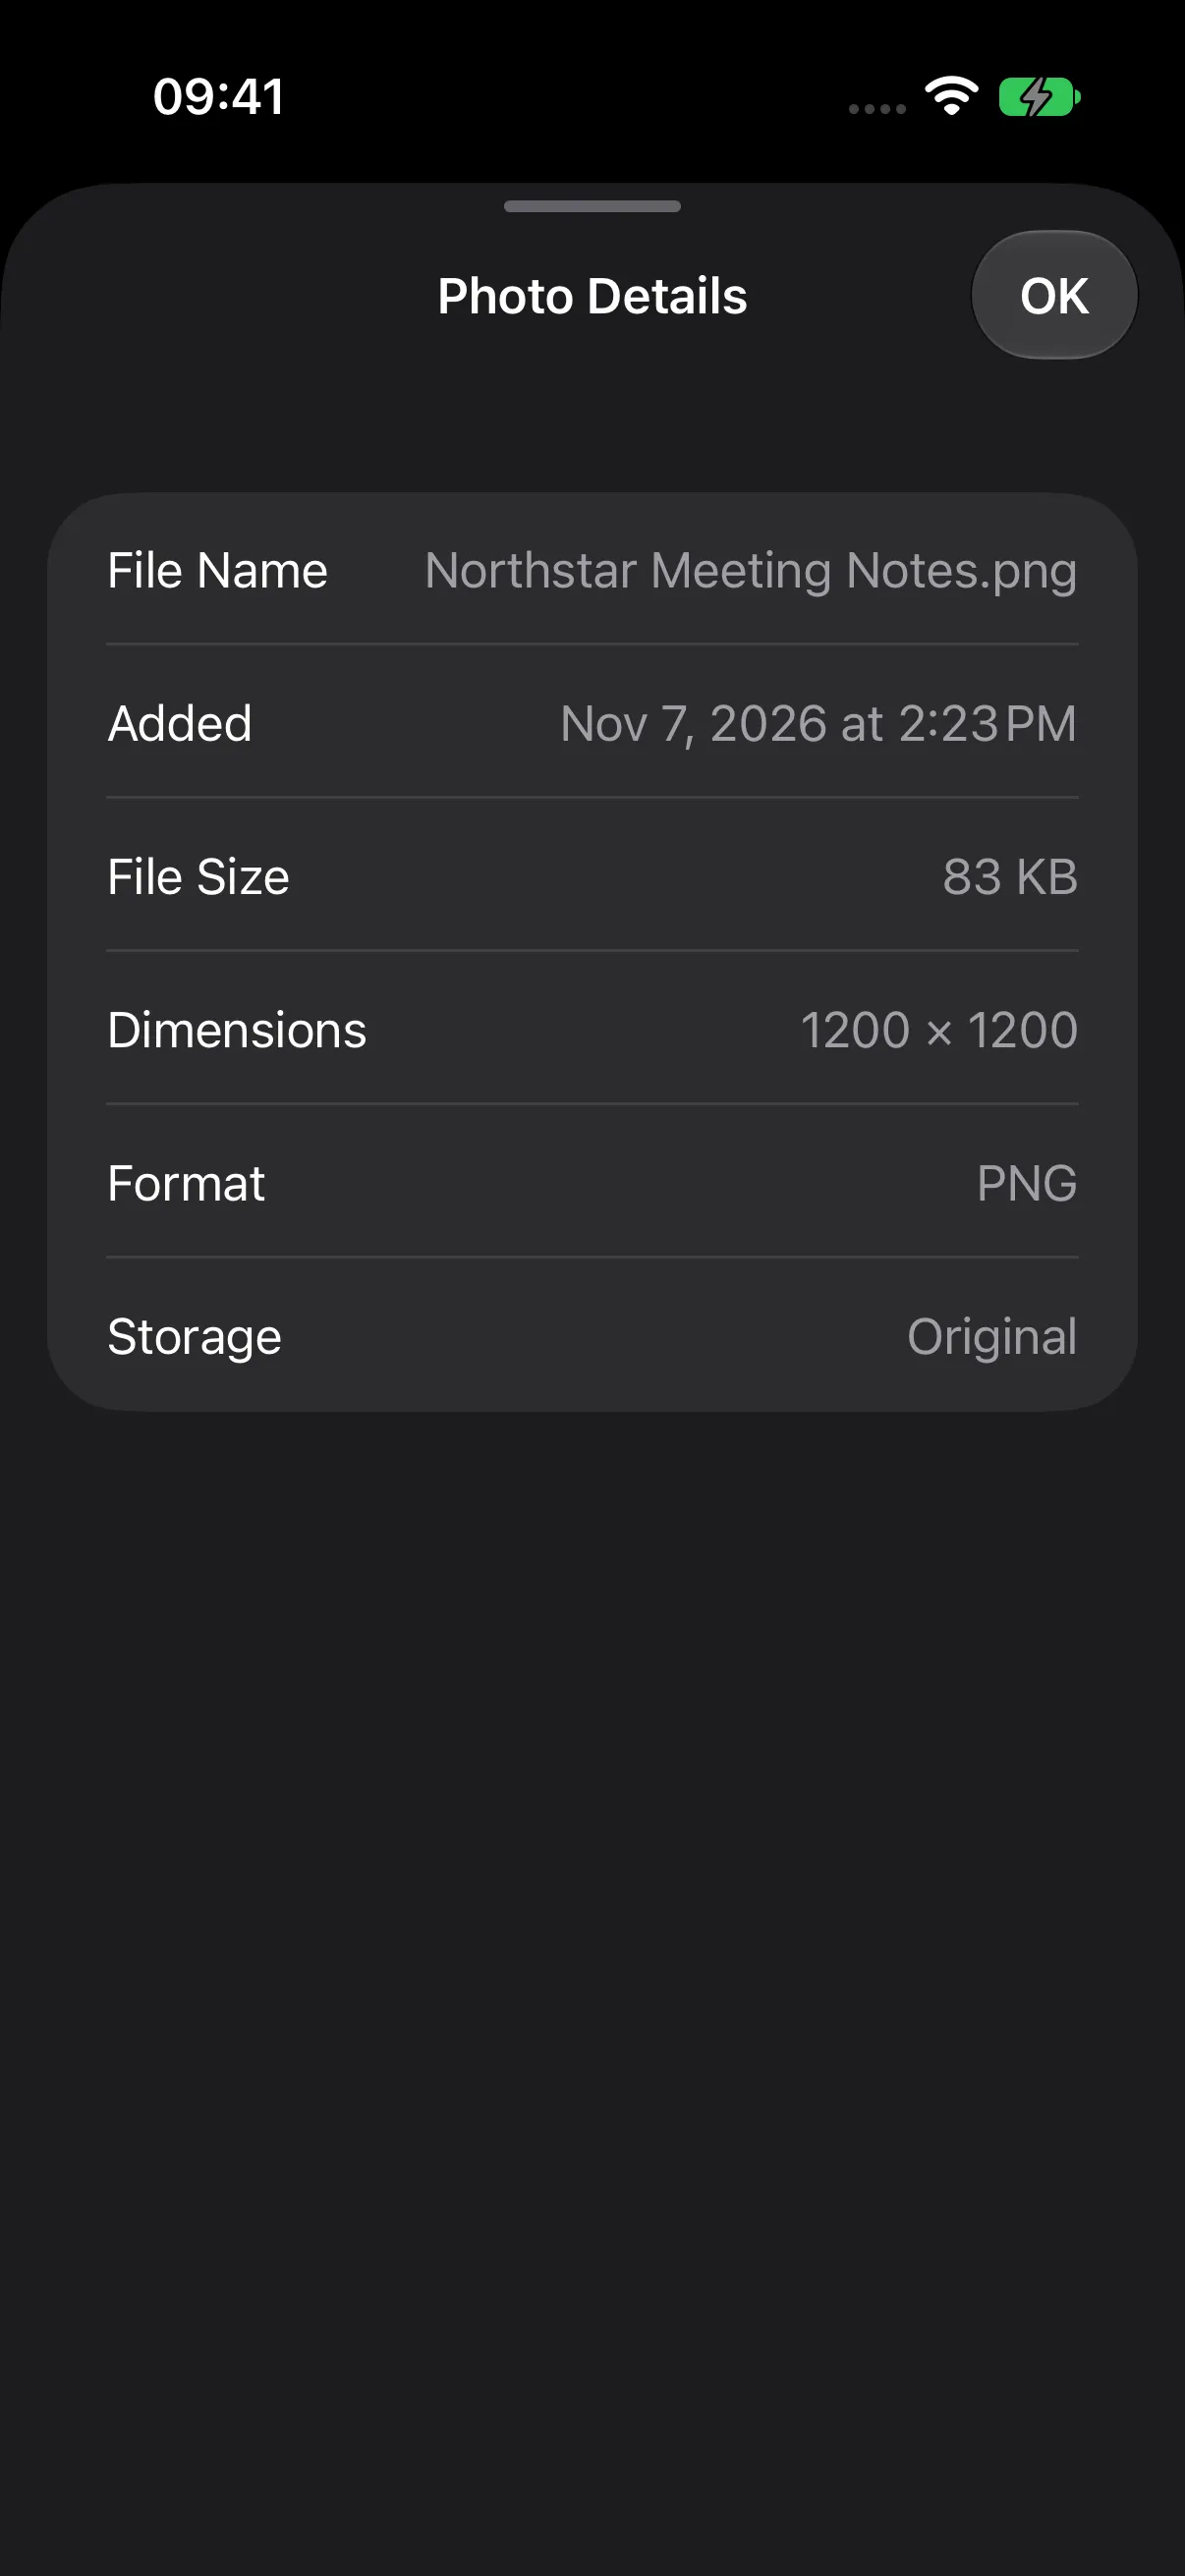
| Field | Meaning |
|---|---|
| File Name | The imported filename. |
| Added | When the photo was added to the vault. |
| File Size | The stored attachment’s size. |
| Dimensions | Pixel width and height, when available. |
| Format | The detected or stored image format. |
| Storage | Original or Optimized, when available. |
Attach a File to a Login
Open an entry’s editor and choose Attachments > Add Attachment > Photos or Files. Review the attachment’s name and size, then save the entry. To remove an attachment, use its removal control and save again.
Use this path when a file belongs with a particular login. For standalone document organization and OCR, create a record in Files.
Next Steps
Continue to Category Protection, or return to Secure Notes & Payment Cards.